What's new
VORON Design

Register a free account today to become a member! Once signed in, you'll be able to participate on this site by adding your own topics and posts, as well as connect with other members!

VS.000 -- A Switchwire Revival

cdh

Member
For those that we're not at Reno VICE 2024, RCF raffled off the original Switchwire. It's seen better days, and is not currently in working order. I was specifically instructed that no serial transfer would occur until this thing is up and printing (hopefully with a little less rust).

Initial Assessment...

Let's start by examining the current state of affairs and figure out what parts we need. So first things first:
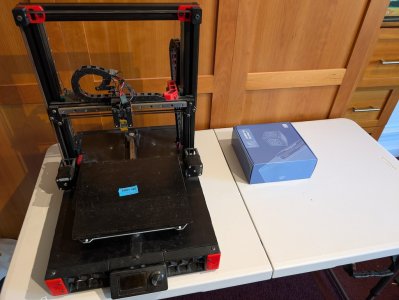
PXL_20241007_182955358.jpg

Off the bat:
  • Toolhead: We'll need to build a Stealthburner w/CAN.
  • Enclosure: Gotta make a run to TAP Plastics
  • Color: As part of this restoration, we'll use the VICE Filament from LDO
  • Build Plate: Is looking a little rough but might still work ok
  • Screen: We'll keep the nostalgic LCD
  • Probe: Inductive probe needs to go. What to replace it with?
PXL_20241007_182959560.MP.jpg

Belt's don't look bad. There's definitely some rust on the X rail.
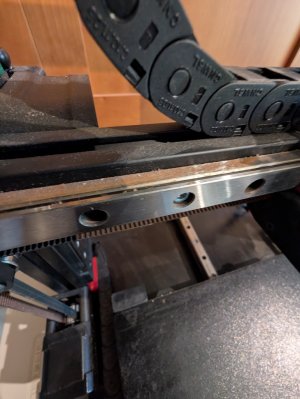

PXL_20241007_183010049.MP.jpg

That looks salvagable. Might not even have to pull it off the printer.

PXL_20241007_183015732.jpg

But that Y rail... and these black oxide screws.
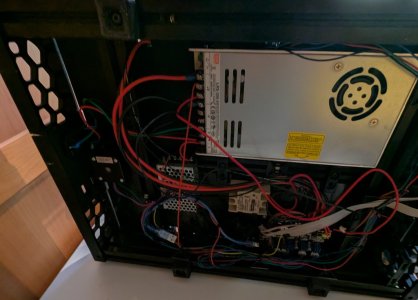
PXL_20241007_183058168.jpg

Assuming everything works here, all we're missing is a Pi!

Questions left to answer:
  1. What probe to put on here? (I have an SB2240 for the toolhead. That doesn' have I2C or I'd use the EBB Eddy that came home with me)
  2. Replace all the screws or just clean them? We could swap everything with stainless
  3. Keep the ABS panels or replace them? They're a little rough in a few spots.
Stay Tuned...
 
UPDATE #2

First things first... let's pull out all the unneeded wiring
PXL_20241011_021341550.jpg

Here lies:
  • All the toolhead wiring except 1 pair for the X endstop (for testing)
  • Extra power wires that ran from the power supply to the SKR for some reason
  • A mosfet that automatically powers the case LEDs when the board is powered up (we'll put in some fun RGB later)
  • An SSR!?
Now let's get a Raspberry Pi hooked up and see what's going on with this board:
Screenshot 2024-10-09 at 4.31.20 PM.png

That is a very, very, very, very, very old version of klipper. And it looks like the previous owner was a fan of mainsailos. To resolve the error, I:
  • Installed Katapult on the SKR. (I hate pulling covers and swapping around SD cards just to upgrade firmware)
  • Installed fresh klipper
  • Pulled a config
And something is off... wait, what's this?
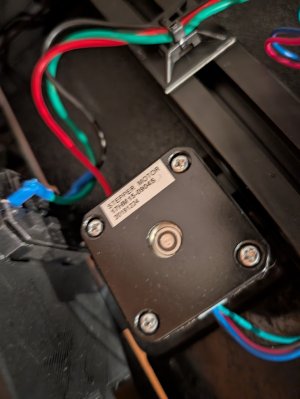
PXL_20241010_030854297.jpg
What is a 0.9 Degree stepper doing on here for the Y axis? Oh well, that's easy enough to deal with.

But the screen doesn't work!?!?
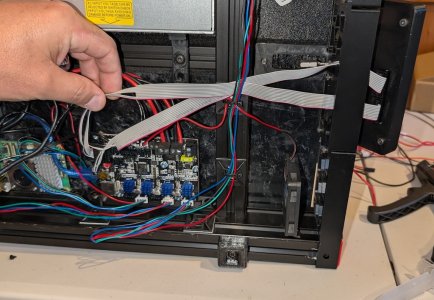
What is this mess
PXL_20241010_232812550.jpg

A few hours later... and a bunch of probimg with a multimeter, and we have this config:
[display]
# mini12864 LCD Display
lcd_type: uc1701
cs_pin: PB9
a0_pin: PB8
rst_pin: PB15
encoder_pins: ^PA9,^PA15
click_pin: ^!PA10
contrast: 63
spi_software_sclk_pin: PA5
spi_software_mosi_pin: PA7
spi_software_miso_pin: PA6
menu_reverse_navigation: False

Other than a little surface rust, the rais are in good shape. Everything moves smoothly. So add some grease, and a few part swaps later...
PXL_20241011_021350273.MP.jpg
 
Last edited:
Holding for a future update

In this update:
  • Z-Probes
  • Toolheads!
  • The last of the red parts
  • CAN bus
  • Undercarriage Cleanup
    • New fan and RPI mounts
    • Cleanup wiring
  • First Print!
Still to be done:
  • Wiring for enclosure lights
  • Enclosure panels: black ABS needs to be polished first
  • Nevermore Mini Install: I use filters everywhere
  • New Rear Skirts: Current build has the power inlet and keystone jacks on the sides and this one is a bit worn out
  • Final Reveal
  • Serial Transfer!

Z-probes... what to use... what to use.
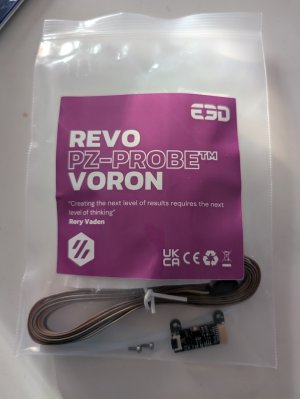
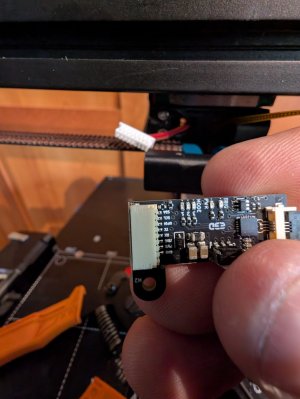
You know the great thing about this community is how helpful people are. You note in a chat how hard it is to find something, and 3 days later it's in your mailbox...
PXL_20241012_002356730.MP.jpg
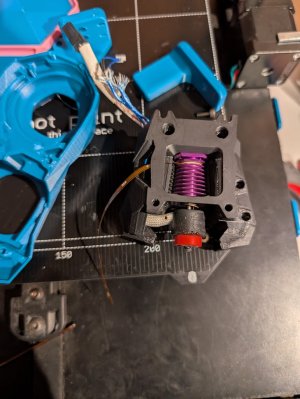
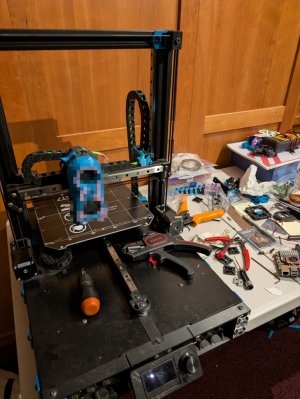
Yeah... we're putting a PZ probe in this. Terrible idea, or terribly AWESOME idea? We'll see... Let's stick it in a stealthburner
PXL_20241012_014653002.MP.jpg
Hmm... we'll need a new x-carriage and we need to build a Clockwork 2
PXL_20241013_024837278.jpg
Now about that PZ probe. Oh yeah... I had to modify the X-carriage to handle this thing
PXL_20241013_183343375.jpgPXL_20241015_030221020.MP.jpg
Now let's swap out the rest of the red parts. The good thing about 4 years of sitting is the belts stick to where they've been. But here's what's come off the macihne:
PXL_20241013_024858380.jpg
We'll have to put those somewhere... Maybe put them in an Acrylic cube or someting. So now where are we at?
PXL_20241018_042540848.MP.jpg
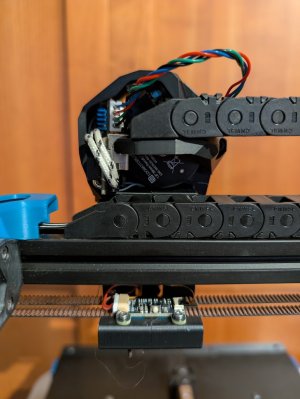
Yeah... The Stealthburner is sensored for the final reveal, but if you look closely, you'll notice the IGUS Chainflex crammed in there. Had to solder on an XT30+2 connector (they're evil).

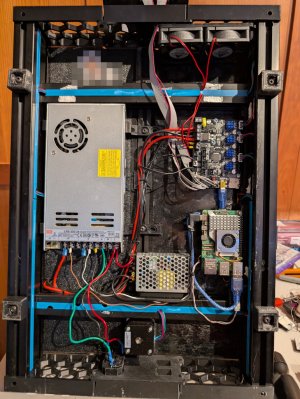
Now for the underside

PXL_20241022_012329628.jpg

The sensored image is hidden for authenticity. It too will be revealed in the serial transfer request. I assume that RCF will remember what he stuck to the underside of this machine. Here a dual-fan mount has been installed in the front so we can run a little quieter at lower speeds. The R-Pi mount was modified to sit higher so the USB ports are less obstructed. Slot covers to hide wiring, and...
PXL_20241022_014323013.MP.jpg
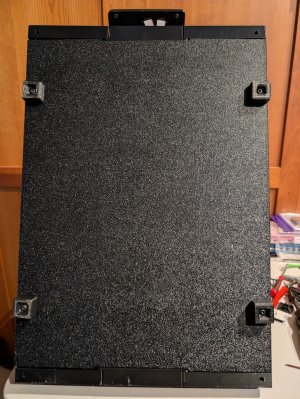
A new bottom panel to keep it all away from fingers.

PXL_20241021_012520085.MP.jpg

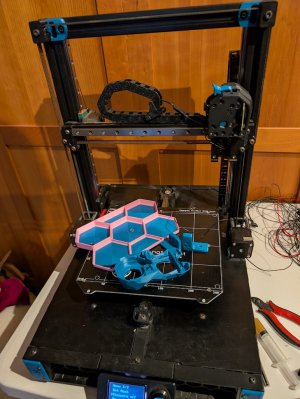
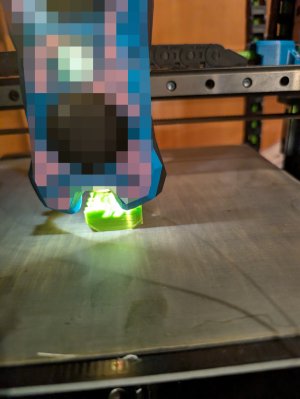
Oh... and it can at least print PLA! That's the bed it came with (after some light sanding and cleaning).

New or Repurposed Parts:
  • PZ Probe (Thanks Doc!)
  • 40w Revo Heater and 0.4mm nozzle from my spares drawer
  • New Sunon Heatsink Fan
  • Used GDSTime part cooling fan (I think?)
  • 2 new 6020 Sunon fans for electronics cooling
  • Double Densitiy rainbow barf Stealthburner LED (with a pair of Adafruit neopixels for lighting)
  • Raspberry Pi 5 (because why not?)
  • IGUS Chainflex for CAN bus
  • New PiCAN USB stick
  • Old SB2240 in the toolhead (Picoblade is evil, but the PZ Probe uses JST-SH which is even smaller)
 
Last edited:
FINAL UPDATE

See the Serial Transfer Requet on Reddit

Thank You!!!
  • RCF for neglecting this poor machine and giving it away so I could have the opportunity to (re)build a switchwire
  • Jason from LDO Motors for the awesome blue filament he gave away at Reno VICE
  • DOC for the Revo Voron PZ Probe. (Yes, you can get a PZ probe working on a swichwire)
  • Steve Builds for his filament holder mods and useful jig for installing the panel clips

What's been done?
  • Enclosure lights are hooked up (RGB Leds of course!)
  • Black ABS panels have been polished and installed
  • Some problems with the clear acrylic panels that we fixed and got installed
  • Nevermire Mini built and installed
  • New rear skirts are in progress and the first is in the serial transfer video
  • Pi 5 has been replaced with a Pi 4 for better camera support
  • A Raspberry Pi Camera Module 3 wide-angle has been installed

Now on to the details.

I switched to a Raspberry Pi 4 as it works better for Crowsnest and threw in a Camera Module 3 wide-angle. Here's the view (might need to adjust this more)
snapshot.jpeg

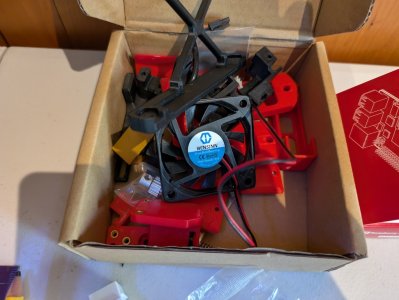
All the red plastic parts have been replaced, as well as a few black ones. Here's the box of removed parts (minus the SSR and miles of wire)
PXL_20241027_180634223.MP.jpg

Here's it's first print in PLA to make sure everything is mostly working correctly.
PXL_20241021_021540810.jpg

So then it was time to clean it all up for a serial transfer. First, the undercarriage:
PXL_20241027_010050136.MP.jpg
The slot covers are custom made to handle the wiring. I didn't route the mains-voltage as that inlet is going to get moved with the new skirts

Then it was time to install the panels. But there's a problem
PXL_20241024_035918941.jpg
What gives?
PXL_20241024_040154856.MP.jpg
Oh I see. RCF used some chonky motors here. I'm lucky to have access to a laser cutter, so we cut a sliver out to make everything fit.

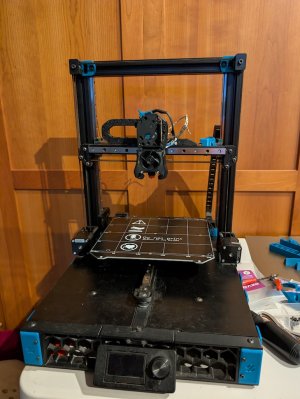
Final Product:
PXL_20241027_175638937.jpg
 
nice recovery...

how is that PZ probe working out? Any bed flex when probing the corners? i was thinking about it for my Switchwire.

Rusty
 
nice recovery...

how is that PZ probe working out? Any bed flex when probing the corners? i was thinking about it for my Switchwire.

Rusty
It's working quite well. It's taken a few rounds of figuring out what setting to run it on so it's sensitive enough to register contaact, not so sensitive that it triggers all the time, and not so insensitive to flex the bed into oblivion. Bed meshing shows a slight incline from left=>right which I'm currently blaming on the keyback, but since I'm not getting an inverted taco, it seems to be successfully probing.
 
Top