What's new
VORON Design

Register a free account today to become a member! Once signed in, you'll be able to participate on this site by adding your own topics and posts, as well as connect with other members!

Bed Mesh Calibration does not look right

Ho-whizzle

Well-known member
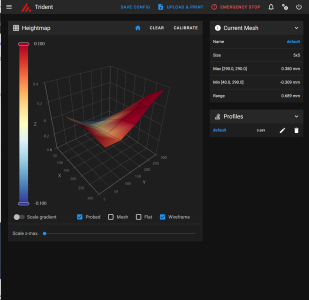
I had to revuild my Klipper from scratch on my Voron Trident 300mm and after getting KAMP working, the bed mesh calibration looks horrible. What am I doing wrong?

Is this is software or hardware related?
 

Attachments

  • Screenshot 2024-02-23 232929.png
    Screenshot 2024-02-23 232929.png
    144.9 KB · Views: 27
Put a straight edge on the build surface and look for high and low spots - reasonable quality metal rule should be enough.

Hold a light behind the rule and look at where the rule meets the build surface, ideally you shouldn't see any light coming through. Where light comes through, the bed is low (where no light comes through, it's high). Check it along the back edge, front and center, then repeat running along the side edges and center, then check on the corner to corner diagonals. That will tell you if it's a hardware issue.
 
Thanks but looking at the mesh bed diagram the issue is more to do with a tilt than a bowing of the heat bed. I will try it still, thanks again
 
Hi, most probably your Y profiles with linear rails are not parallel. Front has 2x leadscrews to do Z tilt, but rear only one in the middle. Thus rear corners cannot be adjusted with Z tilt. Your left profile is higher than the fight one and on mesh it looks like there's a dip.

What you need to do is loosen rear screw on left Y profile a bit, and gently tap extrusion there to push it tiny bit down. Fasten the screw, do mesh again and see how it demonstrates. Once rails are parallel you will see mesh flat.
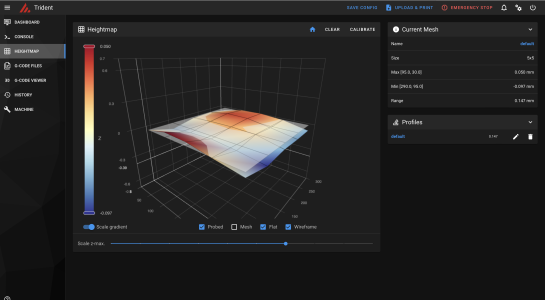
Yes you are absolutely right, the rails must of came loose when I was replacing the lead screw nuts.
I dont have any smart way of making accurate change so I have to use a sprite level and many bed mesh attempts to get closer to the 0.05mm variance, any tips will be very much apprieciated.
 

Attachments

  • Screenshot 2024-02-24 at 17.45.17.png
    Screenshot 2024-02-24 at 17.45.17.png
    826.2 KB · Views: 22
Hi, I don't have better method honestly, besides measuring both sides against the same (height) object or calipers.
 
You don't need to get to 0.05mm.

0.5 is really good and less than 1mm over the entire bed is acceptable - given that 99% of your prints won't use the entire bed.

Klipper's bed mesh takes care of the rest for you. (this isn't a low end ender where it's entirely manual - software does the hard work for you.)
 
Top