What's new
VORON Design

Register a free account today to become a member! Once signed in, you'll be able to participate on this site by adding your own topics and posts, as well as connect with other members!

Extrusion or bed level? Trident 300 build

Looks like a useable PRINT_START. Some suggestions (though none of this helps with an inconsistent first layer):
- The second G28 after the Z_TILT_ADJUST can just home Z with G28 Z to shave a few seconds.
- Any particular reason why you turn off fans with M107?
- The G92 E0.0 after M109 can be removed since extruder hasn't moved from the previous G92 E0.

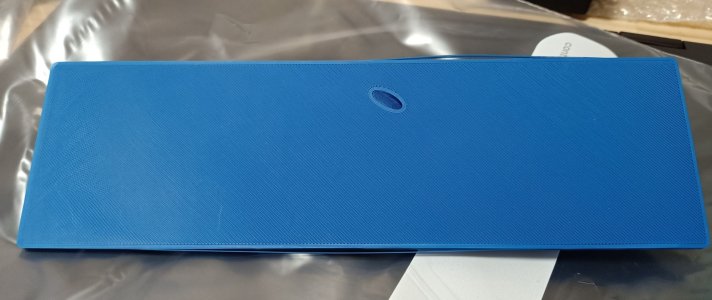
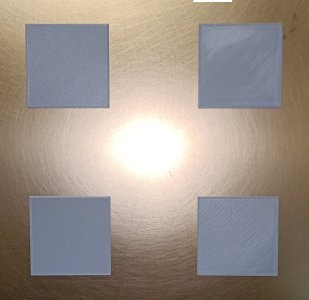
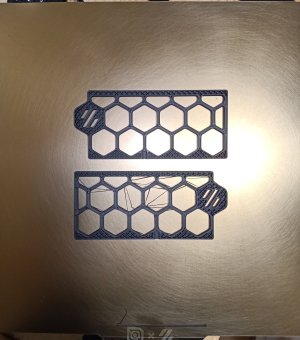
Hm... The first layer kinda looks acceptable to me. The unevenness might be caused by a slightly tilted nozzle? is your hotend perpendicular? Do you see a similar thing happening with top surfaces as well?
Thank you. As soon as I have the machine back up and running I will make those changes to my print start macro. I'll admit, I grabbed that macro from discord I think it was. I've only changed a few positions and added the bed mesh.

Yes, I agree. First layer doesn't look too bad in those photo's. Those were after I adjusted the y extrusions I think. Plus, the camera man (me) didn't do a great job of highlighting what I can see with my eye.

Thanks again for your suggestions!
 
I guess next step is do a set of first layer calibration patches. I'd throw one in the center and each corner of the bed. That should give a good idea of how level the bed is and how effective in general the mesh is.
 
I guess next step is do a set of first layer calibration patches. I'd throw one in the center and each corner of the bed. That should give a good idea of how level the bed is and how effective in general the mesh is.
Yes, that is what I normally do. Prior to disassembling the gantry some patches would show the nozzle too far from the bed while others too close, even with a bed mesh calibration. To add, I have not been able to get ABS to stay down when using anywhere but the centre of the bed. That's esun ABS+ which is normally quite easy to print with.

I'm attaching the x gantry to the y as we speak so am hoping will be operational and able to test by the weekend.
 
A question relating to racking issues - what is the best way to proceed with trying to eliminate racking issues? I normally move the x all the way to the back or front on the y and lightly tighten the fasteners on the x gantry. Then test the y movement and repeat. But I always find that even with light - medium finger pressure with a hex wrench on the carriage fasteners I get terrible movement (not smooth at all) at one end of the travel. Am I approaching this correctly?
 
Well, I wasn't expecting that! After rebuilding the gantry I am seeing a big improvement to my bed mesh results. The only thing I changed was moving (rotating) around the y and x rail extrusions. Am about to print a few square patches to see if there are any improvements to the first layer.
 

Attachments

  • Screenshot 2023-06-01 152940.png
    Screenshot 2023-06-01 152940.png
    288.3 KB · Views: 51
I will have a good read through of the v2 gantry squaring tonight, thank you.

My bed mesh results are now decent I think? But I am still experiencing what I see as an uneven extrusion or uneven bed. Hopefully the attached photo captures what I see, as I have not been able to explain it very well above. Any thoughts? I'm now leaning towards an extruder or hotend issue of some kind.Screenshot 2023-06-05 113236.png
 

Attachments

  • trident-first-lyer.jpg
    trident-first-lyer.jpg
    635.5 KB · Views: 35
Last edited:
Ah, still not sticking? Is it perhaps an issue with the flex plate surface? I had a terrible time getting parts to stick to a couple of plates when new. I eventually resorted to 600 grit sandpaper to scuff them up, then the dish soap with warm water & brillo pad. After that, parts started sticking. I'll now need the occasional IPA wipedown or redo the dish soap & brillo scrub.
 
Ah, still not sticking? Is it perhaps an issue with the flex plate surface? I had a terrible time getting parts to stick to a couple of plates when new. I eventually resorted to 600 grit sandpaper to scuff them up, then the dish soap with warm water & brillo pad. After that, parts started sticking. I'll now need the occasional IPA wipedown or redo the dish soap & brillo scrub.
No, still not sticking. I do scuff up my smooth PEI before first use so that's a tick there. And use dish soap to clean. I'm going to try a new heater and thermistor. Nozzle has had a clean so it's really all I can think of for the time being. Just glad my V0 is a trusty little workhorse :D
 
No, still not sticking. I do scuff up my smooth PEI before first use so that's a tick there. And use dish soap to clean. I'm going to try a new heater and thermistor. Nozzle has had a clean so it's really all I can think of for the time being. Just glad my V0 is a trusty little workhorse :D
Similarly, I have one spring steel with an unknown PEI that really has a hard time sticking no matter how much I scuff and wash. CSHyde stuff always works well for me.

Do you have a way to measure chamber temps? Or maybe there's a gap in your chamber seal? Or too much cooling too fast? Temperature differential can cause printed parts to warp off the bed.
 
It's been a difficult one for me to diagnose. Depending where on the PEI I print it either sticks very well or not very well. I played around with thumb screw tension yesterday and thought there was some improvement so continued to tune some abs filament (esun abs+) . Started a more substantial print after all that but found this 1/10 of the way into it.

I have the chamber temp thermistor that's on the LDO toolhead PCB. I also replaced my print start macro with the one called "a better print start macro". I have the chamber temp set at 40 in my slicer. The printer heat soaks to 40 deg and then starts. Chamber temp seems to sit around low 50's when printing. I have my PCF set around 20% at the moment which seems to be quite low compared to a lot of profiles I have seen for ABS and Vorons.
 

Attachments

  • IMG20230609074453_edited.jpg
    IMG20230609074453_edited.jpg
    444.5 KB · Views: 33
Last edited:
It's been a difficult one for me to diagnose. Depending where on the PEI I print it either sticks very well or not very well. I played around with thumb screw tension yesterday and thought there was some improvement so continued to tune some abs filament (esun abs+) . Started a more substantial print after all that but found this 1/10 of the way into it.

I have the chamber temp thermistor that's on the LDO toolhead PCB. I also replaced my print start macro with the one called "a better print start macro". I have the chamber temp set at 40 in my slicer. The printer heat soaks to 40 deg and then starts. Chamber temp seems to sit around low 50's when printing. I have my PCF set around 20% at the moment which seems to be quite low compared to a lot of profiles I have seen for ABS and Vorons.
I also wait for chamber temps to hit 40C before printing.

Okay, more questions trying to suss out the issue. Since you've shown this happening with gray and black filament, I'm guessing this happens to all of your spools? If your PEI sheet is double sided, how is it on the textured side? Do you have any other smooth PEI to try?
 
I will try the opposite side of the sheet, which is textured. I think from memory when I first attempted to print ABS on that side it also had issues with sticking, however that was before I had fully enclosed the printer. I have no other smooth PEI sheets.

Just wanted to quickly add - I appreciate everyone's help here... some days it gets to me a little too much and I may come across as being a bit short. Just know that all the help is appreciated! :)
 
I suspect your build plate more than anything else. Your last mesh results are good, there's nothing there that looks like it should cause your issues. I would definitely try different filament and a different build plate; I have some plates that were awful to get parts to stick to at first, now one has been my primary plate for a while (the other two are out of commission after TPU parts liked sticking to them too much). The plates are semi-consumable, so having multiples is good anyway.
 
Finally parts are staying down 🤞 
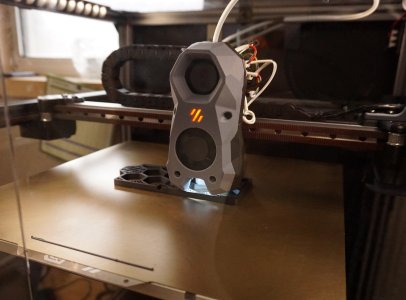
thanks to all for the suggestions / help. Second medium sized print is now running successfully with esun ABS+ I'm hoping I can now finish off printing the remaining external parts and nevermore filter.

To be honest, I have no idea what the problem was. I tried the "rough" side of the plate and parts stuck. I did wash the plate more thoroughly with a new brand of dish washing soap, so I'm wondering if our previous soap may have had an ingredient that may have caused the issue. The smooth PEI surface, which is the finish I prefer is now working well I think.
 

Attachments

  • DSC00998_edited.jpg
    DSC00998_edited.jpg
    477.9 KB · Views: 35
Me again........ o_O

Well, seems I am still having the same issue. For the life of me I just can't work this out. I have tried probing more points, from 5x5 up to 9x9 as well as different smooth points and algorithm. Nothing seems to make a difference. I can see the lead screws adjusting / compensating while printing but it's as if the adjustments are not at the correct location.... i don't know, I am seriously running out of things to try without throwing more money at this printer, or fully rebuilding.

It's difficult to highlight the issue with pics but I think the attached images may highlight the issue better than my previous 'patches'. One side the first layer is noticeably too 'squished' while the other side is too high.

Anyone have any ideas?
 

Attachments

  • edited2.jpg
    edited2.jpg
    271.5 KB · Views: 33
Yeah it does look inconsistent ... would you minjd posting your whole printer.cfg here?
Also, what probe do you use?
 
Thank you! I am using Klicky Probe NG.
I have attached a zip of the printer cfg as well as the included macros (klicky variables, print start, etc)
 

Attachments

  • ldo-trident-300_config.zip
    8.7 KB · Views: 2
Top