What's new
VORON Design

Register a free account today to become a member! Once signed in, you'll be able to participate on this site by adding your own topics and posts, as well as connect with other members!

My first creation.

argusz

Member
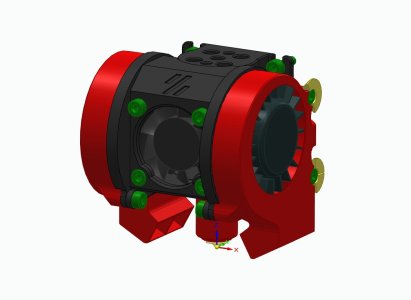
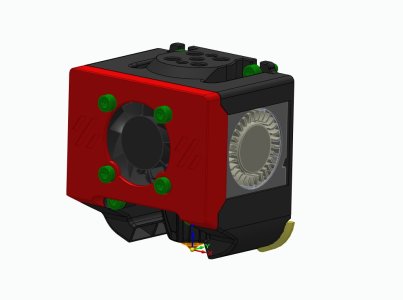
I'm Adrian, i go as "argusz" or "printicus". I want to present you with my ideea of toolheads for Voron 2.4 and Trident. I will very much appreciate an opinion.
The links are from thingiverse, but i can be found also on printables:


Thank You.
 

Attachments

  • Miniburner XL 02.jpg
    Miniburner XL 02.jpg
    139.8 KB · Views: 22
  • Miniburner 01.jpg
    Miniburner 01.jpg
    117.3 KB · Views: 20
Interesting design. Have you done any fluid dynamic testing to see how the air flows?
 
Interesting design. Have you done any fluid dynamic testing to see how the air flows?

No... you mean in software? No. I did all the design in Solid Edge CE. I don't think this free software has that. I will see how to do that...
I just started 3d drawing around a year ago, I did not try this, yet.
 
Last edited:
No... you mean in software? No. I did all the design in Solid Edge CE. I don't think this free software has that. I will see how to do that...
I just started 3d drawing around a year ago, I did not try this, yet.
I would at least do the bowl of water test on it to see how it looks when running part cooling. There are a few software that can do fluid simulations but I am unsure how difficult they are to learn.
 
It is interesting indeed, and looking through the pictures of the XL, in picture Miniburner XL12.jpg it shows a breakout board which I would very much like to have identified?
The only comment I would like to make is that I do not believe people will dismantle their 5015 fans for fun to fit them in your designed holder, if I understood correctly. If this is indeed the case that you take them apart to fit the guts into your ducts, I think it would be better received if you changed the design slightly so you could fit the whole 5015 on a duct and just line it up with the mouthpiece. But that is my take on things, not necessarily so for all people I am sure.
I love the fact you use both a revo and a orbiter V2, I used them as a combo for a long time now and cannot praise them enough, well played.
 
It is interesting indeed, and looking through the pictures of the XL, in picture Miniburner XL12.jpg it shows a breakout board which I would very much like to have identified?
I think it would be better received if you changed the design slightly so you could fit the whole 5015 on a duct and just line it up with the mouthpiece.
I don' have the photos here, but in my pictures are three breakout boards: afterburner, stealthburner and LDO Nitehawk 36 usb board. I use Nitehawk 36 now.
For fitting the same form factor fan on both sides is dificult when you must consider some dimensions in x and y you must constrain the design... no mather what you still must chop some material of... so whats the diference? You would still destroy the casing in some extend.
My first iteration was like that, but between the partial fan casing and the needet printed parts to complete the fan there was little space for air flow.
Hei... you can test it with a cheap fan first... if its to your liking you just need to reprint one printed part.
I will post a video with the "bowl of wather" test. I did that, but never film it.
 
Last edited:
better than CFD or water dish tests is an actual print test, such as the Shuriken D85.

Chirpy has a good writeup on it.

the important thing to do on htis test is to get your print time under 6 minutes, and try it with PLA and with ABS. PLA is a much harder test.

Let us know how the testing goes!
 
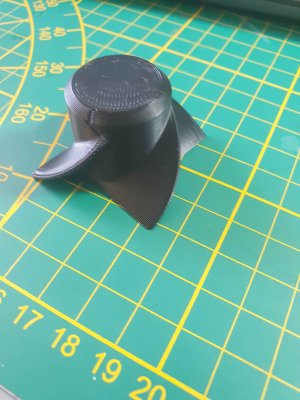
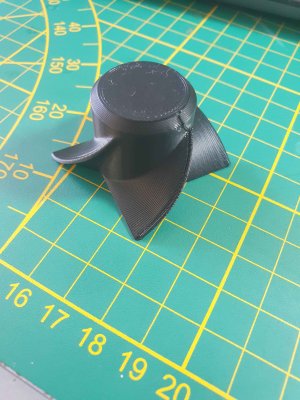
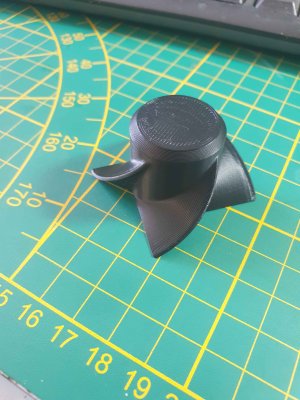
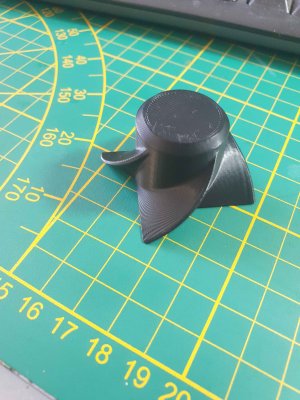
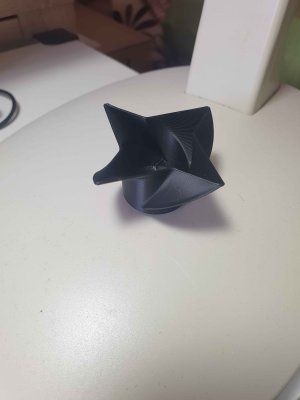
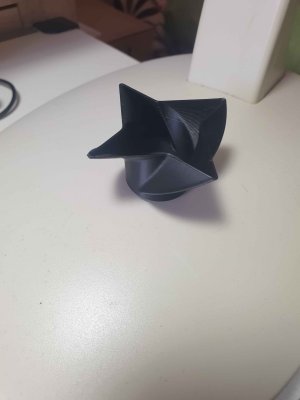
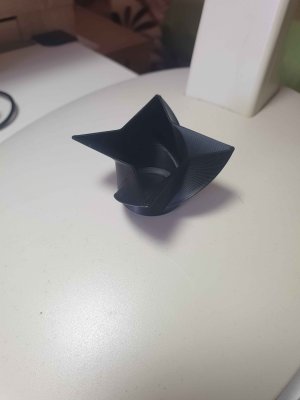
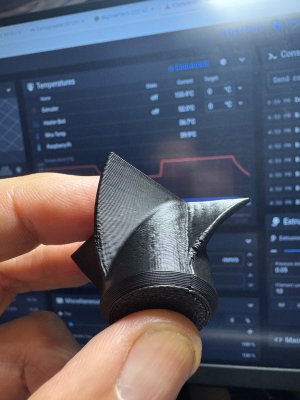
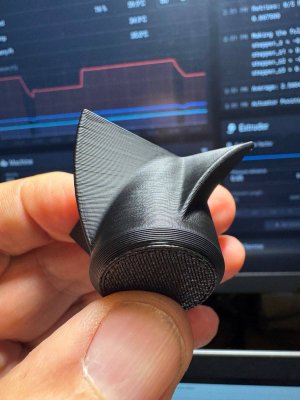
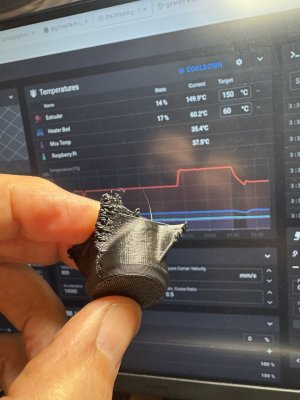
As requested this is the Shuriken85 Fan Duct Test. Under 6 min with Overture PLA. Two walls, no infil, no top layer, 10k accel.
 

Attachments

  • 20240827_102526.jpg
    20240827_102526.jpg
    574.8 KB · Views: 13
  • 20240827_102533.jpg
    20240827_102533.jpg
    676.1 KB · Views: 13
  • 20240827_102537.jpg
    20240827_102537.jpg
    543.3 KB · Views: 14
  • 20240827_102540.jpg
    20240827_102540.jpg
    655.9 KB · Views: 16
  • 20240827_102611.jpg
    20240827_102611.jpg
    389.7 KB · Views: 13
  • 20240827_102606.jpg
    20240827_102606.jpg
    337.4 KB · Views: 15
  • 20240827_102616.jpg
    20240827_102616.jpg
    382.3 KB · Views: 14
Last edited:
Ok so I have done my own shuriken tests, about 10 in total, and I have a few findings of my own to add. Fisrt of all, the speed that it tells you to set is not ever reached when you have set the dynamic speed for overhang to be active. The part is small and with that accel rate it never reaches more then 200 or something like that, depending on the overhang speed settings. Second finding is that if you actually switch all the dynamic speeds off, and you really print it at 500mm/s as the instructions tell you, you need a very high flow hotend. I do not know what hotend is used in this shown example but mine is a Revo Micro with standard brass 0.4 nozzle and that bottoms out at 13 mm^3/s. This is under 200 mm/s print speed if you print in a long straight line and you actually reach that speed.
So when I set my voron 2.4/350 to 500mm/s with 10000 mm/s^3, the best speed it got on this model with dynamic overhang speed was about 200 to 250mm/s. The results were not accapetable to me. I do not want to print for speed only, my parts have to fit, perform a function and most of the time need to look at least half decent. My machine is using a 7040 cpap which cools via a modified mantis duct. Generally this is considered to be a very efficient parts cooler, most people turn the fan speed down to 60% or so for normal situations. For my test I ran it at 100% and it is very noisy, but that is not the purpose of the test.
When I run the print at 300 mm/s and dynamic overhang is set to scaling %age from 50% at 75% overhang to 10% speed at bridging, the results were near perfect with the fan running at 100% speed. The duration of my test print was somewhere around 7 minutes 20 seconds. If I want perfect I need to run at 200 mm/s with dynamics on and then it takes nearly 9 minutes.
Questions I have are:
1) what were all of your settings to get that result?
2) how long did it take the printer to print (not counting the bedlevel mesh time)
See photos of my prints attached.
Please note that the actual speed reached during printing depends massively on the slicer settings, and not only on the speed settings for perimeters and such. In the samples below the speeds are in the filename but the actual maximum speeds reached were respectively 195 for the 300, 160 for the 200 and 350 for the 500_no dynamic.
My hotend bottoms out at around 190 to 200 so my results show this fact really well. The 300 is still acceptable for most parts but do show slight under extrusion and cooling shortage, while the 200 is perfect in every way. The failed print was clearly under extruding by massive amounts. On that one I saw extrusion volumetric values of nearly 30 coming passed and this is clearly visible.
If I pursued ultra fast printing I would need to step up to a much higher flow extruder, but it is not my game to be honest. If you compare my print durations with standard out of the box machines I am 2 to 3 times faster while holding (near) perfect quality. And that is what I am after.
Setup:
RPI 4 8Gb
Octopus V1.1
LDO orbiter V2.5
Revo micro
Cpap 7040 with modified mantis duct
Looking forward to your settings so we may evaluate further.
P.S. looking at my own pictures I was reminded by that I should lower my z-offset a bit more, so please forgive me, I will do it for the next print I start ;)
 

Attachments

  • shuriken 300_dynamic.jpeg
    shuriken 300_dynamic.jpeg
    224 KB · Views: 4
  • shuriken 200_dynamic.jpeg
    shuriken 200_dynamic.jpeg
    176.2 KB · Views: 4
  • shuriken 500_NO dynamic.jpeg
    shuriken 500_NO dynamic.jpeg
    209.1 KB · Views: 3
Ok so I have done my own shuriken tests, about 10 in total, and I have a few findings of my own to add. Fisrt of all, the speed that it tells you to set is not ever reached when you have set the dynamic speed for overhang to be active. The part is small and with that accel rate it never reaches more then 200 or something like that, depending on the overhang speed settings. Second finding is that if you actually switch all the dynamic speeds off, and you really print it at 500mm/s as the instructions tell you, you need a very high flow hotend. I do not know what hotend is used in this shown example but mine is a Revo Micro with standard brass 0.4 nozzle and that bottoms out at 13 mm^3/s. This is under 200 mm/s print speed if you print in a long straight line and you actually reach that speed.
So when I set my voron 2.4/350 to 500mm/s with 10000 mm/s^3, the best speed it got on this model with dynamic overhang speed was about 200 to 250mm/s. The results were not accapetable to me. I do not want to print for speed only, my parts have to fit, perform a function and most of the time need to look at least half decent. My machine is using a 7040 cpap which cools via a modified mantis duct. Generally this is considered to be a very efficient parts cooler, most people turn the fan speed down to 60% or so for normal situations. For my test I ran it at 100% and it is very noisy, but that is not the purpose of the test.
When I run the print at 300 mm/s and dynamic overhang is set to scaling %age from 50% at 75% overhang to 10% speed at bridging, the results were near perfect with the fan running at 100% speed. The duration of my test print was somewhere around 7 minutes 20 seconds. If I want perfect I need to run at 200 mm/s with dynamics on and then it takes nearly 9 minutes.
Questions I have are:
1) what were all of your settings to get that result?
2) how long did it take the printer to print (not counting the bedlevel mesh time)
See photos of my prints attached.
Please note that the actual speed reached during printing depends massively on the slicer settings, and not only on the speed settings for perimeters and such. In the samples below the speeds are in the filename but the actual maximum speeds reached were respectively 195 for the 300, 160 for the 200 and 350 for the 500_no dynamic.
My hotend bottoms out at around 190 to 200 so my results show this fact really well. The 300 is still acceptable for most parts but do show slight under extrusion and cooling shortage, while the 200 is perfect in every way. The failed print was clearly under extruding by massive amounts. On that one I saw extrusion volumetric values of nearly 30 coming passed and this is clearly visible.
If I pursued ultra fast printing I would need to step up to a much higher flow extruder, but it is not my game to be honest. If you compare my print durations with standard out of the box machines I am 2 to 3 times faster while holding (near) perfect quality. And that is what I am after.
Setup:
RPI 4 8Gb
Octopus V1.1
LDO orbiter V2.5
Revo micro
Cpap 7040 with modified mantis duct
Looking forward to your settings so we may evaluate further.
P.S. looking at my own pictures I was reminded by that I should lower my z-offset a bit more, so please forgive me, I will do it for the next print I start ;)
Hi. I dont remember the specifics of my slicer settings for that test. Usualy i adjust settings for that specific situation when I do a test and i dont save them... The key requirement of "badnoob" request was "under 6 minutes" and I just adjusted my speed for that request(see video in my post). If i remember correctly that translated in something of a global speed of arround 80-90mm/s(no dynanic speed). That sounds low, but that specific part is verry small, with one wall and the layer time was under 2 seconds. Most slicers profiles slow down the speed to arround 20mm/sec when layer time is under 10-15seconds. I did the test at higher speeds to, and had similar results as you.
In my oppinion, this test is not ment to put out perfect parts at full speed. Its ment to see where the weak points in your settings are and tune them for better results. Nobody prints perimeters at 300-500mm/s and expects good results, especialy for small parts with short layer times. If you scale that test stl to 1000% i bet the results will be much better at high speed, because the layer time is longer.
My setup:
Voron 2.4 350x350x500, BTT Manta M8P with CB1, LDO Orbiter v2, Trianglelab CHC Pro hotend

PS. And there are manny settings you can make depending on what are you printing: layer width, temperature... for this print I think I used 0.48 width and 185-190 celsius.
 
Last edited:
Absolutely it is not meant to get a perfect part, originally it is for test and design mods on your cooling duct to see if some different design works better.
I have since printed teh dshuriken 85, which is more severe than the 55, and got the same results. I need to get a higher flow nozzle to get faster speeds. It is the Revo's downfall.
But the print quality is good and you can change nozzles in a blink of an eye, so I am not complaining.
 
Top