What's new
VORON Design

Register a free account today to become a member! Once signed in, you'll be able to participate on this site by adding your own topics and posts, as well as connect with other members!

Top layer of printed voron parts are a little rough

Dutchronnie

Active member
I am printing parts for the voron 2.4 on my modded creality cr-10
The parts are printed with eSUN ABS+

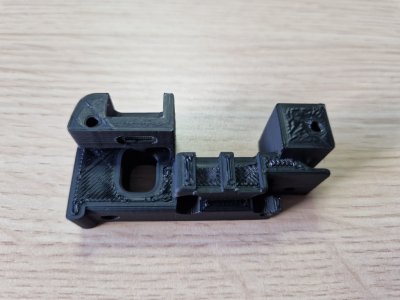
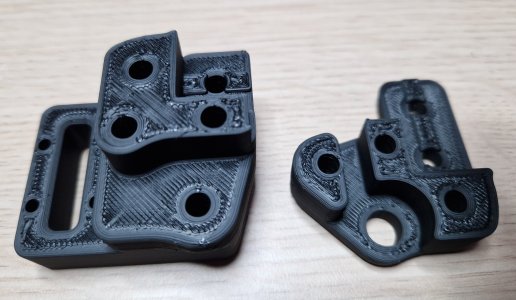
But the last layer is a littebit rough, i need to sand them to get a perfect fit. I think this can be better, i don't have this when i print PLA, only ABS
I slice the parts in Cura and print them with a temperature of 235 degrees and a bed temperature of 100 degrees.

Does somebody know how i get a smooth toplayer?
What do i have to change in Cura?

20230814_221745 (Groot).jpg
 
I'm using eSun ABS+ too, with similar Cura settings, on a Prusa Mk3 and I'm getting similar top layers. I've had a little warping too but so far everything is going together nicely. Time will tell if it affects quality significantly. I doubt it will, but can reprint anything that causes an issue. I'm planning a simple stock build that I can then tweak, mod and improve cosmetically once it is actually working. Unless someone knows better, I wouldn't worry about it.
 
20230815_114908.jpg

It is better now with ironing activated, but only the last top layer.
Top layers that are lower in the print are not affected by the ironing setting.

I see now that i have the option checked "Iron only last Layer":)
 
If somebody hasn't sent you link to this website, I may as well do it: https://ellis3dp.com/Print-Tuning-G...shooting/small_infill_areas_overextruded.html I suggest you take a look throughout the whole website, it's a treasure trove of useful information on printer tuning.

Also, eSun ABS+ is ... how to put it ... rather controversial filament. It's not the best, very inconsistent diameter, sometimes you cannot get proper results until printed at 270 degrees and layer adhesion is crap. It's also ABS+ and this filament has much lower temperature resistance than normal ABS. It's not recommended for functional parts anymore.
Thanks, that is good information, I will read everthing.
I ve see this page before, but tunning, i thought ill wait with this page when i have built the Voron.

But of course it is also suitable to my old printer.;)
 
Had this exact same problem yesterday !

The culprit was the nozzle. Replaced the old, crappy, cheap and badly worn one with a nickel coated BMG CHT, and top surfaces now are just perfect. Had these CHT for some time, but was lazy, and didn't realize how worn it was... I first played with top layer flow : no success. Finally replaced the nozzle with the BMG.
The plastic doesn't stick to the nozzle anymore. Of course after calibration (the Ellis way, each and every step), and got the same parameters ! Filament now is eSun ABS+.
This being said, tiny top surfaces never will be perfect.

I'll post a couple of pics showing the before/after ; at this point, I didn't reprint the bad parts (DIN mounts).

I get excellent results with these Cura parameters (eSun ABS+ and also the previous filament I was using, the cheapest I could find on Amazon) : 1st layer flow 100% (for no visible gaps and perfectly smooth surface), then 95.5%. shrinkage compensation : 100.6%, minimum layer time 15s, LA 0.04, toolhead : slightly modded Stealthburner / E3D V6, Input Shaping, outer walls 75mm/s, others 150mm/s, 3000mm/s², infill 5000. Printer : self designed, belted dual Z with one motor and 2:1 ratio, all structural parts machined from at least 6mm aluminium, reinforced every angle with in-house machined large corners, the frame and bed being reused from a Tevo Tornado (CR10 clone). Much more rigid and precise than any CR10/Ender printer, so mechanical issues cannot be part of the equation in case a problem occurs. Active heated chamber : 50-55°C.

Also could be a mechanical issue : lose tool and/or carriage (but your layers do not show such symptoms : no waves).

(currently building a LDO 0.2 and a LDO 2.4/350 I just received ; the custom "Super Tevo Tornado" was built for building the Voron's - project inceptions)
 
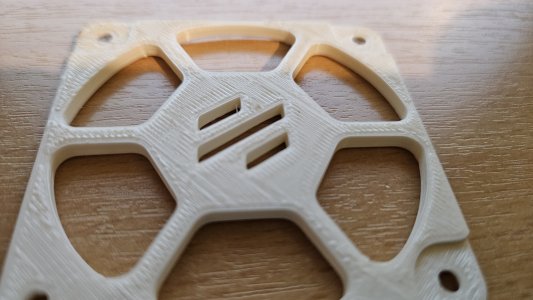
I'm also getting really bad surface results, but only on small top surfaces. Thing is, they look way better on my good 'ol Prusa MK3S, so I know it should be possible to also get there with my Voron.
I did my EM, and PA calibration, but top surfaces still look bad with ABS. But almost all filaments I have give a worse top surface finish on my Voron than my Prusa MK3S.
(Voron V2.4 350mm, Stealthburner, Dragon HF)

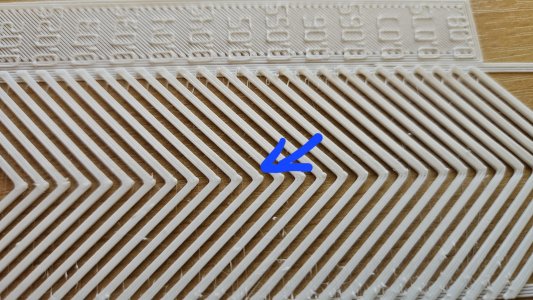
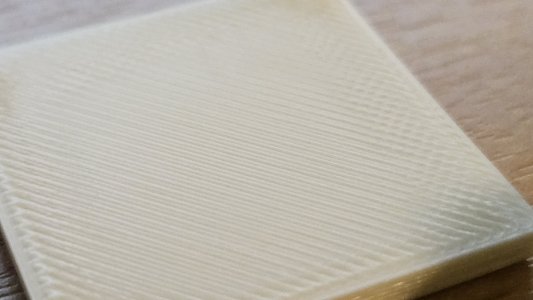
PA_results_compressed.jpgextrusion multiplier cube.jpgugly top surface print_compressed.jpg
Any suggestions on how I can further debug these issues?
 
I'm also getting really bad surface results, but only on small top surfaces. Thing is, they look way better on my good 'ol Prusa MK3S, so I know it should be possible to also get there with my Voron.
I did my EM, and PA calibration, but top surfaces still look bad with ABS. But almost all filaments I have give a worse top surface finish on my Voron than my Prusa MK3S.
(Voron V2.4 350mm, Stealthburner, Dragon HF)


Any suggestions on how I can further debug these issues?
Honestly to me it looksl ike you are overextruding. How is your extruder set up in printer.cfg in terms of gear ratio and rotation distance?
 
I concur. Go back to the EM tuning plates and keep going down on percentage until you get a good surface.
 
@Sanity Agathion That's what I thought also, but when looking at the center of my EM square's they look great. If I drop down from 0.99(used in image) to 0.98, I can spot small gaps between some of the lines in the center of my EM cubes.

I was able to improve my small top surfaces by quite a bit by increasing my temp from 250 to 255, this shows more stringing in my temp tower, but led to better results. (also redid PA tuning).

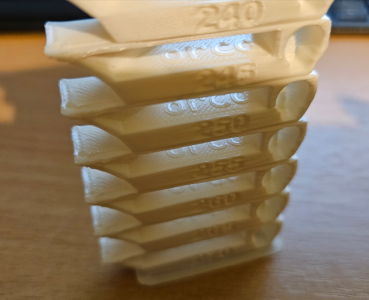
Strangely, when looking at my temp tower (done through OrcaSlicer profile), small top surfaces look great at every temp.
This while the default orcaslicer profile runs top surface at 100mm/s and my Prusaslicer profile only 45mm/s.
OrcaSlicer profile also has EM=1, which makes it double confusing.

I'll try to do an EM cube through my prusaslicer profile with top surface at 100mm/s to see if faster=better somehow.
1696363053504.png
 
Top