ChrisNeal
Member
About 6 weeks ago I received most of the parts for my V2.4 R2. I used the West3d self source configurator for most of this, while other parts were purchased from DFH, Fabreeko, and KB3D. (Mouser for the Pi)
Parts list + the first thing that comes to mind about each item:
-------------------------------------------------------------------------------------
LDO 300 orange frame - The tolerances seem spot on. Everything fits snugly
BTT Octopus Pro 1.0 (429) - Looking back, I didn't need the Pro but I figured "60V? maybe some day I'll use it so get the Pro". Reality: I'll probably never go over 24V with this system.
Raspberry Pi 4B 4GB - Overkill, but the price difference between 2 and 4 gigs was minimal.
Mean Well LRS-350-24 - Coming from a pair of underpowered Ultimaker 2 machines, which could have perfomed so much better if they hadn't been saddled with 220W PSUs, I wanted to provide more than the Voron needed. Soon I needed to order a second one of these 350s because I test-mounted the first one into one of my UM2s, suddenly making it capable of successfully printing non-warped ABS and ASA parts for my Voron. It's pemanently in the UM2 now.
Mean Well LRS-50-5 - The threaded screw holes in the chassis butt right up against the circuit board, so it took a bit of swapping out mounts and screws to find a combo that didn't cause concern of damaging it.
Chaotic Labs CNC parts kit - quality machining IMO
Triangle Labs TBG-Lite extruder - Size, shape, and weight seemed good, but I still need to test it.
Berserker linear rail kit - Seems solid to me with smooth gliding.
Dropeffect XG hot end - I liked the idea and the few reviews that I watched. I still haven't gotten a chance to test it out yet.
Hartk ERCF V3 Rabbit Toolhead PCB - Wanting to install an ERCF system one day, this seemed like a good idea. After assembling and dealing with so many wires, I'd probably change to a CAN bus system if I were starting from scratch, or just leave out the PCB entirely and patch wires together at the print head.
Keenovo 290x290 500W AC heat pad - easy installation
Mandala Roseworks Voron Magbed 300 - I've been pleased with the Buildtak magnetic Flexplate systems on my UM2s, coupled with PEI coated steel sheets, so this looked like the way to go for me.
LDO v2.4 motor kit - Hopefully I can push them soon
Lightweight Labware Kinematic bed mounting kit - The spring plates seem weak to me, but maybe they perform well that way. Hopefully I'll be testing them with prints soon.
Lightweight Labware Titanium backers - sharp lines, easy installation.
Build sequence:
--------------------------------------------------------------------------------------------
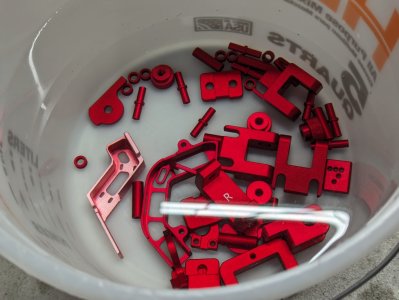
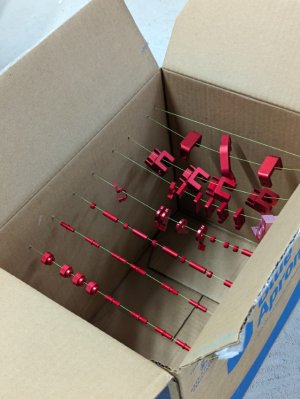
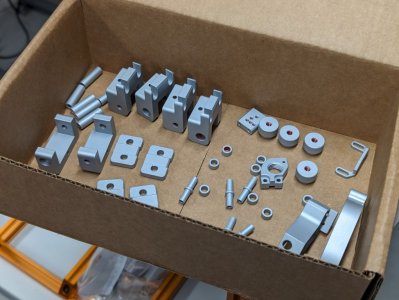
I didn't like the red anodized accent color on those AL CNC parts, so I soaked them in some paint prep solution, washed them off, then strung them out for spray painting.
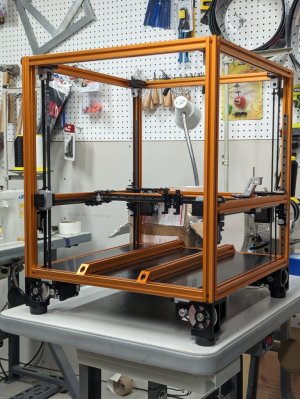
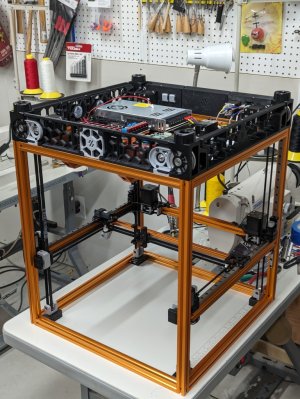
The frame assembly was probably the easiest part of this build for me.
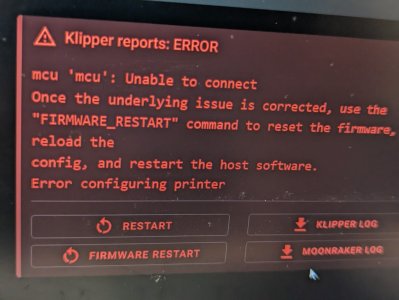
Then I started bench testing the electronics and ran into a wall. My Pi wasn't communicating with my Octopus. I spent quite a while toubleshooting this, then finally decided to try my other board (I'd bought 2 identical MCUs because I was planning to build a second system after I learn Klipper). The second board worked using all the same jumpers, .bin file, etc. so I RMA'd the first one and moved on.
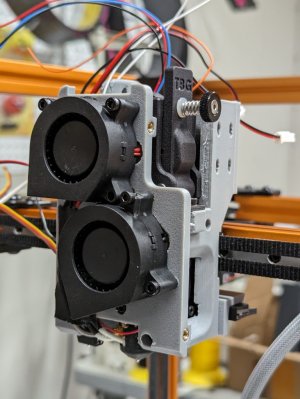
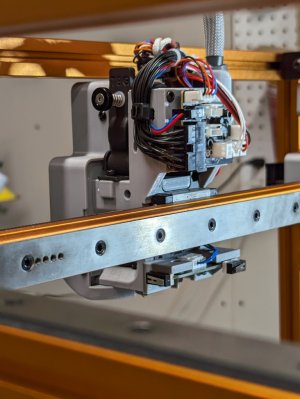
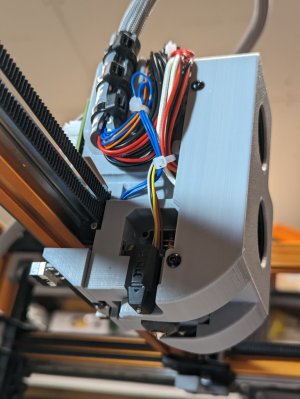
Building a Stealthburner went ok, but I decided it wasn't exactly what I wanted, so I started making a printhead using all the parts I had on hand. Everything fits, but I haven't been able to test it yet. "How hard could it be?" was what I'd read in the Voron build manual, so why not. <edited to add> It took a lot longer than I expected and this is the third iteration and probably needs more work. </edit> My wiring is inefficient. Next time I'll be able to eliminate several or quite a few. We'll see. I figured I'd keep it simple for testing, and to me simple meant using straight-through wires for the hot end, XY endstop, and Microprobe.
On to software config... I got the probe calibrated and ready to try doing a mesh bed, but then I had to hit the road, so it's just sitting there waiting til I get home.
Parts list + the first thing that comes to mind about each item:
-------------------------------------------------------------------------------------
LDO 300 orange frame - The tolerances seem spot on. Everything fits snugly
BTT Octopus Pro 1.0 (429) - Looking back, I didn't need the Pro but I figured "60V? maybe some day I'll use it so get the Pro". Reality: I'll probably never go over 24V with this system.
Raspberry Pi 4B 4GB - Overkill, but the price difference between 2 and 4 gigs was minimal.
Mean Well LRS-350-24 - Coming from a pair of underpowered Ultimaker 2 machines, which could have perfomed so much better if they hadn't been saddled with 220W PSUs, I wanted to provide more than the Voron needed. Soon I needed to order a second one of these 350s because I test-mounted the first one into one of my UM2s, suddenly making it capable of successfully printing non-warped ABS and ASA parts for my Voron. It's pemanently in the UM2 now.
Mean Well LRS-50-5 - The threaded screw holes in the chassis butt right up against the circuit board, so it took a bit of swapping out mounts and screws to find a combo that didn't cause concern of damaging it.
Chaotic Labs CNC parts kit - quality machining IMO
Triangle Labs TBG-Lite extruder - Size, shape, and weight seemed good, but I still need to test it.
Berserker linear rail kit - Seems solid to me with smooth gliding.
Dropeffect XG hot end - I liked the idea and the few reviews that I watched. I still haven't gotten a chance to test it out yet.
Hartk ERCF V3 Rabbit Toolhead PCB - Wanting to install an ERCF system one day, this seemed like a good idea. After assembling and dealing with so many wires, I'd probably change to a CAN bus system if I were starting from scratch, or just leave out the PCB entirely and patch wires together at the print head.
Keenovo 290x290 500W AC heat pad - easy installation
Mandala Roseworks Voron Magbed 300 - I've been pleased with the Buildtak magnetic Flexplate systems on my UM2s, coupled with PEI coated steel sheets, so this looked like the way to go for me.
LDO v2.4 motor kit - Hopefully I can push them soon
Lightweight Labware Kinematic bed mounting kit - The spring plates seem weak to me, but maybe they perform well that way. Hopefully I'll be testing them with prints soon.
Lightweight Labware Titanium backers - sharp lines, easy installation.
Build sequence:
--------------------------------------------------------------------------------------------
I didn't like the red anodized accent color on those AL CNC parts, so I soaked them in some paint prep solution, washed them off, then strung them out for spray painting.


The frame assembly was probably the easiest part of this build for me.


Then I started bench testing the electronics and ran into a wall. My Pi wasn't communicating with my Octopus. I spent quite a while toubleshooting this, then finally decided to try my other board (I'd bought 2 identical MCUs because I was planning to build a second system after I learn Klipper). The second board worked using all the same jumpers, .bin file, etc. so I RMA'd the first one and moved on.

Building a Stealthburner went ok, but I decided it wasn't exactly what I wanted, so I started making a printhead using all the parts I had on hand. Everything fits, but I haven't been able to test it yet. "How hard could it be?" was what I'd read in the Voron build manual, so why not. <edited to add> It took a lot longer than I expected and this is the third iteration and probably needs more work. </edit> My wiring is inefficient. Next time I'll be able to eliminate several or quite a few. We'll see. I figured I'd keep it simple for testing, and to me simple meant using straight-through wires for the hot end, XY endstop, and Microprobe.


On to software config... I got the probe calibrated and ready to try doing a mesh bed, but then I had to hit the road, so it's just sitting there waiting til I get home.
Last edited:

