What's new
VORON Design

Register a free account today to become a member! Once signed in, you'll be able to participate on this site by adding your own topics and posts, as well as connect with other members!

a secondhand Voron 2.4 350 being rebuild after it traveled nearly 2000 km by air, in a suitcase!

The Omron Inductive probe the what is in the standard build but I think most people change this out almost immediately for faster and more accurate probes.

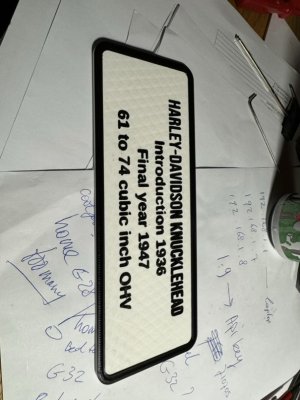
Ahh the Knucklehead, a classic!
 
Progress and setback.
Progress is that I have successfully implemented and modified my very first macros and they worked as expected.
Setback is that twice in a row the printer shut down due to an unexpected temperature loss from the hotend. Since this is gradual, i.e. the thermistor keeps reading a lower temperature over time, I suspect a wire breakage in the heater element.
I have ordered full set of silicon wires for the whole machine, and cable tray for the base, since the original builder never did a fantastic job in the first place and used pvc wiring everywhere.
For now I am simply going to fit a new heater cartridge as test, but some time this summer I will rewire the lot.
Despite all this still happy.
 
Before you rewire it all note that there are alternatives to wiring the toolhead such as CAN bus or USB toolheads. It can reduce the wires running to the toolhead from 20-26 wires down to 4 or a single USB cable.
There are pros and cons to all the situation but just wanted you to know there options are available.
 
I heard a lot of nightmare stories from people trying to upgrade to can bus, how realistic is that fear?
 
And how does it compare to usb?
There is so much debate over which one is better or easier to setup. I did a poll on the Voron Discord a month or two ago to see which one is preferred and CAN won over USB.
Is CAN hard to setup? Depends on your skills with Klipper and Linux. I would say most people have some issue but are able to work though it.
I have used most CAN boards on the market and only had an issue on the first setup.
Sine then I have switched to using USB and I like it better for how easy it was to setup and the speeds are faster since USB protocol is faster then CAN.
Thank you for your honest and level headed answer. Could you, if it is not too much trouble, show me your setup with regards to what is added to the printer with usb. And if you still have photos of the can show me those as well?
I know it might be a pain and excuse me if it is, I just hope to see some system in real life and get an idea as to what are the physical differences. If it is not possible, because you do not have photos at hand, don't worry. I am sure I could find some on the internet.
 
I can grab some pics later but here is a short video of a Benchy start process on my machine. The reason for the video is to highlight the 4 motor toolhead design.
 
I can grab some pics later but here is a short video of a Benchy start process on my machine. The reason for the video is to highlight the 4 motor toolhead design.
This seems to show you run an umbilical from the tool-head rather than the cable chains. Why did you do this and how does it perform? How did you fix this to the top of the printer and what happens to the umbilical once you reach higher levels?
 
Inserted my filament change macro and it works. Need to finetune some things but basically I am quite happy.
However I have a bed mesh problem. It does quad level then bed temp en then bed mesh calibrate.
After it is done it reports bed mesh has been saved to profile (default) for the current session. The save_config command will update the printer config file and restart the printer.
It then proceeds with docking the probe and it does hotend temp and starts printing.
But on the left side of the bed it prints with signs it is clearly too close to the bed. While towards the edge of my 200 mm wide print it is ok again.
Why does bedmesh not correct this?
I haven’t yet done a bed height map, I will do this next

are you using your bed mesh in your print start macro ?
also setting your z-offset correctly is important.

Code:
...
BED_MESH_PROFILE LOAD="default"
...
 
can you share your filament change macro code here ?
This is my macro which the slicer calls with M600 when I slice a colour change on a certain layer height.
Be careful, my machine is a V2.4 350, so you will need to check your moves and extrude lengths before using this exact macro!

[gcode_macro M600]
gcode:
{% set X = params.X|default(50)|float %}
{% set Y = params.Y|default(0)|float %}
{% set Z = params.Z|default(10)|float %}
SAVE_GCODE_STATE NAME=M600_state
PAUSE
G91
G1 E-.8 F2700
G1 Z{Z}
G90
G1 X{X} Y{Y} F3000
G91
G1 E-100 F1000
RESTORE_GCODE_STATE NAME=M600_state

This will move the printhead to the front for easy reach and spit out the filament with a retract of 100mm.
I then remove the filament, reload a new one and manually prime the nozzle before cleaning it.
Then I do RESUME from the console and it resumes the print.

It may not be perfect, please be careful and check. I am only working with macros for a few days so I do make mistakes!
 
are you using your bed mesh in your print start macro ?
also setting your z-offset correctly is important.

Code:
...
BED_MESH_PROFILE LOAD="default"
...
This is my start print macro.
I do not think it contains what you mentioned, I assumed that running the bed mesh calibrate and save it to default for this session would use it automatically.

[gcode_macro PRINT_START]
# Use PRINT_START for the slicer starting script - please customise for your slicer of choice
gcode:
# Parameters
{% set bedtemp = params.BED|int %}
{% set hotendtemp = params.HOTEND|int %}
{% set chambertemp = params.CHAMBER|default(0)|int %}

# <insert routines>
;G28
M190 S{bedtemp} ; wait for bed temp

# TEMPERATURE_WAIT SENSOR="temperature_sensor Chamber" MINIMUM={chambertemp} ; wait for chamber temp
G32
BED_MESH_CLEAR
BED_MESH_CALIBRATE
G0 F6000 X10 Y340 Z10
# <insert routines>
M109 S{hotendtemp} ; wait for hotend temp
# <insert routines / nozzle clean>

I would also really love to insert a prime nozzle routine before moving away from that park position after calibrate. I am searching but have not found one yet to use and modify.
Early days but slowly making steps forward.

So you think I should add the

BED_MESH_PROFILE LOAD="default"

before it will use the one it just made?
 
This is my macro which the slicer calls with M600 when I slice a colour change on a certain layer height.
Be careful, my machine is a V2.4 350, so you will need to check your moves and extrude lengths before using this exact macro!

[gcode_macro M600]
gcode:
{% set X = params.X|default(50)|float %}
{% set Y = params.Y|default(0)|float %}
{% set Z = params.Z|default(10)|float %}
SAVE_GCODE_STATE NAME=M600_state
PAUSE
G91
G1 E-.8 F2700
G1 Z{Z}
G90
G1 X{X} Y{Y} F3000
G91
G1 E-100 F1000
RESTORE_GCODE_STATE NAME=M600_state

This will move the printhead to the front for easy reach and spit out the filament with a retract of 100mm.
I then remove the filament, reload a new one and manually prime the nozzle before cleaning it.
Then I do RESUME from the console and it resumes the print.

It may not be perfect, please be careful and check. I am only working with macros for a few days so I do make mistakes!

it looks quite similar to what I have
i have also based mine on the sample code in klipper repo
 
it looks quite similar to what I have
i have also based mine on the sample code in klipper repo
It is exactly what I did too. Just modified it to do more of what want and of course to reflect my machine.
One thing I really do not like is movements between certain commands that are not needed. So I check those macros and find what is duplicated and carefully remove what I do not need.
It does not only speed things up but generally looks tidier too.
 
This is my start print macro.
I do not think it contains what you mentioned, I assumed that running the bed mesh calibrate and save it to default for this session would use it automatically.

[gcode_macro PRINT_START]
# Use PRINT_START for the slicer starting script - please customise for your slicer of choice
gcode:
# Parameters
{% set bedtemp = params.BED|int %}
{% set hotendtemp = params.HOTEND|int %}
{% set chambertemp = params.CHAMBER|default(0)|int %}

# <insert routines>
;G28
M190 S{bedtemp} ; wait for bed temp

# TEMPERATURE_WAIT SENSOR="temperature_sensor Chamber" MINIMUM={chambertemp} ; wait for chamber temp
G32
BED_MESH_CLEAR
BED_MESH_CALIBRATE
G0 F6000 X10 Y340 Z10
# <insert routines>
M109 S{hotendtemp} ; wait for hotend temp
# <insert routines / nozzle clean>

I would also really love to insert a prime nozzle routine before moving away from that park position after calibrate. I am searching but have not found one yet to use and modify.
Early days but slowly making steps forward.

So you think I should add the

BED_MESH_PROFILE LOAD="default"

before it will use the one it just made?
I do not run bed mesh calibrate in print start macro the only thing I have is
"BED_MESH_PROFILE LOAD="default"

Some people like to run bed mesh or adaptive mesh or kamp before every print but I have never done this, i just load my existing mesh and it works
However after some weeks or months if I see that first layer is not going down well I delete existing mesh
- re-do the bed mesh using my klicky probe (mainsail bed mesh ui for calibration and saving bed mesh)
- re-calibrate z-offset with feeler gauge or paper method ( klicky + autoz + some manual tuning and checks)
- test flat square (100x100 mm) which are 3 layers thick (0.2mm layer height so total of 0.2x3 = 0.6mm thick) on various parts of bed
to check first layer adhesions is perfect and touch is smooth and print surface feel nice and even

NOTE
- My bed mesh is a 9x9 with klicky probe
- I also have autoz setup to calculate z-offset
- I still do an offset check with paper/feeler gauge to check nozzle is at correct height from bed
 
Last edited:
I do not run bed mesh calibrate in print start macro the only thing I have is
"BED_MESH_PROFILE LOAD="default"

Some people like to run bed mesh or adaptive mesh or kamp before every print but I have never done this, i just load my existing mesh and it works
However after some weeks or months if I see that first layer is not going down well I delete existing mesh
- re-do the bed mesh using my klicky probe (mainsail bed mesh ui for calibration and saving bed mesh)
- re-calibrate z-offset with feeler gauge or paper method

NOTE
- My bed mesh is a 9x9 with klicky probe
- I also have autoz setup to calculate z-offset
- I still do an offset check with paper/feeler gauge to check nozzle is at correct height from bed
I never did it before and eventually I will also not do it on this machine. But this machine is still new to me so I like to understand everything before I will chop features.
I also think that running a bedmesh every few months, or after mayer rework, is enough. This way it would also drop that bed mesh calibrate from the start macro.
I also run with a clicky probe but I do not know yet how many points it takes or where to set it from.
I did find a useful macro from https://github.com/jschuh/klipper-macros, where he also has a fast bed mesh which sets the size to check to the size of your print. Once I got that working I think I will run that for a while and see what I think of it.

regarding bed mesh points

Code:
[bed_mesh]
speed: 300
horizontal_move_z: 10

## 300mm build
mesh_min: 40, 40
mesh_max: 260,260
zero_reference_position: 150,150 #for use with stock z endstop # sanket: check if we need this ?
## 300mm build

fade_start: 0.6
fade_end: 10.0
probe_count: 5,5 # Values should be odd, so one point is directly at bed center
algorithm: bicubic

probe_count is where we assign , this sample has 5 x 5 point mesh, I have this as 9,9 for a 9 x 9
 
Top