What's new
VORON Design

Register a free account today to become a member! Once signed in, you'll be able to participate on this site by adding your own topics and posts, as well as connect with other members!

De racking, again.

rendman

New member
Printer Model
Voron 2.4r2
Extruder Type
Clockwork 2
Cooling Type
Afterburner
Hello all,

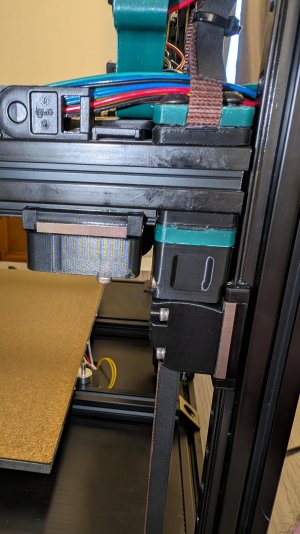
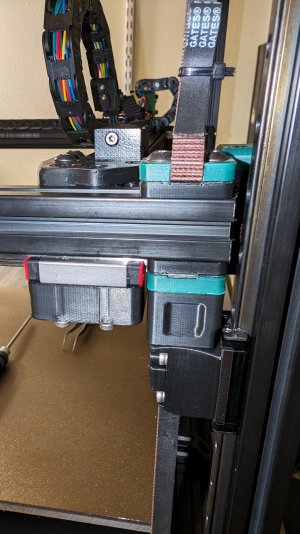
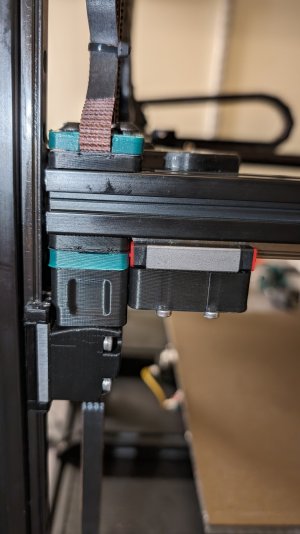
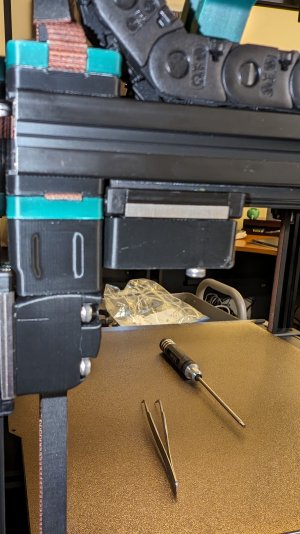
I seem to have a racking issue I cant shake. Attached are photos of each corner of the gantry where the linear rail sleds are. You can see there is a pretty noticeable gap on one side compared to the other. I have followed Neros deracking video and AndrewEllises deracking guide without much luck. Anyone have any ideas about what could be going on?

350mm Voron 2.4r2
Omron probe
Afterburner toolhead

Front right
1000001238.jpg
Right rear

1000001235.jpg

Front left
1000001237.jpg

Left rear

1000001236.jpg
 
I don't have a specific solution for you, but a couple of comments. First make sure your x/y belts are exactly the same length. Second, in the first picture it looks like the a/b drive assembly is not flush with the end of the extrusion. (page 93 & 95 of the assembly manual) But in photo 4 it looks much better.
Sorry I can't be of more help, and good luck in tracking this down.
Hmmm, you are right, I think. It looks even worse in person. I'll try and pull those back to where they need to be. I'll report back with the results.
 
When it comes to racking, make sure the belts are the same length when attached. Start off with the same tension. When you begin to tighten the tensioners, do each side one turn at a time so you have the same amount of tension on each side. Now when you go to tuning they should be very close to each other.
 
I had this exact same problem with mine. I didn't go and re-measure the belts, though.

What I did was move the gantry all of the way forward and zip tied it tight to the front on both sides. I then loosened the tensioners in the front all of the way, then removed the extruder so I could access the belt connections. I then loosened each securing anchor until the belts slid through with a slight pull and got them loose. From here I tightened the anchors about 1 turn so that the belts would come through if pulled with some tension and you could feel the teeth engage the notches. Then using a pair of forceps (needle nose pliers would have worked) I pulled the belts to moderate tension from the gantry connection feeling each tooth engagement and then went to the other belt without adjusting the securing anchors. Once both belts were set, I tightened the anchor down.

From here I set the tension with the tensioners in the front using the sound the belts made as a guide. When they sounded the same, I was good. So far, so good for me.
 
Top