- Printer Model
- 2.4r2
- Extruder Type
- Clockwork 2
- Cooling Type
- Stealthburner
As you'll hopefully see in the post below, I did my best to figure this out on my own and failed, so I come to all of you for ideas!
My printer is a Voron 2.4r2 with CW2 StealthBurner and a Rapido MK1. I’m printing Polymaker ASA on a spool that hasn’t given me any grief thus far (I last printed with it a few days ago) and am slicing with Orca Slicer.
The build itself is fairly vanilla (totally stock other than the filter, bed fans, daylight, magnetic panel mounts, and CNC metal parts from Chaoticlab that were... surprisingly cheap at microcenter). It has and has about 700 hours on it, during which it's run through 4.1 km of filament. I would say that 75% of that was with ASA, 20% PETG, and 5% is TPU.
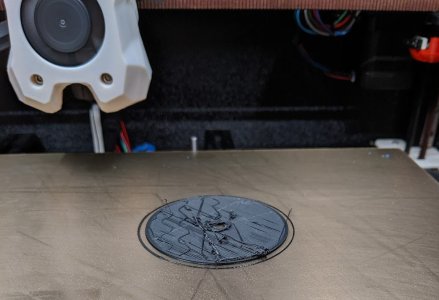
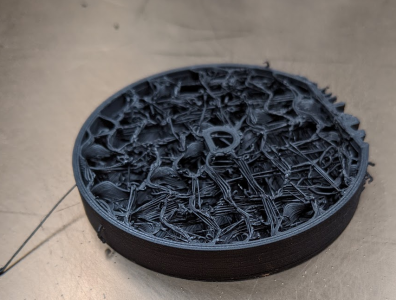
The photo below contains two of the three jams I’ve experienced in that time span. The first print failed on a very similar feature (internal bridge), but on a much much much smaller print. I’ve printed some pretty long (> 12 hour) parts on this printer with the same brand of filament, and similar settings, without issues although this is the first large “fairly normal polygon with big parallel faces” that I’ve tried to print.
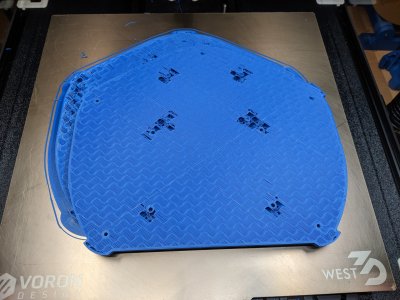
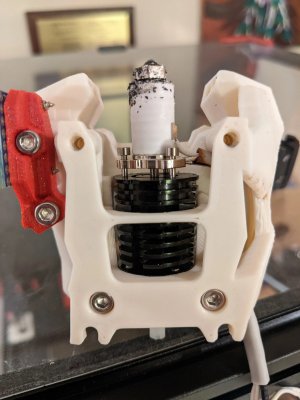
For all three jams, I was able to release the extruder latch and pull the filament out of the heat brake. There was a blob at the bottom of the filament, which would be too big to get through the orifice in the heat brake (it’s a very snug fit on a Rapido). I suspect this is from sitting touching the heat brake for the remaining hour and 50 minutes in the print after the jam occurred. Note to self: install a filament run-out sensor…
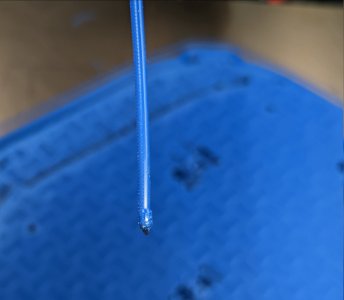
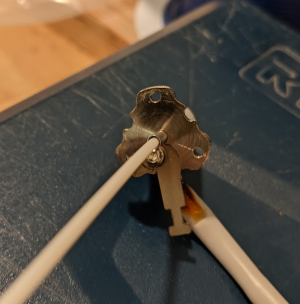
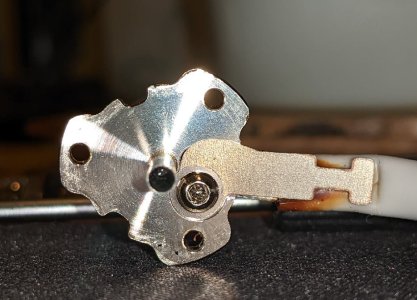
There’s also always been a little bit of filament left in the hot end. The photo below is what came out after manually pushing it out with a metal rod I got with my i3 clone.
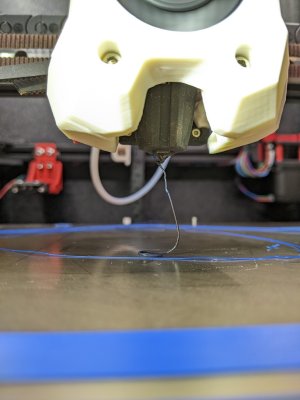
After the first clog on the small print, I reset and the print went off without a hitch. I didn’t think about it again until the top print above failed. I decided to swap nozzles just to be safe and bumped my extruder temp up from 230 to 240.
It looks like I might have been under extruding a tad on the third print and/or I need to tune pressure advance. The OG nozzle was plated brass, and I had recently tuned, so if it was starting to wear out then some minor under extrusion with a new/fresh nozzle makes sense.
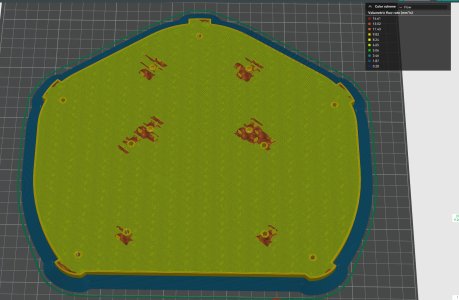
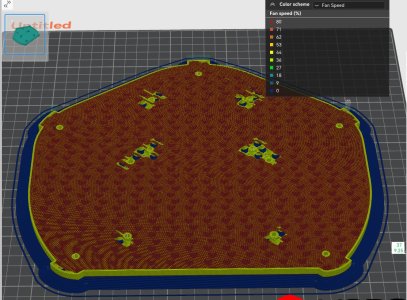
Here’s what the slicer shows as happening on this layer. I am not showing the full layer so you can see it ends with the internal bridge on the lower left. There are a handful of retractions, but they’re not very frequent. There is no retraction at the end of the internal bridge before the travel to the start of the next layer.
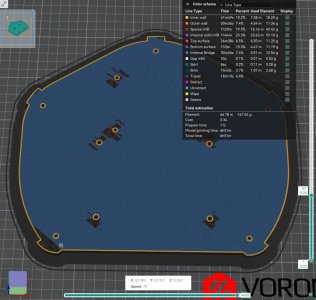
The next layer starts perimeters first in the lower right hand corner. I don’t see evidence of the perimeters starting, so odds are the jam is happening between the two layers.
I have the slicer set to print nearly all features at the same speed, other than overhangs. This is potential correlation #1
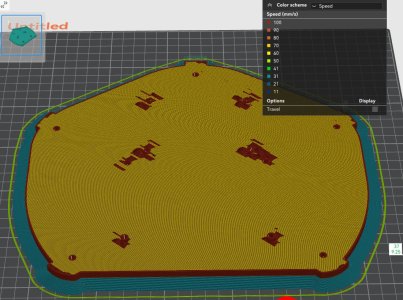
I have the fan set to 40% with no cooling for the first 10 layers. However, for overhangs it’s going to 80%. This is potential correlation #2
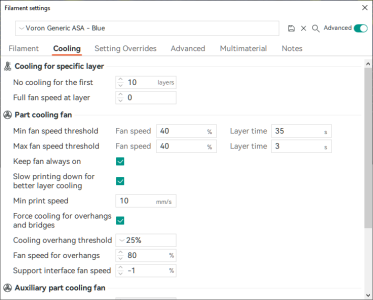
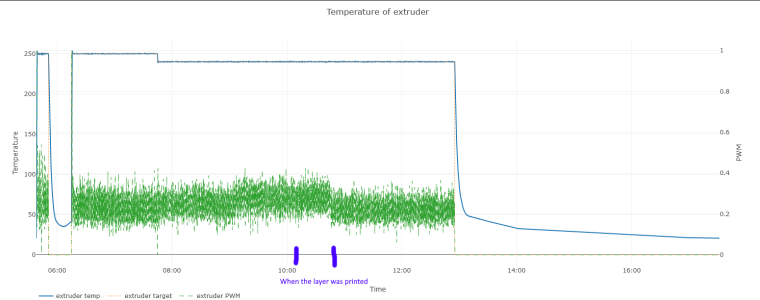
Looking at a graph of what was going on with the extruder, it looks like all is (fairly) well here, at least from a temp perspective. The min PWM value might increase a hair for this layer, but without calculating the average and/or smoothing the line it’s hard to eyeball meaningfully. It does appear that the PWM falls off some once the jam occurs.
All three failures happened in the past month. Literally about a month ago, I changed three things:
So what do you think? Hot end? Potential wire flakiness in the chains? The extra cooling on that feature? The slower speed on that feature (and corresponding dip in flow)? Flakey filament? Something else entirely?
My printer is a Voron 2.4r2 with CW2 StealthBurner and a Rapido MK1. I’m printing Polymaker ASA on a spool that hasn’t given me any grief thus far (I last printed with it a few days ago) and am slicing with Orca Slicer.
The build itself is fairly vanilla (totally stock other than the filter, bed fans, daylight, magnetic panel mounts, and CNC metal parts from Chaoticlab that were... surprisingly cheap at microcenter). It has and has about 700 hours on it, during which it's run through 4.1 km of filament. I would say that 75% of that was with ASA, 20% PETG, and 5% is TPU.
The photo below contains two of the three jams I’ve experienced in that time span. The first print failed on a very similar feature (internal bridge), but on a much much much smaller print. I’ve printed some pretty long (> 12 hour) parts on this printer with the same brand of filament, and similar settings, without issues although this is the first large “fairly normal polygon with big parallel faces” that I’ve tried to print.

For all three jams, I was able to release the extruder latch and pull the filament out of the heat brake. There was a blob at the bottom of the filament, which would be too big to get through the orifice in the heat brake (it’s a very snug fit on a Rapido). I suspect this is from sitting touching the heat brake for the remaining hour and 50 minutes in the print after the jam occurred. Note to self: install a filament run-out sensor…

There’s also always been a little bit of filament left in the hot end. The photo below is what came out after manually pushing it out with a metal rod I got with my i3 clone.

After the first clog on the small print, I reset and the print went off without a hitch. I didn’t think about it again until the top print above failed. I decided to swap nozzles just to be safe and bumped my extruder temp up from 230 to 240.
It looks like I might have been under extruding a tad on the third print and/or I need to tune pressure advance. The OG nozzle was plated brass, and I had recently tuned, so if it was starting to wear out then some minor under extrusion with a new/fresh nozzle makes sense.
Here’s what the slicer shows as happening on this layer. I am not showing the full layer so you can see it ends with the internal bridge on the lower left. There are a handful of retractions, but they’re not very frequent. There is no retraction at the end of the internal bridge before the travel to the start of the next layer.

The next layer starts perimeters first in the lower right hand corner. I don’t see evidence of the perimeters starting, so odds are the jam is happening between the two layers.
I have the slicer set to print nearly all features at the same speed, other than overhangs. This is potential correlation #1

I have the fan set to 40% with no cooling for the first 10 layers. However, for overhangs it’s going to 80%. This is potential correlation #2


Looking at a graph of what was going on with the extruder, it looks like all is (fairly) well here, at least from a temp perspective. The min PWM value might increase a hair for this layer, but without calculating the average and/or smoothing the line it’s hard to eyeball meaningfully. It does appear that the PWM falls off some once the jam occurs.

All three failures happened in the past month. Literally about a month ago, I changed three things:
- Moved to Orca Slicer from SuperSlicer. I manually ported most, but not all, settings over (I'm sure I unintentionally missed some things)
- Adding 2x bed fans to try to get my chamber temps up. I do not have a chamber thermistor installed yet, so I don't know what my temp actually is, but with a 350mm 2.4 with the stock Acrylic panels I doubt it's very high
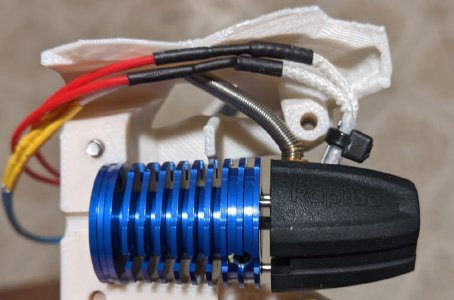
- I discovered that my Rapido was vibrating itself apart. I screwed it back together too tightly the first time, which crimped the end of the hot side the filament feeds into closed just enough to no longer let filament through. I was able to use the taper on a small tap to reverse the situation
So what do you think? Hot end? Potential wire flakiness in the chains? The extra cooling on that feature? The slower speed on that feature (and corresponding dip in flow)? Flakey filament? Something else entirely?


