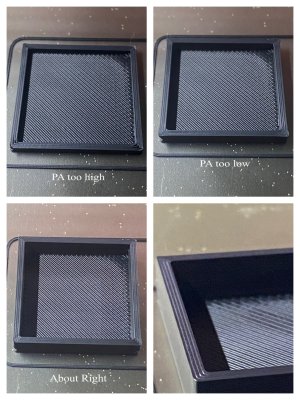
The Klipper Tuning Tower or the Lines Method should get you into the right ballpark but it's a good idea to make sure PA is behaving as expected while actually printing using your slicer profile.
Print two 30x30x30 cubes near the front of the build plate so you can easily inspect the corners as they are printing. Space them so you can see one clearly while the toolhead is over the other one. Make sure they have at least 4 walls. Infill, top and bottom surfaces do not matter. Use your normal print settings for EM, speed and accels. Leave input shaper enabled.
As soon as the bottom solid layers are done begin inspecting the top surfaces of the perimeters at the corners of the cubes. If there are gaps your PA value is too high. If there are bulges in the corners or the spaces between the perimeter lines are blurred than your PA is too low.
Live tune PA until you find the right balance. Use the command `SET_PRESSURE_ADVANCE ADVANCE=0.0x`. This command can be sent while printing to change the current setting. Increase or decrease the value in increments of 0.01 and fine tune using increments of 0.005 if necessary.
Once this is done add the new value to your print start macro or edit your config file.


