Update....
It's been a journey, I've lost track of how many times I've had the toolhead apart...... let's just say, lots. Some self inflicted wounds, some fighting " normal printed extruder " type issues, and one brand new revo heater that decided to quit, though I don't know if that was just a bad heater, or the bend I had to put in the strain relief to get it to clear the Z hardware.
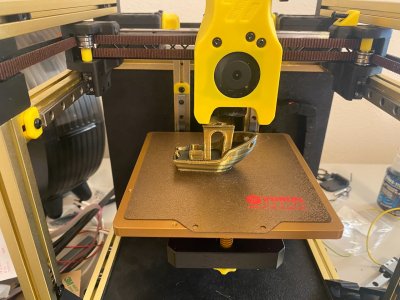
In any case, I had it printing fairly reliably with a dragon burner/revo nozzle, and I even installed some LEDS for some bling. I noticed while tearing it down to install the LEDs, that, yet again, my Z nut was sloppy as heck. The origional one ( black plastic ) got chewed up in no time. My kit came with the coated black Z Screw, so I thought this was odd. I replaced the nut, and this time left the anti backlash part off. This made the Z screw turn a lot more freely, but alas, within days, the dreaded black goo was all over the screw and I had substantial wear again. So, I then installed a brass OLDHAM, thinking it would not only last longer, but help with Z artifacts. Well, nope, now the screw was covered in brass glitter and grease, and probably .5mm or more of play after only a handfull of hours printing.
Well, my brain thinks that my fancy Teflon coated Z screw is just not right. Rather than order up a new Z motor/lead screw, I decided to go with a belted Z . There are a few designs floating around out there. I settled on the moving pulley design, can't remember whose design it is. It offers an 8 to 1 gear reduction ( 4 to 1 at the stepper with belt, and a 2 to 1 with the moving pulley assembly ).
A bit of back of the napkin math, and I was able to make it an even 10 to 1 reduction by moving from a 20 tooth drive pulley on the stepper, to a 16 tooth. This required both a 16 tooth pulley, and a new timing belt. But it works. I then went to a 400 step per rev motor, rather than the "stock" 200 steps per rev. If I did my math correctly, this should give me a nice even 0.01mm per full step on Z.
I haven't yet tested it, so I have no idea how well, or even if, it will work. Getting the belt installed on a built printer is no small task, and checking all the movement, I noticed that there was an interfearance between the hot end wiring and the upper belt pulley bolt. I modified the upper pulley bracket to counter sink the bolt a bit, and that should fix it, but I haven't gotten back to it yet. Hoping my next days off I can get it all buttoned back up and start printing again. I also bought parts to upgrade the V0.1 top hat ( that never quite fit right ) to the V0.2, and I got the fridge door and clicky clack for that. All the parts are here, and I have boxes full of printed parts to do the upgrade, just gotta sit down and "get er done" .
Wondering if anyone else has had Z lead screws that just wanted to chew up the Z nuts like crazy?
I'm also hoping that, with a belt now, I can look forward to better looking prints in the Z.
Joe