What's new
VORON Design

Register a free account today to become a member! Once signed in, you'll be able to participate on this site by adding your own topics and posts, as well as connect with other members!

V2.4 R2 Build by MagicToolbox

MagicToolbox

Active member
Stopping building and actually doing some documentation has been REALLY hard.

A friend gave me a Voron 2.4 kit. With a ridiculous number of upgrades, mods, and extras. Printed (is STILL printing) ASA parts on his Voron when I discover missing pieces. He has a number of thoughts on improvements and wants a collaborator to work through them with. I'm ecstatic that he decided I was the right person.

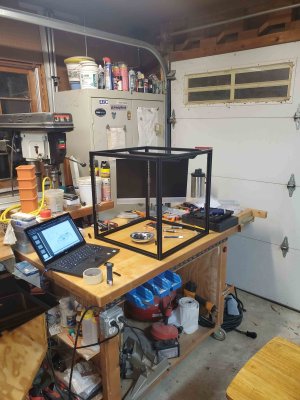
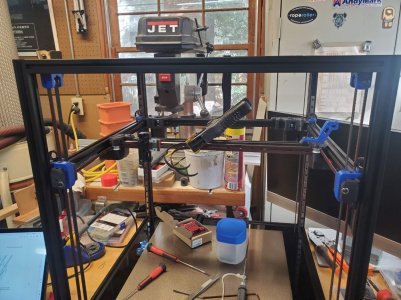
I have some pictures from the build process, I promise to post them up soon, but I gotta go to bed. So for now I'll just post a how it started picture from the day the boxes, bags and bins of parts was delivered on 10/29...20231029_201558 (1).jpg
 
Voron 2.4 Build Issues list:

Wire retention on A-B motor - ordered extrusion slot cover 11/6/23

First Calibration Cube printed 11/7/23 20:43
Enclosure minus the doors installed 11/8/23 00:02

Doors installed 11/8/23

Rerun Bed PID with enclosure installed - done 11/8/23
Rerun Extruder PID with enclosure instaled - done 11/8/23

Hot tighten E3D v6 nozzle - done 11/8/23
Need to print and install the Bowden retainer - done in PLA 11/9/23

ABS print left and right X-carriage parts due to missing holes - done 11/9/23 (PIF)
Install new X-carriage parts - done 11/9/23
Rebuild hot end with better wire arrangement - done 11/9/23
Install E3D silicon sock - done 11/9/23
Install stoo'pit mains wire shield - done 11/9/23

Check Z-Endstop location after moving the printhead
Check Inductive probe leveling after re-install
Quad gantry level passed - done 11/9/23

Build and install exhaust fan - done 11/10/23

Wire retention on A-B motor installed 11/10/23
ABS print and install spool holder 11/11/23

Exhaust fan is now blowing 11/11/23
Reverse bowden tube install - installed 11/11/23

ABS print & install new SHORT Z-stop mount, installed 11/11/23
Check Z-stop location - OK
Rerun Bed PID with exhaust installed - done
Rerun Extruder PID with exhaust instaled - done

Run the Z-stop calibrate AGAIN 11/11/23

Why are the Print fan and the hot end fan paired up?
Fan jumper wires were all set to 12v - changed to 24 v and now works
When should the electronics fans be coming on?
Once the jumper and polarity was fixed, they come on when the heated bed is on.
24 VDC mount needs to be downloaded, printed and mounted - done

TUNING!!! https://ellis3dp.com/Print-Tuning-Guide/
Gantry Squared, Z_ENDSTOP recalibrated
Extruder calibrated - Rotation = 22.33990078
11/13/23

Changed to PLA to print the skirt parts
Reverse flow direction on electronis fans done
Print electronics fan guards and retainers - installed 11/18/23

Designed and PLA printed LED light bar holders - 11/18/23
Lots of tuning and adjusting. ASA now seems to be working at 265/110 11/19/23

Wire loom on X carriage needs redesign, print and installed
Printed new X/Y joint cable path in ASA 11/19/23
Installed and photo'd new Cable path 11/20/23

Printing revised light bar holders in ASA - 11/19/23
Installed AND configured on PC8 (yeah, all I did was uncomment, but I figured it out)... 11/20/23

Print deck support clips https://mods.vorondesign.com/detail/7vnCQwmDSUxvUPSLaLtElg 11/20/23
Print belt guards (Blue ASA) Installed 11/21/23
Print Pi3Plate (Blue ASA) printed 11/21/23

Need to Black ASA print a second fan support bracket and NOT mount fans in it - installed 11/28/23
Changed printer.cfg to display Spider and RasPi temps 11/28/23

Black ABS print PI Plate skirt mod - printed 11/27/23
can only install after moving to SPI interface, USB are external

Machine and install Alumaclad bottom deck 12/1/23
XES, 5V, & SERVO wires are NOT in the main wire harness - these may be needed for ERCF.
Wires have been provided separately.
Install missing 3 wires in harness! 12/2/23
Finalise (riiiight) wire management 12/2/23

Installed warped nevermore fan housing for chamber circulation -12/3/23

Print Z-belt corner covers with wire path - 12/3/23
https://mods.vorondesign.com/detail/LzEFU0RDHXUarF7y69x2Q
Installed new 90 deg power cord, plugged into UPS - 12/3/23
ASA printed reverse Bowden tube holder -12/4/23 installed 12/8

Print Sturdy handles: https://mods.vorondesign.com/detail/EAM1ZiQJCUzXznvOA767w installed 12/6/23

Print Nevermore filter 12/6-12/8 installed 12/9
Print ASA Blue fan guards, installed - 12/9
Print Nozzle wiper - 12/9 Macro installed and working 12/20
Print LCD hinge -12/9

Print Rollback legs: https://www.printables.com/model/408015-voron-rollback-stands/files - 12/10
This will interfere with reaching the current power switch...
Installed 12/16
Wire in the chamber lights - wired to PB3 (OEM Exhaust fan) 12/16
configured in Klipper, changed the Nevermore to come on with bed heater and stay on down to 40C
Install deck wire covers 12/16

Black ASA print splitting rear center skirt replacement - installed 12/17
Install CAT6 R-Pi to Keystone connector - 12/17
Installed filtered power input 12/17
Designed, printed and installed side switch 12/17

Design and print grommets for deck through holes Printed and installed 12/21 (needs to be printed in blue)

Print 20/20 wire channel covers - installed 12/26
Camera monitor, mount, wire, configure - installed 12-26

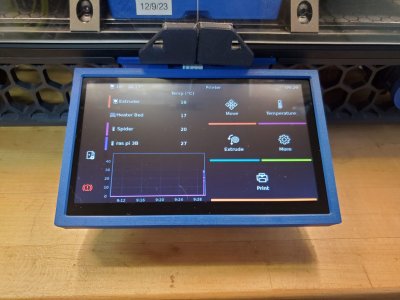
Install BTT PiTFT70 - 12/31
Install Klipper backup - 12/31 (Token expires on 12/31/24)
install KIAUH - 12/31

Update Klipper, Mainsail and Moonraker - 1/1/24 - HAPPY NEW YEAR!!

Design and print a charcoal spoon/funnel

Install electronics cover
Print Galielo Extruder parts
Build StealthBurner - Galileo-2 extruder perhaps?
build clicky-clack doors: https://github.com/tanaes/whopping_Voron_mods/tree/main/clickyclacky_door
MMS filament managers:
 
Last edited:
A question regarding the wires that power the exhaust fan in the back.

The instructions I am using do not even show the fan wires. Is there a standard way of getting power to the fan?

I have a couple ideas but wanted to see what everyone else is doing.
 
So while I wait for my first filament card to print in ASA, I'll post some of the build process pictures and mention the few challenges I had.

This is a Fysetc 350 kit, and since it was a gift, I was not entirely sure which add-ons, upgrades, or extras might be included. I'm not entirely sure which site I got the build instructions from at this point, I know I have at least two different PDF's between 2 computers and my phone.

My background is in Electronics, but I am pretty well versed in Mechanical as well. I am a hobbyist woodworker and in what normal people would call their spare time, I help mentor a FIRST FRC team associated with the makerspace where I volunteer. So I have a fair bit of knowledge for the wiring and mechanical stuff - I am lacking on the software side though.

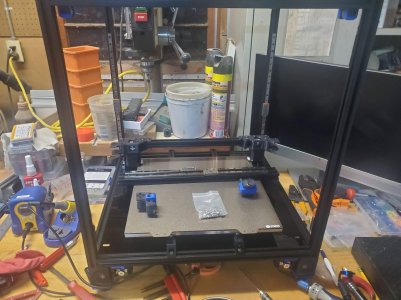
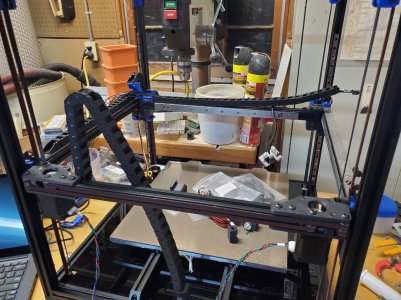
I used a small granite surface plate to build the frame, which helped a lot, I probably should have used the stove like some of the online suggestions with enough space for the entire frame. I found a couple of early frame joints that needed flushing up as I was installing the covers towards the end.
Base.jpg
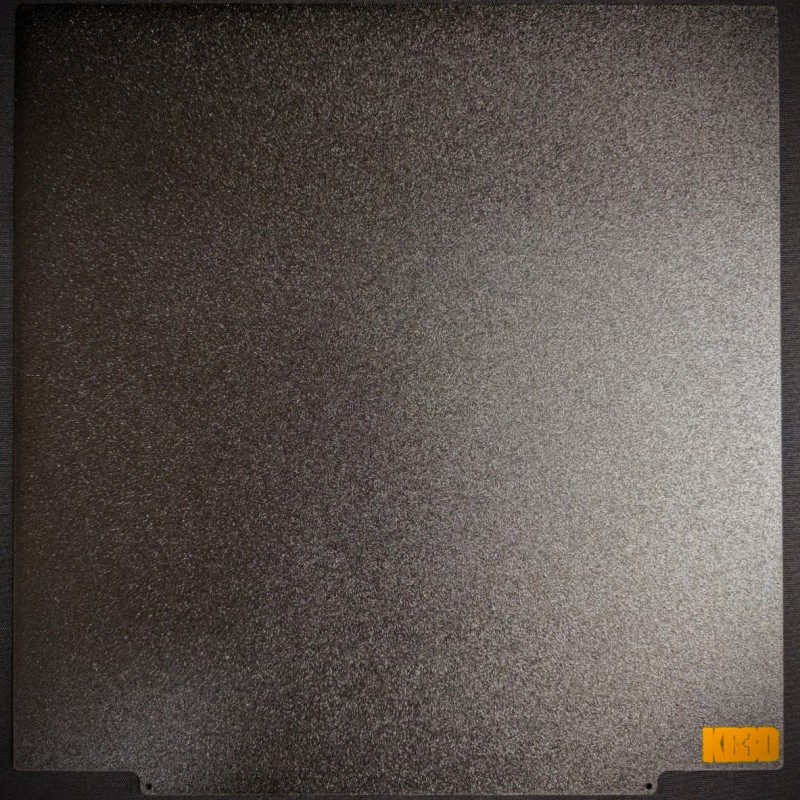
The kit I got included an adhesive insulation that appears to go on the back of the AL bed. I installed it, having read several differing opinions on whether it should be there or not, I am conflicted. I may attempt to remove it when I go back in to install the Nevermore filter later.

Gantry assembly came next, I found that using a 4" piece of severed ZIP tie shrink fit over the end of the Gates belt helped thread around the various bearings and pulleys. Spring clamps also helped hold the belts in place once I got them where I wanted them.
Gantry assembly.jpg
Seen on the bed is a ChaoticLabs metal TAP module, I installed it only to discover that it is an early version that does not include the X-axis zero switch arm. So I took it off and installed a set of the carriage blocks that I eventually discovered were missing the back access screw holes necessary for the Afterburner print head. My buddy had printed the parts for the StealthBurner print head, but the kit included the Toolhead PCB that fits on the AfterBurner. So I disassembled the SB and requested a set of AB parts.
 
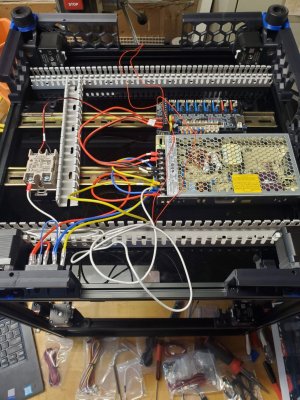
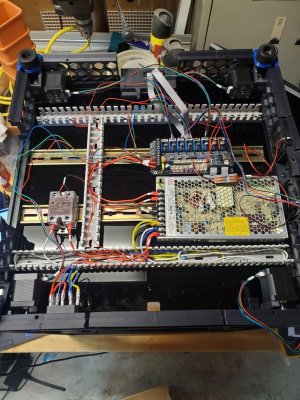
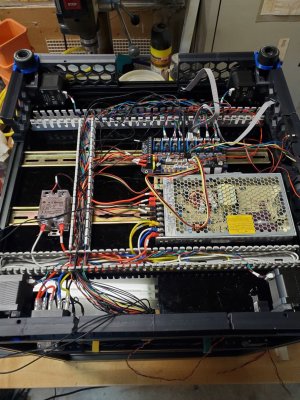
Installing the Electrical components was a little challenging since the Assembly manual I was using was for a different controller board. This Fysetc kit included a Spyder 3.0 controller. The kit did include a double sided printout, one side a photograph of an assembled electrical bay, and the other a pictogram with wires and devices labeled.

Electrical beginings.jpgWire routing.jpgmore wire management.jpg
I spent a fair amount of time searching through the printed parts and finally decided that the printed mounts were not there. Another request for prints was placed, and I carried on, using the cardboard from the box to make a cover that held things in place as I rolled the Cube back and forth. I later lost a fair bit of time Googling an error code because I didn't read the whole callout on the "48V Driver Support M1 & M2" jumper setting.

Spyder 3.0 boards require a small provided plug with a preinstalled jumper to be plugged in on the top right of the board for the A & B motors!

I got an error message along the lines of "TMC2209 stepper driver: Unable to read tmc uart" that was not particularly helpful in debugging the problem, although Google searching led me to suggestions to check the driver jumpers, so I pulled the drivers in that corner and only then saw the call out.

I used my drill to put a twist on the stepper motor driver wires, It may or may not help with cross talk, but it sure helps keep the wires less tangled.Drag chain and harness.jpg
I did not find much in the way of documentation for installing the drag chain. One thing that helped was I remembered the three Ti bars and hardware kit that came with the many boxes. As I installed them, the mounting locations for the 'stationary ends' of the drag chains became clearer.
 
Last edited:
None of the Electrical mounting kit parts seem to match the mounting holes for the 24 VDC supply that came with this kit. The other parts are now all mounted and happy. I provided my own Raspberry PI 3B+, but hte kit came with an SDcard preinstalled with the software. Google and following directions got me through the install. My other self inflicted error was in not being very careful about which section of the config file I was editing. Changing pins and adding exclamation points will not fix the axis you are troubleshooting if you put them on a different axis.

I also missed the (MANDATORY) addition of
[include mainsail.cfg]
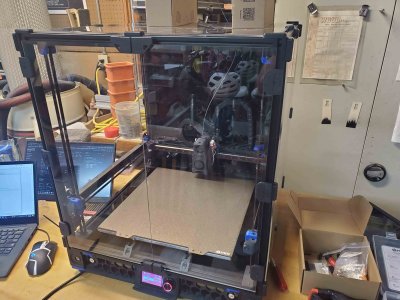
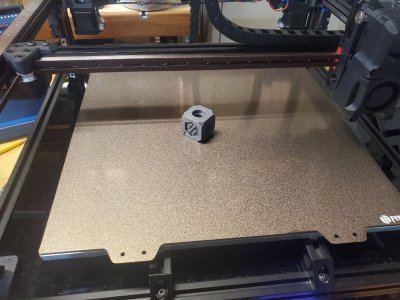
in the printer.cfg file for an embarrassingly long time, but with help from this forum Google and my buddy I got a successful calibration cube in PLA. Cal cube.jpg
And by successful, I mean it measures 30.2mm x 30.1mm x30.04mm (X Y Z) after only calibrating the extruder. This is an amazing piece of kit, the Voron Design Team and the community has done a great job documenting it and supporting rookie builders. Thank you.
 
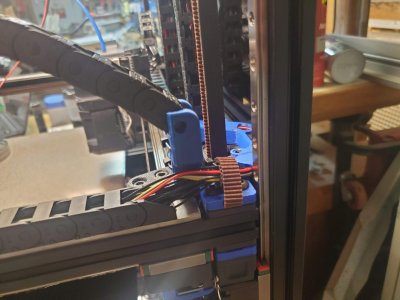
I have spent a fair bit of time going through the Ellis tuning guide. I got PLA printing pretty reliably. I really need to go through and fully understand how to set up a Cura Slicer profile for both the printer and different filament types. I have redesigned the right side drag chain mount to eliminate an unnecessary bend for the wires, and I managed to print it in ASA.installed at limits.jpg

One thing that burned me while I was doing tuning: I have a copy of the printer.cfg file open in Notepad++ on my laptop. I make changes, I save changes, I upload, I FIRMWARE_RESTART and the new goes into effect. That all works really well. EXECPT for when you have made a change to the config file via the SAVE_CONFIG command. The PID tunes, the Z endstop all of these values that get saved to the end of the file kept getting blanked out and I spent WAY too much time trying to figure out why my Z zero was wonky.
 
Last edited:
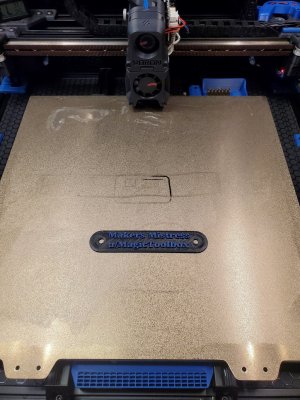
I think I have decided on a name for my printer. I spend all my free time with it, often to the exclusion of my family and my sleep schedule, I buy little trinkets for it, but there always seems to be something else that it needs. So I dubbed it: Makers Mistress.

I just posted my Serial number request on Reddit.

Serial request posted.jpg

I did take a week of vacation but I have been busy with add ons. I printed the Rollback legs, Nozzle cleaner with bucket, and completed the Nevermore filter. When I originally assembled the bed, I put the adhesive "cotton (nope, not cotton) insulation" on the back of the build plate and heater. This interfered with the air intake for the Nevermore filter under the bed. So I disassembled the bed, removed the insulation (not fun) and while I was there, I removed the acrylic deck and replaced it with a CNC cut Alumaclad salvage from a sign shop panel, since it was a salvage, I put hexagon vinyl on it to make it look a little better. I added in the deck supports under and over as well to keep it in place and add some color to the preimeter.
 
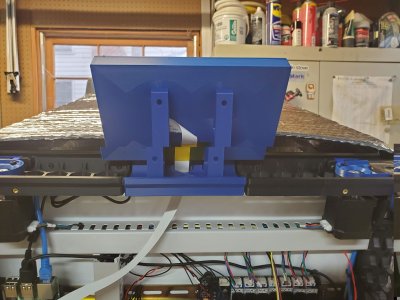
Our cats found my Christmas list and ordered me the BTT PiTFT70 that was on there. I didn't like the way the ribbon cable bent through the included slot, so I used some kapton tape and put it through the partial hex at the top of the front center skirt. It feels much less likely to catch on something now.

PiTFT underside.jpgPiTFT Topside.jpg

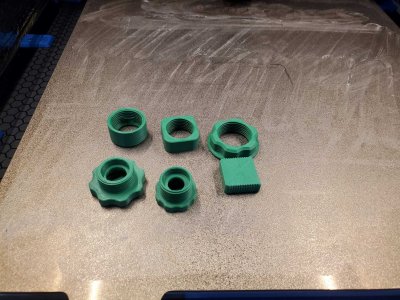
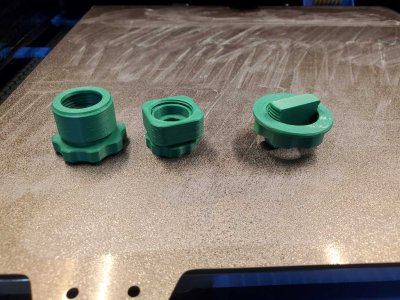
I have spent some quality time with Ellis, and now I'm getting consistent parts that fit together and look good.

thread test apart.jpgthread test together.jpg

I installed Klipper backup and KIAUH so now I have off site backups and a way to install other helpers as well.

I have heard updates to Klipper can be dangerous, but I figure the beginning of the year is a good time to do a full update, so Klipper, Mainsail and Moonraker are now up to date.
 
Last edited:
Top