Laserbea4k43
Well-known member
Hi,
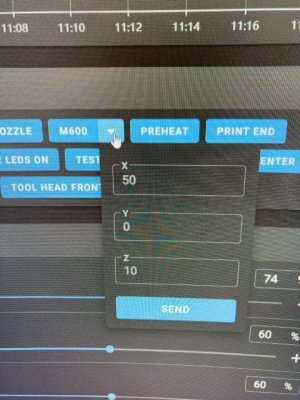
I want to use multiple filaments on a project. Are there scripts/guides to set this up?
I want to use multiple filaments on a project. Are there scripts/guides to set this up?
Register a free account today to become a member! Once signed in, you'll be able to participate on this site by adding your own topics and posts, as well as connect with other members!