What's new
VORON Design

Register a free account today to become a member! Once signed in, you'll be able to participate on this site by adding your own topics and posts, as well as connect with other members!

Voron 2.4 r2 350 LDO Kit w/Phaetus Rapido HF

robrob

Active member
day01_01arrival.jpg

Oh snap, a couple heavy boxes showed up :D

day01_02parts.jpg

Good timing! I had just mostly finished my giant pile of parts. the generated spreadsheet checklist was clutch.

day01_03unboxed.jpg

Unboxed boxes. Glad I have extra surfaces to spare.

day01_04sqaure.jpg

The frame squared up fairly easily on my kitchen countertop.

day01_05size.jpg

Now that I'm back in the workshop (ie: basement) it's starting to set in how big this boi is.

day01_06rails.jpg

Cleaning and greasing rails.

day01_07railinstall.jpg

installing rails. First time using a little electric screw driver- gotta say it's pretty handy. As are these little part trays I found somewhere and finally have a good use for.

day01_08bottomdeck.jpg

Base frame and floor deck complete! Ready for the real fun to begin when I get home from work tonight. It's gonna be a great weekend!
 
THanks! Here's this "mornings" update :D

Day02_01Heatsetinserts.jpg

First time working with heatset inserts; immensely satisfying!

Day02_02ABS.jpg

This was also really my first time printing ABS. It feels really nice and substantial in hand, especially once you start packing it full of parts. Also, just found out about loctite in glue stick form on a stevebuilds stream- it’s awesome!


Day02_03MotorFeet.jpg

Z Motors and Feet are done!

Day02_04AngryIdlers.jpg

(Z) Idlers be angry! There were a few pleasant little design touches like this sprinkled throughout the project. <3

Day03_01Organizer.jpg

I thought I had a system for finding the rights bags of fasteners when I needed them, but there is a lot of M3s. SO many I took the advice of reddit and went out and bought one of these part organizers in the morning. HIGHLY RECOMMENDED. Peeling the tiny label maker labels was the most tedious part of the project so far, but also an excuse to bust out dental tools.


Day03_02Gantry.jpg

Gantry Assembly

Day03_03GantryInstalled.jpg

Gantry Assembled, and installed.

Day03_04Bed.jpg

Heated Bed installed. Just a tad bit bigger than my Prusa :D

Day03_05Stealthburner.jpg

Now for serious business. I expected this part to suck, but it went super smooth and everything clicked into place pretty easily.
 

Attachments

  • Day03_06NeoPixelHarness.jpg
    Day03_06NeoPixelHarness.jpg
    157.8 KB · Views: 5
Day03_07onlyfans.jpg

One fan just pops in and is friction held, but the other requires removing its built in fan mounts; I thought this was weird at first but a few minutes of filing later I came to admire the ingenuity.


Day03_08AssembledSB.jpg

So dope looking!


Day03_09ughBelts.jpg

Ok, real talk, the AB belting almost broke me. First, there is no mention of how long to cut the belts, and cutting anything is stressful because you get one shot then it’s off to wait for a shipped replacement if you mess up. But I understand why, and spend the first chunk of time wrestling all 20 feet or whatever through so I can find the length and make two equal belts. This is less of a hassle than I imagine, especially the second time around.. Until I realize I had the idlers pushed back and not forward, thus the belts were not going to be engaged by them and I had to de-belt/rebelt a third time– this time with a MUCH trickier pathway. I wrestle with the idlers for like abhor, almost cry, look on discord for no advice (other than to see a lady also had issues with this in December). I take a deep breath, and then realize the belts actually are very “hintable”. I could just kinda bend and roll them to help steer them where I waned them to go and bam, got it. Got the second on on the first try too. But yeah, that was the first “oh god this sucks” moment.

Day03_10Mechanicals.jpg

Anyhow, just after sunrise on the third day, mechanicals are complete. On to wiring and electronics!
 
The belts do suck at first but I could do them in my sleep now. Not that I do it that often but once you get used to them, its pretty easy.

Build is coming along very nicely! Colors look great and yes, I too love doing heat inserts :)
 
IMG_7471.jpg

Got the electronics laid out and mounted on the underbelly.

IMG_7478.jpg

Had to crimp new connectors to my hot end to work with the electronics inside the stealthburner; first time using ferrules, these are pretty neat! (especially with wagos)

IMG_7490.jpg

wiring complete. I had to print a new piece for the rear skirt, not sure where my spreadsheet went wrong, but the parts I had printed did not fit. No biggie.

IMG_7496.jpg

the functional build itself is complete! ( I still have to mount all the walls and doors, as well as print and build the filter fan and run my lighting). But the mechanical bits as well as the pi and touchscreen are all working, with firmware flashed and Klippe/mainsail setup and online.

what a weekend!
 
No new pics as there is no visible progress, but here's an updated build log/ dumb mistakes I fixed:

- attached X Y limit switches in wrong orientation; thankfully this was simple to reorient without messing up my nice wiring job. derp.

- figured out how to route my B motor wiring, and why I was having trouble - I had been working on the wiring backwards, and I had left maybe 6 inches of extra slack below the deck; once I fished that out and recovered the wire, it was simple to jsut run it through the extrusion all the way to the cable chain. derp.

- started installing the cosmetic belt hole coverings on the deck. after getting the first one snapped in nicely, discovered that my rails are mounted like 1 mm to low on the extrusion for the rest to squeeze through. Before I either A) turn it on its side and loosen up the rails and try to shift them up a mm, gantry and all, to make the room (and even them out) or B) Crack open Fusion 360 and attempt to make a new Z belt cover that is 1mm thinner, at least in the region that needs to scoot under the bottom of the rail? I am gonna take the advice of discord and try sanding the underside of the part down with sandpaper to see if I can get clearance.

- covered the garish red light on the back of the touchscreen panel that was casting the big red spot on my table with electrical tape.

- trouble shot an MCU shiutdown in Klipper that was caused by a connector on the print head coming lose when the cable mess got disturbed; tidied up said cables with tiny zip ties.

- After successfully homing X and Y got my Z clicker located and positioned; this required shifting around the whole bed and clicker location (twice). But it's good now!

- got tailscale installed on the pi so that I can configure my configs to backup to GitHub during lunch at work.

- realized proximity sensor was set too high so nozzle would crash on z; lowered it. Then the quad corner leveling failed because it was set too low. Raised it again, this time not as much (used a thick hex wrench as reference instead of blindly stabbing at least) and now it's barely too high again. Sigh. Have to redo again, only it's a mild pain the ass because I have to pull 4 long screws out of the hot end and remove the fan shroud and extruded to get to the screws to adjust said probe. But hopefully third or 4th time will be the charm tonight!

- barring the quad corner leveling, I wanted to at least make sure my extruder extruded. Which it didn't. I examined it mechanically and saw the gears turning when I hit extrude. and I could force filmant through by hand. Everything looked working, but nothing. I putzed around a a few, and then for shits and giggles, hit retract to see if it would engage that way. Lo and behold, it extruded when I hit retract (and I assume was attempting to retract when I hit extrude. This was easily fixed by removing an "!" from the extruder section of my printer config file.

so yeah, another long night behind me with no real visible progress, but I'm real close now.
 
"- started installing the cosmetic belt hole coverings on the deck. after getting the first one snapped in nicely, discovered that my rails are mounted like 1 mm to low on the extrusion for the rest to squeeze through. Before I either A) turn it on its side and loosen up the rails and try to shift them up a mm, gantry and all, to make the room (and even them out"

I did the same and just loosed the rails and slid them up. I do think I added the rail alignments just to be safe but yeah, worked great.
 
Another photo free update:

- Got the neopixels in the stealth burner working

- Managed to get the stealth burner door shut by replacing the Rapido's thermistor connector with a smaller JST-style one. That was some fiddly fun!

- Connected Klipper to Octoeverywhere and Mobileraker

- moved my inductive probe again and successfully set Z and quad-leveled.

- Managed to print my first test print without crashing Z and scratching up my pretty new textured PEI :D

 
Does the Rapido HF require anything other than a different tool holder portion of the Steathburner to have the cooling align correctly?
 
Getting closer. Spent a couple hours last night trying to add a second camera to the setup- a raspberry pi 3 wide- to no avail; sounds like a couple other folks with the same camera are also having issues after the latest crows nest update. :/

More concerning is I seem to have knocked one of my corners out of square while tossing the thing around, or maybe trying to press the z motor deck covers in place, hopefully that isn’t a major pain in the ass to correct.

Did get the back panel on though!


IMG_7546.jpeg
 
Rough weekend of highs and lows in the basement :(

First, did some software tweaking to get my LEDS to indicate status; struggled for a minute to figure out why my code wasnt firing and had a breakthrough while down the street at a cookout- realized I was trying to call in the place I was defining, and moved the code. no errors! but in my attempt to verify remotely, I crashed into a benchy still on the bed which must have knocked the wire I had a short in lose and my constant MCU disconnects returned.

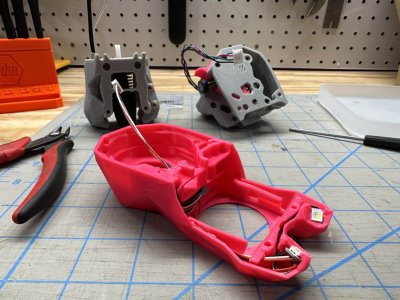
so buckled down and resolved to get my CAN BUS installed. (the kit arrived earlier this week, but was putting it off as I wasnt eager to rip apart my print head and deal with the super tiny connectors.

anyhow, print head disassembly.

at first it went great. the smaller breakout board uses Dupont connectors, which I can crimp easily . in fact, the wire management is much nicer than before, with everything now the perfect length with no slack having to be taped up to stay out of the way. awesome!

IMG_7646.jpgIMG_7647.jpg

I did not take any photos of the main breakout board assembly because it was such a PITA. Tiny connectors are in fact TINY. here is a product shot that probably doesn't accurately communicate jsut how freaking tiny these freakers are.

Screenshot 2023-06-12 at 11.20.15 AM.jpg

but I did it!

onto configuring the U2C and installing Can.

Can breakout board- flashed firmware fine!
Can control board- flashed firmware fine!
Can umbillacle cable- built correct wiring harness, tested it with multimeter, verified pin out- awesome!

time to plug it all together. at this point it's 5am and I am still riding my high from successfully managinb all the fiddly connectors and getting that resembled and flashing all my firmware right. I need to connect the Can control board to my power supply, but dont see any examples in any of the video reviews, nor documentation. I think I have a bright idea and wire it in to the open slots of the UK2.5b power distribution block.. (cue curbyourenthusiasm music)
IMG_7648.jpg

turns out that was real dumb. First ground and earth? not the same thing. not the same thing at all. Also, that red block is connected to my mains, not the 24v, so

yeah, loud pop, big flash and blue smoke :(

IMG_7649.jpg

Electrical engineer on discord chastises me and tells me to throw that board away immediately. I declined to tell them about the second pop I heard, but I assume that was on the breakout board that was also connected in that power chain , so throwing that away too. :(

Fedex replacement for all the can bus ordered. hopefully it's just a $75 mistake that sets me back 2 days.

oh, and while this was happening, I was printing a new SB Mount on my ender and I hadn't heard anything from it in a few and I look over and its just a giant melted blob of ABS covering the whole hot end. Rather than deal with it, I jsut walked away from the bench in disgust and went to bed defeated at 5:30 am,

but man, the can bus conversion gave my crimper collection a workout.

IMG_7650.jpg

...

last night I at least tried to get the ender back online, but the hot end was in a real rough state. replacement hot tend ordered :/

so yeah, current status: two busted printers, and my little voron 0.2 kit was just delivered this morning. lol/doh.

ideally big voron is an easy fix- fingers crossed it's simply a matter of flashing firmware on replacement boards and dropping them in place and connecting power in the proper place. that stuff is going out on a Fedex truck today for delivery tommorow.
 
Oh man, that is a tough weekend. I have been through a few boards that let out the magic smoke. It's never fun.
 
Top