What's new
VORON Design

Register a free account today to become a member! Once signed in, you'll be able to participate on this site by adding your own topics and posts, as well as connect with other members!

Voron 2.4r2 350 build

Coyote

Well-known member
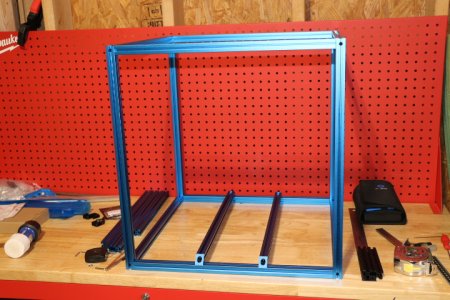
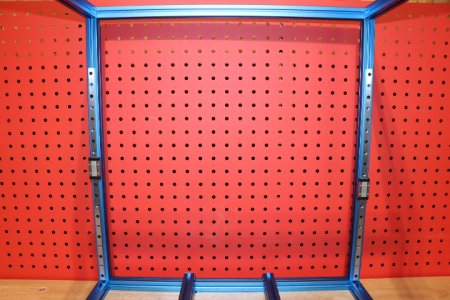
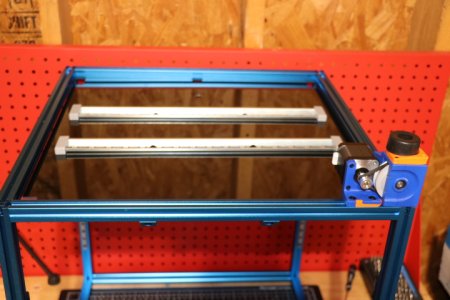
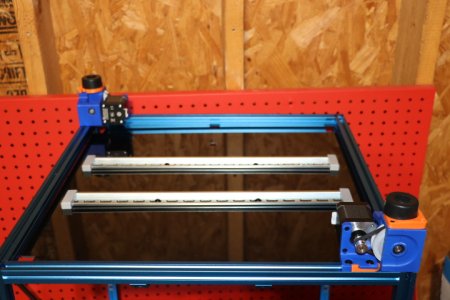
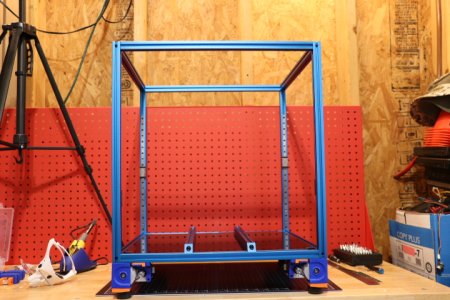
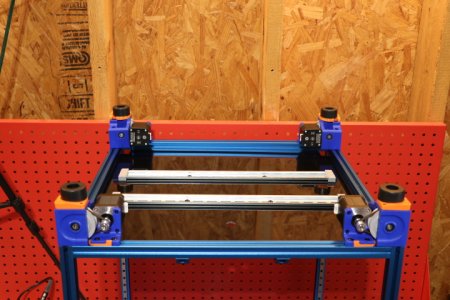
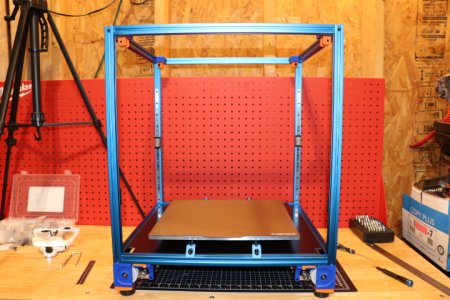
This will be my first Voron but not my first 3d printer. I caught the 3D printing bug from a Anet A8 many years ago and now I have several more printers including a Prusa Mk3, Anycubic Chiron and others. I have also built a small bed slinger of my own and have one resin printer. But the Voron will be my first CoreXY printer. I self sourced the parts for my 350 but did not go as far as to cut to size my own extrusions. but bought an LDO frame kit. I just recently completed assembling the frame kit the frame kit and I'm currently printing the printed parts using Hatchbox blue and orange ABS. Since this one of about a half dozen projects I currentyl have going, hopefully it won't take the rest of the year to finish my Voron...:)
 

Attachments

  • IMG_1549.JPG
    IMG_1549.JPG
    300.5 KB · Views: 39
Got the Z rails cleaned, lubed and installed. Waiting on 3D parts to finish to start installing Z drives...
 

Attachments

  • Z-rails.JPG
    Z-rails.JPG
    276 KB · Views: 38
Finally got the Z-Drives install. The diameter of the shaft for the last belt assembly was a bit larger than the others thus the bearings would not fit. I had to grind the shaft a bit for the bearings to fit, But I was able to assemble the last Z-Drive. I used my Prusa MK3 for the printed parts so maybe the Voron was getting back at me with a shaft out of spec...
 

Attachments

  • IMG_1582.JPG
    IMG_1582.JPG
    207 KB · Views: 35
  • IMG_1584.JPG
    IMG_1584.JPG
    207.6 KB · Views: 38
  • IMG_1592.JPG
    IMG_1592.JPG
    284.8 KB · Views: 38
  • IMG_1591.JPG
    IMG_1591.JPG
    265.5 KB · Views: 35
Z-Idlers and build plate installed. Making progress, but I haven't got to the really fun part yet...building my wiring harness...whoo-hoo
 

Attachments

  • IMG_1596.JPG
    IMG_1596.JPG
    294.7 KB · Views: 35
After taken a break to visit my newest grandson and his parents of course, I finally got the gantry assembled...slowly but surely wins the race or something like that..


IMG_1628.JPGIMG_1629.JPGIMG_1630.JPG
 
I'm in envy :). Happy building! I'm still waiting for parts from around the world for my Voron 2.4 350. These printers look like true beasts and the ones to consider being the dream machines with having so much potential for modifications. Keep us updated!
 
My son is at uni, still a little while before becoming a grandad I think. Congradulations on your newest grandson! :). I think I understand your need for creating something, Im over 50 and love working with this stuff, just check my instagram for RetroComputerCollector!.Hope your build goes well. I maybe asking you for some advice soon on the build :)!! I have spent £350 on Ali and another £450 on OneTwo3D for parts. Exc.Octopus and a fair few other bits though. Still, happy to spend a bit to get a printer like this Voron! You should make note of any issues along the way as I am guessing I will have the same at some point! Happy to help too though as we are on the same path :)
 
it's cool to see people that are building a Voron 350, I've been buying my parts too. But to find them in stock or able to be shipped that day you order is a different story. I got parts coming from AliExpress that are not even going to be here tell the end of the month.
but what controls are you using?
I went with manta 8 from Bigtree and finding out there is not that much out there about that controller. programing the cm4 is the biggest issue on the manta, no simple way to, or information that works, or that is in a language that I know.
MY box of parts is starting to get larger. :)
 
Got the gantry installed. Finally it's starting to look like a printer. All my wiring cable arrived today as well as hardware for Tap. Finished printing Stealthburner parts today as well. Starting installing A/B tomorrow or Monday. The thing about being retired is that every day is Saturday, except Sunday...:)

IMG_1637.JPGIMG_1638.JPG
 
it's cool to see people that are building a Voron 350, I've been buying my parts too. But to find them in stock or able to be shipped that day you order is a different story. I got parts coming from AliExpress that are not even going to be here tell the end of the month.
but what controls are you using?
I went with manta 8 from Bigtree and finding out there is not that much out there about that controller. programing the cm4 is the biggest issue on the manta, no simple way to, or information that works, or that is in a language that I know.
MY box of parts is starting to get larger. :)
In my request for neopixel problem I ziped a complete directory for a quite good running mp8 setup.
 
It's been a while since my last build update, but I was waiting on some Tap hardware. Finally got the A/B belt runs complete. Is it just me or would having my eyes poked out with a burnt stick been more fun. I think I spent more time getting the A/B belt runs correct than any thing else thus far...Well that's done...onward and upward...


IMG_1721.JPGIMG_1722.JPG
 
Got most of the high voltage wiring done. Testing will have to wait until I get back in town...at least the ground testing passed thus far...


IMG_1781.JPG
 
"I haven't got to the really fun part yet...building my wiring harness...whoo-hoo"
Looks like the fun has begun.;)
 
got back home, finished up high voltage wiring, printed some wire keepers to help clean up the rats nest. Re-tested all grounds, pugged her in and did not turn into smoke generator. Checked 24V and 5V PSUs output, 24.07V and 5.05V were the readings...onward and upward...or as Buzz Lightyear says, "To infinity and beyond"...

IMG_1801.JPG
 
Got the Pi4 wired up and fired up today. I can assess it via the Kippler web interface and Putty from my laptop...getting closer...:D
 
Been on travel for a bit so have not been able to work on my build. Got back yesterday and finish installation of Stealthburner toolhead with CW2 and Tap as well as x/y endstops. I used the single board Stealthburner pcb and a E3D Revo Voron hotend. At least with the toolhead, it looks more like a printer. Next up...more wiring...


IMG_1877.JPGIMG_1878.JPG
 
Well I finished the control board wiring and cleaned up some of my previous wiring. Fired her up and no smoke. Performed some on the initial startup. Bed and hotend heated up just fine. But X/Y home test moved in the wrong direction so edited the printer.cfg file to remove the '!' from dir_pin. Now X/Y home correctly. Making sure Tap works correctly is next. At least the LED on the Tap PCB seems to work as intended, red when toolhead down, blue when up. Rest of initial set will have to waith until tomorrow. Cross your fingers🤞


IMG_1884.JPGIMG_1883.JPG
 
Top