What's new
VORON Design

Register a free account today to become a member! Once signed in, you'll be able to participate on this site by adding your own topics and posts, as well as connect with other members!

Galileo2 Release

That is pretty exciting! About halfway through the live stream recording. It looks great! My 2.4 is working pretty well but I think I'm going to give this a go anyway. My 2.4 is meant to be arguably my best printer and this seems like a worthy upgrade to try since I have a few things I'd like to do, even if they're minor (I gotta re-run the cabling for the LEDs on SB for instance).

My $0.02 on the conversation in the stream about the Voron principle and off the shelf parts. I think there's room for both having pure off the shelf and some manufactured things. Having a "pure" option I think is important juxtaposed to certain companies wanting us to relive the pantent encubered dark ages of 3D printing. As long as it stays away from that calamity, I think offering some higher end upgrades and improvements that might be harder for the average person to produce is a-ok (Galileo 2 included of course).
Just having off the shelf parts is also a big deal for repairability.
If everything is off the shelf then you don't need to worry about not being able to find parts for your open source printer since they are technically not supported by a company.
That being said, the custom parts of the galileo 2 are not that difficult to make (MJF printing), so it's likely that somebody will have parts in stock for a long time.
 
Last edited:
@JaredC01 Thanks for your work on Galileo 2 and releasing this to the public!
I especially like the larger contact area with the filament, as this removes one more variable in printer tuning (filament slippage)

Since you went ahead and designed a custom drive gear, how did you end up with 16mm rather than for example 23mm like the Prusa Nextruder? Is it simply space constraint? No advantage to going even larger? (I'm simply curious)

Edit:
Watched this stream and loved hearing about the eccentricity results and more.
Interesting to hear you where planning to have 2 idler bearings initially but that didn't work with the smaller drive gear. Which I believe would be down to getting the optimal mm/s extrusion to motor rotation.
My main question would then be, how come the design was not mirrored to the Nextruder which allows for a larger drive gear?
The 16mm drive gear came down to three main factors... Steps/mm, overall size, and drive gear size/weight.

The target goal for steps/mm was set to 700 based on Robert Lorincz's testing with the Orbiter. He found that to be the "magic number", and based on the testing that CNC Kitchen did with all of the extruders a while back, I'd say he was right! With the gear ratio set at 9:1, it limited how large I could go on the drive gear, so I did some math and figured that a 16mm drive gear would be as ideal as I could get for G2.

As far as overall size goes, I could have gone as large as I wanted if there weren't any other factors to consider, but at the end of the day, the drive system still needed to fit into the CW2 footprint, which meant that going much larger than 16mm would have also required an increase in side of the extruder itself, which we didn't have space to do.

Lastly was the drive gear size/weight ratio. Since we were set with an 8mm output shaft, and using a grub screw on the drive gear, going up to anything larger than 16mm adds additional mass/weight that both increases overall extruder weight as well as the rotor inertia of the drive gear (which is based on outer diameter directly). The LGX gets away with 18mm drive gears because they use a plastic drive gear system attached to the minimal drive gears to keep weight down.

Hope that helps answer the question!
 
Wondering when the native CAD or STP files will be posted?
Once I get some feedback and update any major initial issues that come up, I will post the CAD. Right now we're still SUPER early in the release, so I want to make sure we have a good foundation before we start building new things on it.
 
Just having off the shelf parts is also a big deal for repairability.
If everything is off the shelf then you don't need to worry about not being able to find parts for your open source printer since they are technically not supported by a company.
That being said, the custom parts of the galileo 2 are not that difficult to make (MJF printing), so it's likely that somebody will have parts in stock for a long time.
I fully expect the big Chinese producers of parts will have G2 cloned in a matter of weeks, which is all the more why it's important for me to have a good foundation ready for CAD release... The only thing worse than people PRINTING parts that don't work, is people BUYING parts that don't work, and ideally I'd like to avoid both of those scenarios.
 
Kit came today so I decided it was as good a time as any to assemble it!

Assembly was super straightforward and for me a breeze. I think the documentation here is excellent and the LDO kit is really good!

Installation was sort of "normal". I ended up having to run without the door because the LDO toolhead I have didn't quite fit well enough. The fan headers were right up against the support and the motor header was getting smooshed against the door. So I opted just to remove the door for now. It doesn't look nearly as nice but it seems to do the job. I'm not sure if it was LDO or Sparta3D but my order included a razorpen to cut the PTFE. Using the filament plus the pen made it rather easy to do!

I've extruded some plastic, woohoo! But it's dinner time so I haven't yet tried to print anything yet. So far though, I'm quite happy! If I was gonna nitpick it would be the LDO toolhead board not fitting with the door, but it was really cramped in CW2 also. I might look to see if I can get the updated toolhead PCB from them or somewhere. I'm not sure it's worth spending too much time on though since I'd like to switch to CANbus at some point anyway though probably not for a few months yet.
 

Attachments

  • toolpcb.jpg
    toolpcb.jpg
    783.2 KB · Views: 286
Quick Q for folks, I was trying to figure this out by looking at the exploded view in the docs and thought I'd figure it out during assembly. I blame Human Malware (I'm on 2 weeks into it, oof) but I can't quite figure out what is pushing up against the filament gear? I know obviously the spring tensioner is pushing against something, but it didn't look like it was a bearing there or?
 
Quick Q for folks, I was trying to figure this out by looking at the exploded view in the docs and thought I'd figure it out during assembly. I blame Human Malware (I'm on 2 weeks into it, oof) but I can't quite figure out what is pushing up against the filament gear? I know obviously the spring tensioner is pushing against something, but it didn't look like it was a bearing there or?
There is an MR115 bearing as an idler.
1695670669711.png
 
Just to make sure it is/isn't G2, I decided to swap back to CW2 for now as I'm getting print failures at around the same point for a specific model. The model is long and narrow so long stretches of constant extrusion.

At first I thought it might be a break in a cable but I don't think it is. I thought then it might be an issue with setting the idler screw too tight or loose but that doesn't seem to be it either. I also tried really slowing down my print speed which helped but hasn't completely eliminated the issue.

I did notice the LDO motor was quite hot (almost too hot to touch). I have the run_current set to 0.6 as the instructions indicate.

That said, I'm not quite yet sure what the issue is but thought I'd share my experience in anyone experienced anything similar and had some suggestions. Not suggesting at this point it's G2, but it's the last thing I touched hence why I thought I'd better swap back and see if the issue persists.
 
Maybe filament doesn't get melted fast enough on these long stretches, building backpressure, which leads to skipping/motor not being able to keep up. Have you done any volumetric extrusion tests?
 
I think you can go as low as .3 with the current but you need to test.
Do you have a picture of the issue or what is the issue?
 
Maybe filament doesn't get melted fast enough on these long stretches, building backpressure, which leads to skipping/motor not being able to keep up. Have you done any volumetric extrusion tests?
Definitely possible though I basically slowed things down to the stock PrusaSlicer profile speed (which is rather slow) and was able to go quite a bit faster on CW2. Could be this but that would surprise me. It's weird, once it's stops extruding. I can never seem to catch it in the act when it first starts but I have seen it as it's printing nothing and I don't hear any bad sounds. There's a chunk o plastic eaten out of the filament so the motor was doing something. Oddly though if things cool and I leave it as is and re-heat and extrude from the LCD, it extrudes no problem. That's why I was thinking the motor was overheating or something.

I'm running more tests with CW2 but so far after reinstalling it I had an absolutely flawless print of the same model. I'm trying another one to see if perhaps I just got lucky.

All told I think it's far more likely i just didn't build G2 right or something else is going on than G2 itself. I just haven't sorted out what that is yet. It works great right up until the point that it doesn't which is strange in it of itself.


I think you can go as low as .3 with the current but you need to test.
Do you have a picture of the issue or what is the issue?

Yep, I'll need to rescue them from the waste bin :p 
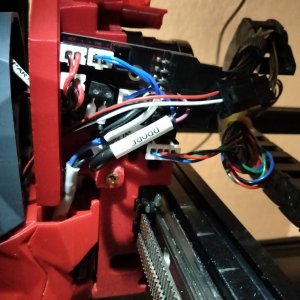
but I can do that after work. Basically looks like the extruder just stops. Like I aborted a print halfway into it. As in the top is basically clean with not much sign of distress.
 
@moodawg I had something similar recently with CW2. The issue was a partially clogged nozzle. When printing, there was some pressure in the nozzle, but it blocked. When I then manually extruded I did so at a fast speed which created enough pressure and unblocked things... temporarily.
Or at least thats my theory, some excessive priving with a 0.4 needle fixed it for me. Maybe a step you can take to eliminate a partial clog as a variable.
I was thinking about that too and that could make some sense. It's currently a 0.6 e3d nickel copper attached to a Rapido hotend. I plan on swapping that out with a 0.4 Bondtech CHT Bimetal so once that comes in I can test G2 to see how things go. The prints I made today on CW2 had no issues that I could see. Could it be that the CW2 might have more pushing force or something?

As requested also, here's some sample images:

This one showing one of the failures (note I'm using my built plate here just since my V2 has good lighting ;)
1.jpg

Here's what the top part from the above is supposed to look like. I did notice the top surface isn't shiny which could indicate the filament might be getting a bit cold. The default profile does 50mm/s though I normally do 35. The sides look good though. But this might indicate there is something up with the nozzle perhaps. This was the only issue I was able to see from the models printed today on CW2.

2.jpg
Here's one of the failures from the first photo next to the completed part. So weird, the part just ends like I stopped the print. I couldn't really find any jagged lines or anything like that, at least so far. The part, at least before it failed, made with G2 to me looks quite a bit nicer. VFAs are done and it just looks "tighter" for like of a better word. If I can get the issues sorted out, it'll definitely be a nice upgrade in print quality on top of already great parts made with CW2.

3.jpg

Finally, I managed to get some completed prints from G2 along the way, though they did show some issues around the same place that I was getting failures. Definitely some distress there which I don't see in the prints made with CW2 today or in recent memory.

4.jpg
 
Greetings, most of the issues with Galileo happens when you don't align spur gear on motor with planets. When you insert it, there needs to be no resistance at all, the gear just needs to fall into place. Any resistance may indicate you are a tooth off or something is not aligned properly. Have you tried that?
 
Greetings, most of the issues with Galileo happens when you don't align spur gear on motor with planets. When you insert it, there needs to be no resistance at all, the gear just needs to fall into place. Any resistance may indicate you are a tooth off or something is not aligned properly. Have you tried that?
I have and am happy to report that it did indeed fit quite smoothly together. I was slightly worried about this but it was like butter.

I think I have found the cause though. I'm not sure why it happens more with G2. Though I was able to print the above parts multiple times without issue after switching back to CW2, yesterday I tried to print another model and had several failures with CW2 that were of the same type of failures I was getting before.

So I tried switching to another filament brand and color (but still PLA) and seemed to have much better results to that point that I highly suspect the issue isn't G2 but something with either that filament or the hotend. Seems like it's heat creep given the behavior. Reminds me a lot of trying to print with HTPLA on a stock Prusa MK3 where it'll just clog into a bulb. Oddly once it cools down and heats back up I can extrude again.

The filament that causes this isn't HTPLA though. I'm going to do more tests and then perhaps reach out to the manufacturer. Oddly this same PLA works great on my Prusas and I'm very fond of it, but I'm not sure why it doesn't seem to get along with my Rapido in my V2.4
 
That's rather weird ... is your hotend cooling fan working properly? Whether it's not heat creep which softens filament in the heatbreak already.
 
Top