Now that's an exemplar build documentation, I want to be like you when I grow up.
VORON Design

You are using an out of date browser. It may not display this or other websites correctly.
You should upgrade or use an alternative browser.
You should upgrade or use an alternative browser.
120mm Micron Build Log
- Thread starter Le0n
- Start date
Gorgeous! Really well done
Thanks for the kind words, @vinnycordeiro @hartk @Daniel@West3D @Rhastlyn!As the others have said, wow, this is a great build log! Did you take the pictures with this in mind?
I always regretted not taking photos during my Trident build, so I made sure to have the camera ready when I started the Micron. But what was supposed to be just a few photos/notes for my own records ended up snowballing into a full build log. Originally posted here: https://leanghoun.github.io/docs/micron/build-log.
The build is a bit non-stock with some tweaks and adjustments to CAD parts, so it's not exactly a build guide, but hoping it might useful to others. : )
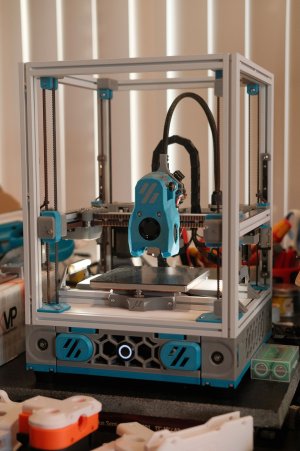
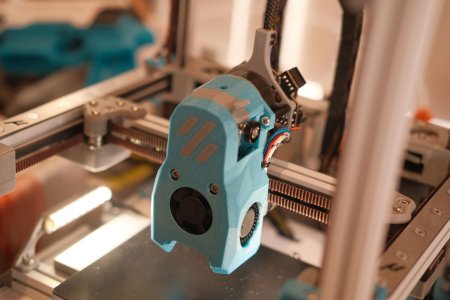
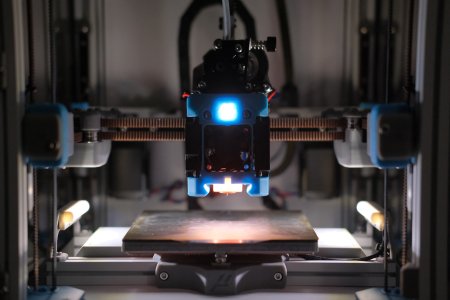
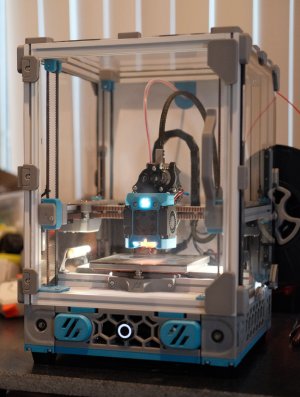
This is the Micron in its current state.
- MiniSB Beta
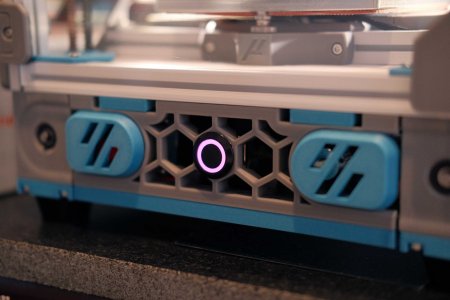
- Chromatek Neopixel front push button
- 2x Neopixel Sticks in low-height "stadium" style chamber lights

- MiniSB Beta
- Chromatek Neopixel front push button
- 2x Neopixel Sticks in low-height "stadium" style chamber lights
Attachments
Last edited:
- Finally on the CAN Bus bus with EBB36 to Octopus CAN Bridge. Had to extend the part that actuates the Y endstop to give the toolhead wires safe clearance. 106mm in the Y direction now, but I can live with that. Also had to print a similar extension to the Klicky mount to move it forward.
- MiniSB official release. I forgot to install the sequin nozzle LEDs.
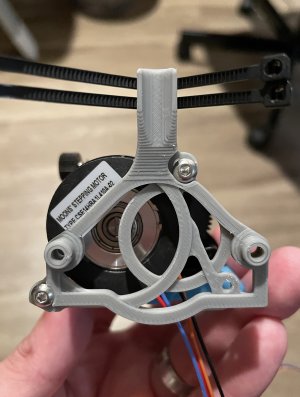
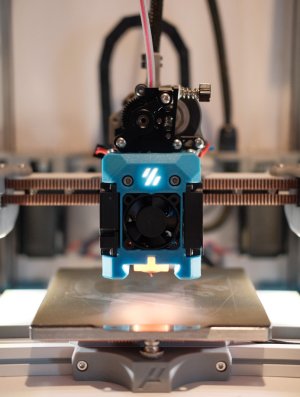
- Replacing Dragonfly with Dragon HF. New Moons extruder motor.
- Rear cable chain is a smaller type now.
- New umbilical gland required reprinting A motor top. Swapping that printed part was tricky. Rather than completely dismantling the gantry, I managed to carefully release that corner's Z belt, unscrew the printed top and swap to the new one without disturbing the bearing/shim stacks and motor.
Attachments
Last edited:
Seeing this build really makes me want to build a micron. The 180 is neat but there's just something about the 120 that I really like.
The stadium lighting is a very clever idea, would be kinda neat to see something similar on a v2.
CAN really cleans it up, although given the amount of wires you had to run previously it was still very tidy.
Love the build!!! without a doubt my favorite Micron!
The stadium lighting is a very clever idea, would be kinda neat to see something similar on a v2.
CAN really cleans it up, although given the amount of wires you had to run previously it was still very tidy.
Love the build!!! without a doubt my favorite Micron!
Seeing this build really makes me want to build a micron. The 180 is neat but there's just something about the 120 that I really like.
The stadium lighting is a very clever idea, would be kinda neat to see something similar on a v2.
CAN really cleans it up, although given the amount of wires you had to run previously it was still very tidy.
Love the build!!! without a doubt my favorite Micron!
Thanks for checking it out, @schwaded! The 120mm form factor has a bit of magic to it for sure. Impractical a lot of the time, but so much fun all of the time.
CAN really helped with a few issues that I had. Toolhead wiring was definitely one of them. The connectors were all cut and crimped to hide well behind the miniAB, but didn't fit the same way behind miniSB. Umbilical stiffness was another. The Igus chainflex is not as stiff as all the wires from pre-CAN, so I feel better about ceiling rub.
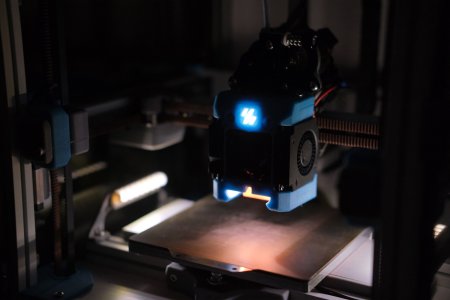
And the stadium lights were a fun addition. Each of the neopixel sticks have 8 addressable RGBW and I've since added some flickering "fire" animation during the heatsoak with LED Effects. Aside from that, they tend to just stay on warm white for visibility:
State of the Micron
I was also able to source slightly shorter 16mm aluminum motor standoffs to reclaim a few of the lost Y mm.
The Dragon Burner build was actually kinda fun. Some notes:
- Dragon Burner (https://github.com/chirpy2605/voron/tree/main/V0/Dragon_Burner)
- VZ HextradORT (https://github.com/VzBoT3D/Vz-HextrudORT)
- Custom EBB36 mount
I was also able to source slightly shorter 16mm aluminum motor standoffs to reclaim a few of the lost Y mm.
The Dragon Burner build was actually kinda fun. Some notes:
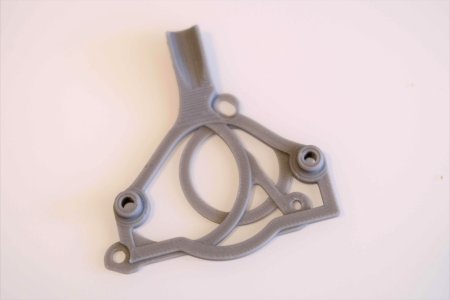
- Hotend mounting block is visible from the outside so going with the original two-color palette didn't look good to me. It's all in accent color.
- The EBB36 mount has only one available thermistor port (unless you run PT1000), so I could not make use of the extra thermistor slot.
- I had to do some minor sanding of the Neopixel carrier to get it to slide into the cowl and not protrude and block the hotend mount.
- The front Voron logo is offset a hair too far to the right and I can't unsee it lol.
- As with most Printers-for-Ant things, mounting and wiring in such cramped spaces can be fiddly. But it's doable. I believe in you.
Attachments
-
 micron-53-dragonburner-hextradort-ebb36-8.jpg630.2 KB · Views: 72
 -
 micron-53-dragonburner-hextradort-ebb36-7.jpg237.9 KB · Views: 62
 -
 micron-53-dragonburner-hextradort-ebb36-6.jpg384.7 KB · Views: 62
 -
 micron-53-dragonburner-hextradort-ebb36-5.jpg385.6 KB · Views: 60
 -
 micron-53-dragonburner-hextradort-ebb36-4.jpg511.9 KB · Views: 73
 -
 micron-53-dragonburner-hextradort-ebb36-3.jpg657 KB · Views: 79
 -
 micron-53-dragonburner-hextradort-ebb36-2.jpg634.9 KB · Views: 74
 -
 micron-53-dragonburner-hextradort-ebb36-1.jpg730.6 KB · Views: 74
 -
Le0n-EBB36-Hextrudort_Mount-Heatsetx2.stl519.5 KB · Views: 17
schloppknat
New member
Nice build, looks great!
I have my Micron close to finished, but have problems with clearance of EBB36 on Z-Chain, Umbilical Mount on gantry. Iam running a LGX Lite. Does everything fit with the Dragonburner and HextradORT without loosing Y and modding the Klicky mount?
EDIT:
I missed the part where you described lost y. How much Y do you have avaibale with your current setup?
Last edited:
Yeah, this was one of the unfortunate compromises with going to EBB36. I even swapped my Z chain down to the slimmer style that doesn't open, and reduced the length of the motor mount standoffs to 16mm. Currently, I have 102mm of Y travel, but if I really cinch down the connectors and wires on the rear of EBB36 and shift the bed forward, I think I can get it back to around 110mm.Nice build, looks great!
I have my Micron close to finished, but have problems with clearance of EBB36 on Z-Chain, Umbilical Mount on gantry. Iam running a LGX Lite. Does everything fit with the Dragonburner and HextradORT without loosing Y and modding the Klicky mount?
EDIT:
I missed the part where you described lost y. How much Y do you have avaibale with your current setup?
schloppknat
New member
110 would be great, but I'll probably try with the standard chain and extend the Klicky Mount to get the printer running. Optimization later.
I also moved the bed forward as much as possible. tried printing multiple (fully parametric stuff) chains, but they get too unstable when getting close to 10mm outer width. Closed is not really an option for me, to much fiddling in case of needed cable repair. Slimmed down one of the EBB mount a bit, Bend some of the connectors downwards and shortened plugs. But I'll just target 100mm y for the time being.
How is the Dragonburner working so far?
Last edited:
Giving up the opening chain was a tough decision, but I wanted to reclaim as much Y as I could. Each mm is almost 1% lol. Could probably reclaim another 2mm or so if I really slim down the CAN board mount and minimize the airspace in the motor/mount/EBB36 stack, and another 4mm if I figure out how to run the EBB36 wires as flat as possible. But it has most of it's Y travel and I avoid printing along the edges of the bed anyways.
Dragon Burner has been doing pretty well actually. I think I was expecting more from the increased fan size, but having Neopixels to light things up has been great. The CNC VZ HextrudORT is still largely untested, but everything tuned up just fine and printing well at the moment.
I think I've run out of mods.
It's been interesting and mostly positive. I hadn't played with any of the other skeletonized extruders before (Sherpas, Sailfins, etc.), and ended up choosing the VZ-Hextrudort because of the quirkiness of the offset motor and the helical gears for filament feeding. Was running into weird feeding issues until I upped the run current on the extruder stepper driver. Since then, it's been running really well. Exposed large gear makes feeding and removing filaments with the thumb both easier and harder. Easier because there's no need to open a latch or clip the filament tip a certain way to get it to insert into the reverse bowden smoothly. Just feed it through and turn the gear to advance the filament. Harder because removing filament by turning the large gear is not as easy as just yanking filament out like with miniAB/miniSB.How do you like the VZ extruder? I haven't seen much feedback from users.
I'm sad to see the Mini SB go, I love the look of it.
Great work as always!
Installation was pretty easy. Loosen some screws then tighten some screws, making sure the motor teeth and gear teeth have the tiniest bit of backlash. No issues with calibrating e-steps or pressure advance. But it does use a different motor mounting position than the EBB36 PCB mounting, so 4 screws rather than 2 screws. So far, I like it!
schloppknat
New member
For a short time I was thinking about soldering directly to the ebb and removing the onboard connectors, but I would like to keep the microfit connector from umbilical, so thats the limit and beside the dupont stuff, nothing sticks out further.
bending the dupont connector ports downwards got me a few mm.
perhaps I have to look into a closed chain too :/
did you check if one of those servo-arm klicky setups would fit to clear the klicky dock space?
bending the dupont connector ports downwards got me a few mm.
perhaps I have to look into a closed chain too :/
did you check if one of those servo-arm klicky setups would fit to clear the klicky dock space?
bawrharwharw, acceptable problem to have - time for the next printerI think I've run out of mods.