VORON Design
You are using an out of date browser. It may not display this or other websites correctly.
You should upgrade or use an alternative browser.
You should upgrade or use an alternative browser.
Salad Fork Build Log
- Thread starter schwaded
- Start date
After taking some time off I am back to working on the Salad Fork.
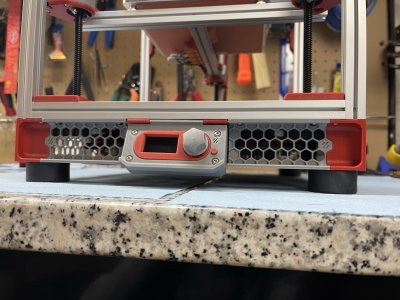
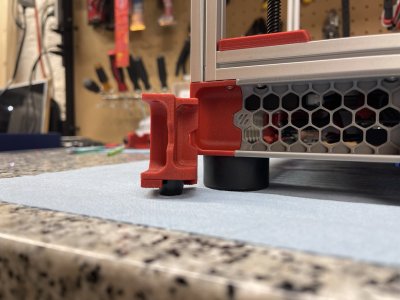
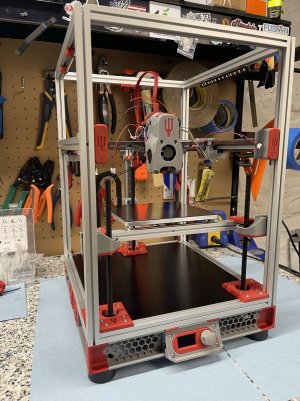
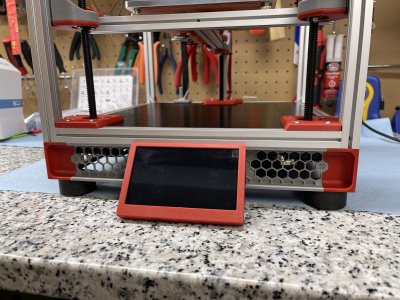
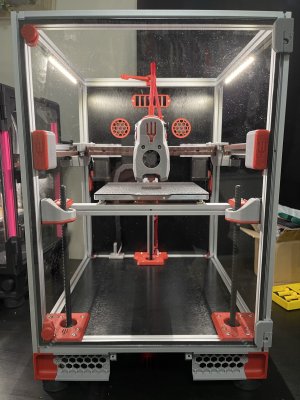
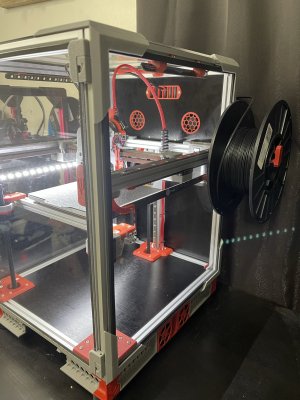
One of the complaints I have are with the BOM feet. They are very tiny and I am not crazy about the look. Fortunately I had an extra set of the voron standard guitar amp feet so after a little modification to the legs I was able to adapt them. The foot isn't exactly fully covered by the leg but enough for it to feel solid.
I also took the time to convert the Micron Waveshare screen mount to fit my SF. I got a bit more room with the new feet but i still needed to adjust the angle to account for how much lower the SF is compared to the Micron. The side skirts needed shortened a little as well, fortunately an easy modification.
Sadly, I wasn't aware that the CB1 doesn't support DSI until after I did this... Fingers crossed i can get my hands on a CM4 in the near future.
(I've also taken the time to try out a different image resizer as the last one really killed the quality, hopefully these images are better looking. The forum doesn't like the raw images)


Last edited:
Wiring up the tool head was nice and simple. The last one I did was my v0 when moving over to CAN and it was a bit of a pain with the tight space.
I did run into an issue with the Revo thermistor wire length, so I had to extend this a little. The wire should stay pretty stationary so I'm fairly confident it won't be an issue.
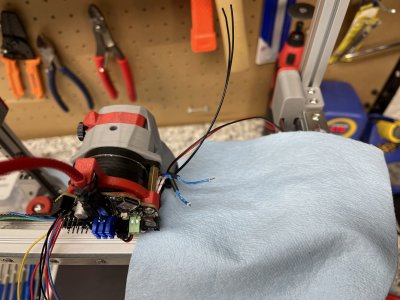
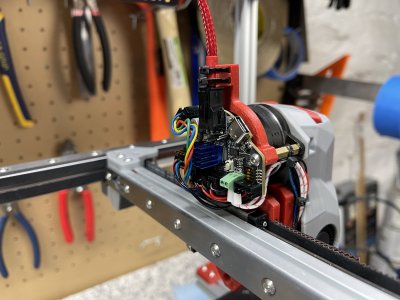
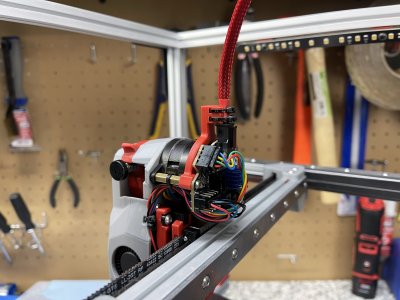
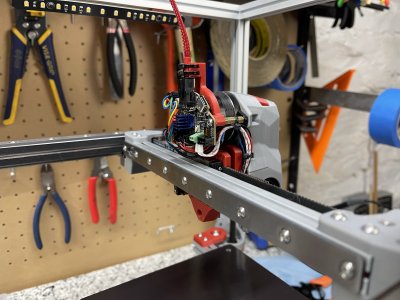
I did run into an issue with the Revo thermistor wire length, so I had to extend this a little. The wire should stay pretty stationary so I'm fairly confident it won't be an issue.


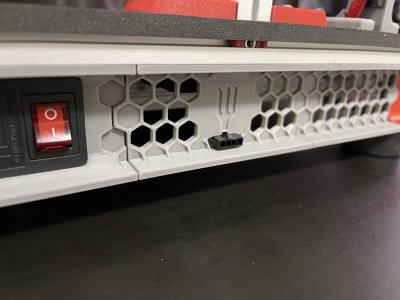
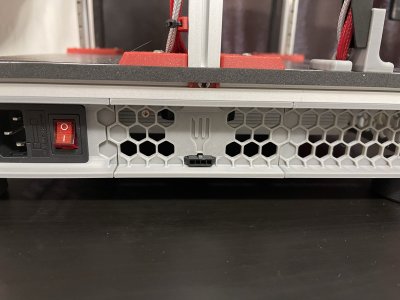
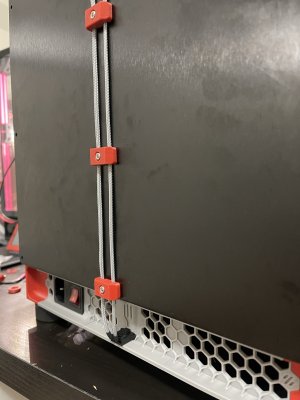
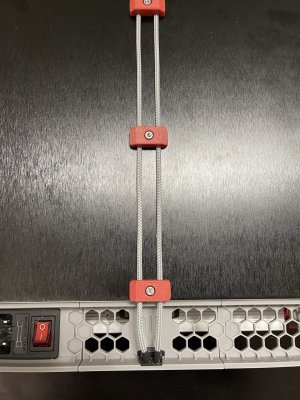
I will be using the Fabreeko rear mounted carbon filter on this printer. This requires the fan wire to route from the rear of the printer down under to the MCU.
I wanted to find a way to do this as elegant as possible without just sticking wires through one of the skirt holes so I modified the center skirt to accept one of the microfit plugs with the panel ears.
I'm quite happy with how this turned out and with the clips holding the wires down the back i think it looks as clean as it can be.


Now it's time to work on panel mounting.
I started out by stealing the micron hinges. I wanted to run 1mm foam on the door and between the VHB tape and foam i had to adjust them out a little to work.
I also borrowed the magnetic latch from Zruncho's zero panel beta as the look is really nice and I don't plan to put a handle on this printer. (Don't mind the dust in the photo, it's still winter here and everything is plagued with static electricity)
I need to decide on how to mount the other panels, i think the standard SF ones are a bit big for my taste so I may end up make something on my own. (Unless the new zero panels come out soon)
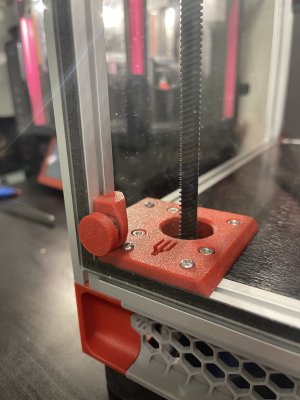
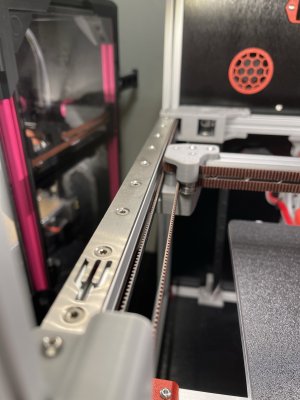
My order of titanium flat heads screws showed up as well so I swapped out the button heads on the backers. The rivet look is cool but the flat head torx screws look even better IMO.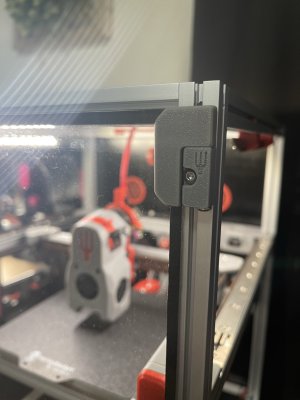


brendanm720
Well-known member
There's the snap latch things... They started out as a 2020 thing, but there is also a 1515 version.I need to decide on how to mount the other panels, i think the standard SF ones are a bit big for my taste so I may end up make something on my own. (Unless the new zero panels come out soon)
GitHub - richardjm/voron-parts: Just some other custom parts I've made that probably aren't worth making a pull request over
Just some other custom parts I've made that probably aren't worth making a pull request over - richardjm/voron-parts
Just some quick little updates.
I've started printing with the machine finally. It was very quick and easy to get fairly tuned and dialed in, by far the easiest machine I've had to start up.
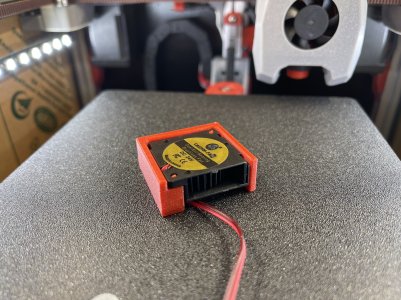
I did notice that due to the chamber size and with the smaller bed I wasn't able to get the chamber any higher than the low 40's. This was easily solved with a set of bed fans.
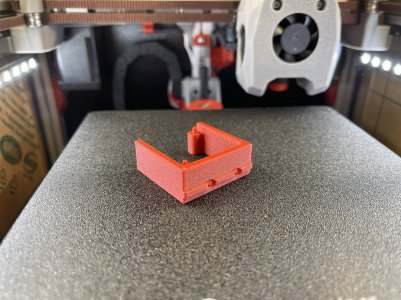
I wasn't able to find any 3010 blower fan mounts so I made a set up quickly and I'm quite happy with them. I'm seeing 65 easily while printing in a 21 degree ambient room, a huge improvement that I'm very happy with. The Fabreeko 200w heater handles them without any issue, running 20% while heating, then 50% once temp is reached using Ellis' bed fans macro.
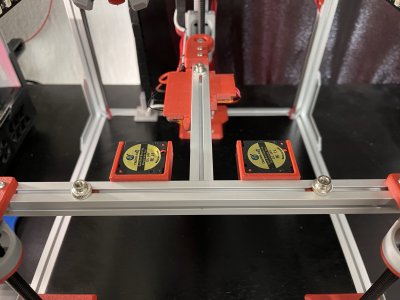
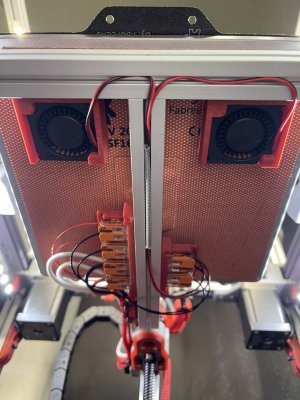


Last edited:
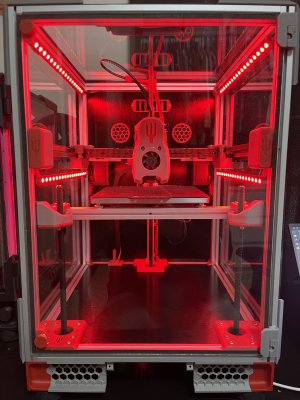
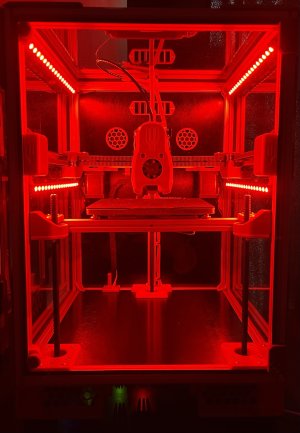
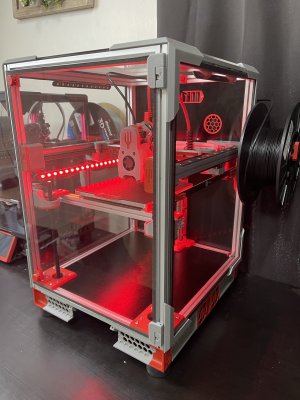
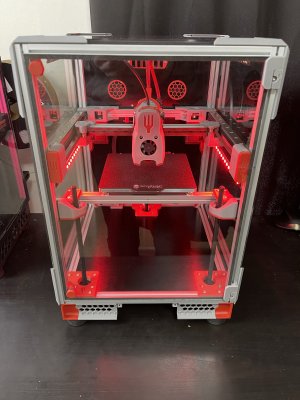
I once again stole a page out of Le0n's book and wanted to get better lighting inside the printer. With the matchsticks up on the top extrusions I was getting really bad shadows. I know the mini SB has provisions for led's (they are on the way), but I like the looked of stadium style lighting and thought it would be a good opportunity to add in some RGB as well  .
.
With some simple attachments to the lower side of the gantry I was able to easily add in some disco sticks. I liked them so much I have another set coming in to replace the matchsticks up top. There is never enough RGB, right?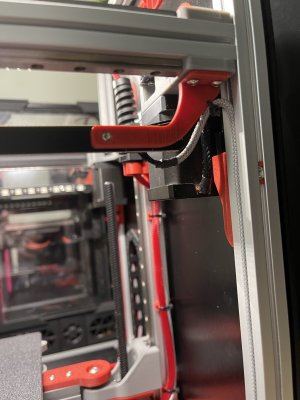
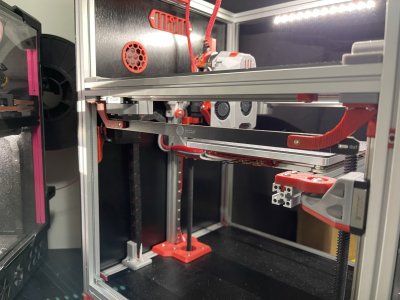
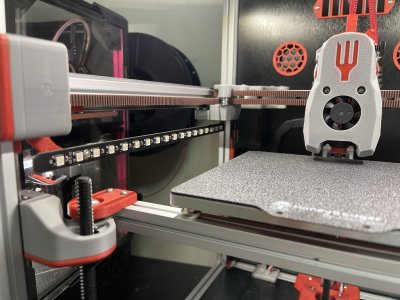
With some simple attachments to the lower side of the gantry I was able to easily add in some disco sticks. I liked them so much I have another set coming in to replace the matchsticks up top. There is never enough RGB, right?


Zero Panels v3 released!
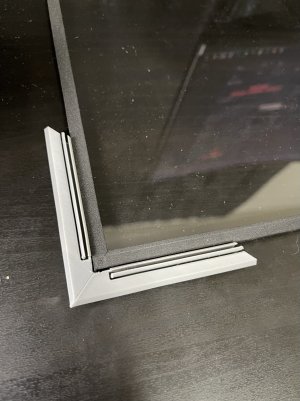
A big improvement on the already amazing zero panels. Much quicker to "assemble" without needing to get the foam tape the perfect length and angle on the corners.
Getting the settings dialed in was also very easy, only requiring 1 test piece after measuring the panels and tape width.
I'm not sold on the mismatch look with using the micron hinges yet but I think I'll keep it this way for a while. It keeps the door and front view a bit cleaner imo vs using the zero panel hinges and door corners. We will see though, it's an easy swap if I plan to change it out in the future.
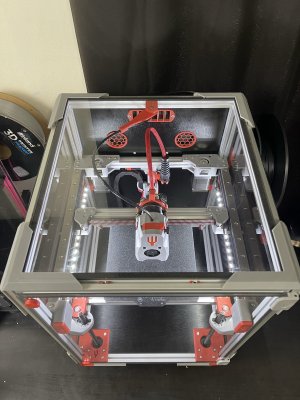
I think I am good to take video and put in for a serial at this point. I just really wish I could get my hands on a CM4 so I can use the screen. I'm used to using a headless printer so it's not a huge deal, i just don't feel the printer is "complete".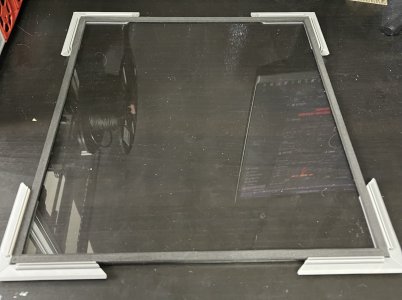


Thanks for the suggestion. I actually did try these as an interim thing but i couldn't get them to put enough pressure to seal up nice. I've had the 2020 version on my v2 since its inception and they work great there, just couldn't get the 1515 version to play nice.There's the snap latch things... They started out as a 2020 thing, but there is also a 1515 version.

GitHub - richardjm/voron-parts: Just some other custom parts I've made that probably aren't worth making a pull request over
Just some other custom parts I've made that probably aren't worth making a pull request over - richardjm/voron-partsgithub.com
brendanm720
Well-known member
That's a shame that the 1515 model doesn't work as well. Oh, well. the panel attachment you've got on there looks great, so I suppose it all works out.Thanks for the suggestion. I actually did try these as an interim thing but i couldn't get them to put enough pressure to seal up nice. I've had the 2020 version on my v2 since its inception and they work great there, just couldn't get the 1515 version to play nice.
Ah your implementation of the side lighting is rad! I might just take inspiration from your version of my version for my Trident (that was very hard to type out lol)!I once again stole a page out of Le0n's book and wanted to get better lighting inside the printer. With the matchsticks up on the top extrusions I was getting really bad shadows. I know the mini SB has provisions for led's (they are on the way), but I like the looked of stadium style lighting and thought it would be a good opportunity to add in some RGB as well.
With some simple attachments to the lower side of the gantry I was able to easily add in some disco sticks. I liked them so much I have another set coming in to replace the matchsticks up top. There is never enough RGB, right?View attachment 1861View attachment 1859View attachment 1860
it made a world of difference! I'm trying to size up my v2 and find a way to add them there it's that good! the bracket is super simple but I did upload it to printables in case the file would be any useAh your implementation of the side lighting is rad! I might just take inspiration from your version of my version for my Trident (that was very hard to type out lol)!
Boop Beta 3 was released so I'm giving that a go.
I am now having a really hard time with input shaping. I can't get these graphs to clear up at all. I'm a bit stumped and will just leave it as is for now and put some hours on the machine. It's still under well under 100 hours of print time so maybe some more settling will help me out.
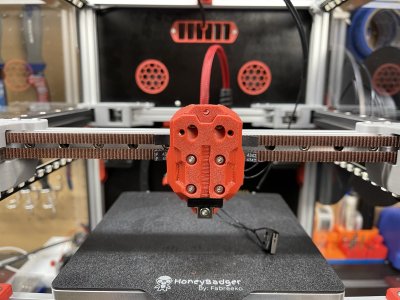
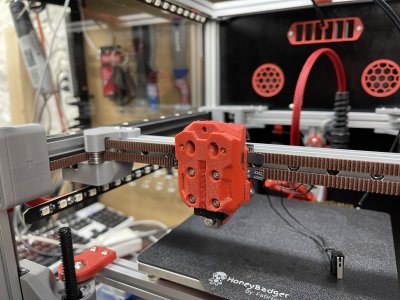
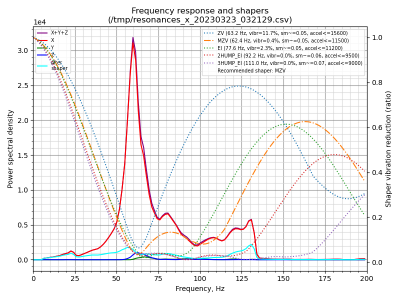
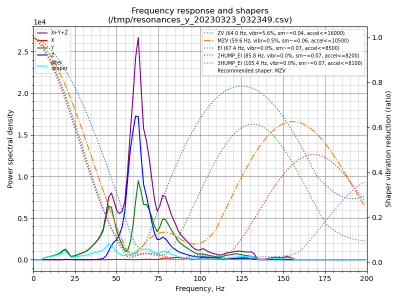
I am now having a really hard time with input shaping. I can't get these graphs to clear up at all. I'm a bit stumped and will just leave it as is for now and put some hours on the machine. It's still under well under 100 hours of print time so maybe some more settling will help me out.


Similar threads
- Replies
- 67
- Views
- 20K


