What's new
VORON Design

Register a free account today to become a member! Once signed in, you'll be able to participate on this site by adding your own topics and posts, as well as connect with other members!

Tronxy x5sa -> Franken Voron Build

Still working on it .. taking it a bit slow .. at this point I'm opting to fully convert it to a Trident .. This should create a much more stable build surface .. overall its not bad ..

The latest issue I've ran into has to do with the reverse bowden connection ..

I've a feeling I'm kinking the tube too much or something .. if I don't put on my top panel it works fine .. if I do .. extrusion just stops and fails randomly somewhere through the print ..

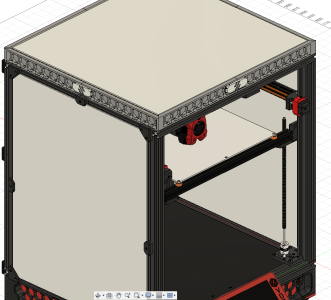
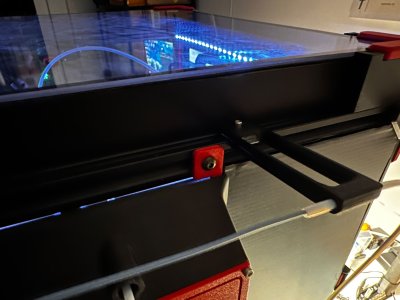
so I hacked up a bit this tophat model: https://www.printables.com/model/571759-voron-24-trident-tophat-35mm to fit on the tronxy frame

Probably not the final version of it .. currently playing with the 35mm version .. I may switch to the 66mm version since it seems more sturdy and the corner screw to eachother .. but I like this tophat design, its simple, just adds a bit of Z clearence for the PTFE tube ..
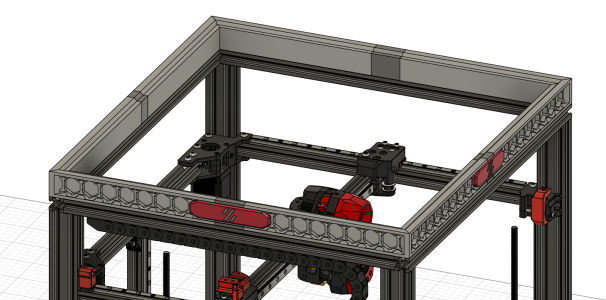
Screenshot 2024-02-25 091140.png
 
I'm going to use this Tophat too! hahaha

All that's left is front doors in CAD, start the conversion this week, the big pieces (skirt, tophat, 7" screen case) I'll only be able to print after enclosure with panels, last steps...
 

Attachments

  • WIP.png
    WIP.png
    112.6 KB · Views: 11
I'm going to use this Tophat too! hahaha

All that's left is front doors in CAD, start the conversion this week, the big pieces (skirt, tophat, 7" screen case) I'll only be able to print after enclosure with panels, last steps...
Actually I ended up switching gears here a bit .. having a hard time printing large solid ABS pieces on my switchwire .. can't seem to get corners not to warp (big piece, had to place it diagonally) ..

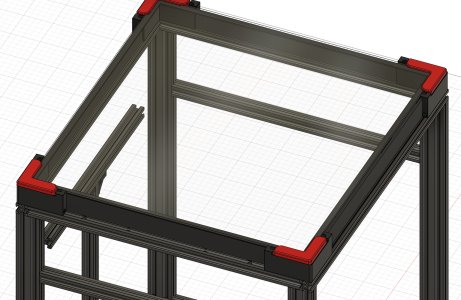
So I'm testing a print of much lighter mount .. basically its a very hollow ~80mm corner piece .. that's designed to slide some coroplast pieces for the main piece of the tophat .. and the corners are designed to perfectly match these magnetic corners: https://github.com/VoronDesign/Voro...mods/Le0n/Magnetic_Panels_with_Magnet_Inserts
 
This is what my tophat (might) look like ..

Screenshot 2024-02-26 180053.jpg

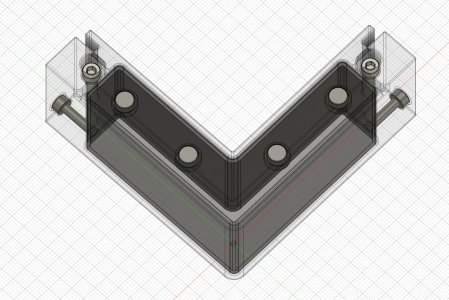
As you can see, I made the corners quite hollow .. just enough to fit things ..

Screenshot 2024-02-26 180438.jpg

Its two parts for ease of printing, doesn't need a lot of structural integrity.

I ended up moving the coroplast further in, aligned with the edge of the top plexiglass panel so that things like spool holders and whatnot can still be mounted at the back.

I expect the coroplast to be a bit flimsy in this setup, but I may just add some very simple supports to it that are attached to the extrusion from the inside and the outside .. maybe just one small anchor point in the middle will be enough.
 
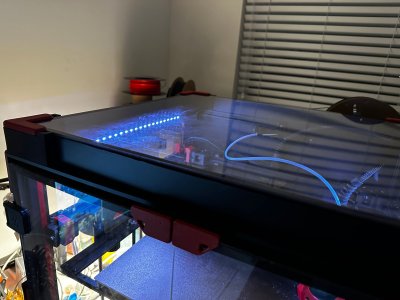
@DrEaD here is my simplified tophat ..
WhatsApp Image 2024-02-27 at 20.30.12_dc2c37ae.jpg

As you can see it still allows for the filament guide or any other similarly attached things in the back


WhatsApp Image 2024-02-27 at 20.32.47_3f5a055b.jpg
 
As I said earlier I’ve been running into so many weird issues with what kind of feels like printing at way above my max volumetric speed …

Except I have a rapido v2 horned .. this thing shouldn’t be choking on ~10 mm3/s …

But then I ran into the docs around pressureadvance and how it basically cranks up the extrusion rate to compensate for acceleration .. I wonder if it’s this .. I was setting my max acceleration (in slicer) to like 3-5k .. but did a print at 1k and it looks way better .. much less random under extrusion ..

Maybe this is the problem all along?
 
Ok so it turns out .. I was over-amping my extruder stepper .. that was making it run hot, and I mean HOT (likely close to 100c) .. which in turn would cause the motor plate and possibly other things start to deform ..

I've since halved the amps on the motor and its magically working much much better :) ..
 
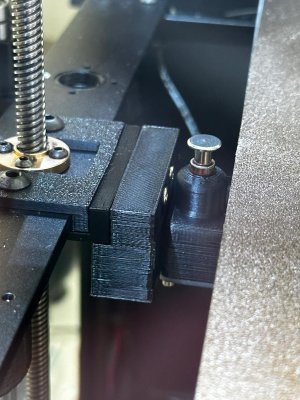
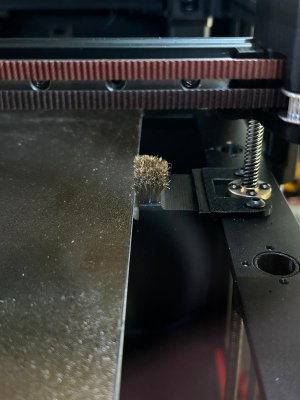
I made a thing :) .. came up with a sneaky way to securely mount things to the tronxy bed frame plates ..

This allowed me to mount the sexbolt Z endstop and a nozzle brush on the other side.

I feel like this is simplifying the setup a lot .. especially since I ditched the bed springs a long time ago .. the endstop is a great way to know exactly where the bed is .. and given its the nozzle pressing it .. its very accurate and doesn't need adjusting should the nozzle start wearing, or I change it .. or I change the whole hotend ..

Probe is still used for KAMP levelling, and for the dual Z alignment.

Also the brush is nice as a combo, since it helps the nozzle be clean for the Z endstop press (I re-home Z a few times in my start macro, and I do it once more time after cleaning the nozzle after everything is heated up nicely)

WhatsApp Image 2024-03-08 at 17.03.27_ab94e5da.jpgWhatsApp Image 2024-03-08 at 17.03.26_9718c877.jpg

I'll re-mount these better on the 2020 extrusions when my Trident Rails finally arrive :) .. but this is quite serviceable right now
 
Nice!

I'll post some pics soon of my (now Trident) build as well ..

Not happy with whatever is going on with my Z rods .. ther's a weird clicking sound and not sure if they're entirely aligned ..

The printer works .. but Z travel is loud and it looks like there is a lot of wear on one of the rods (well probably not the steel rods, likely the brass bit instead) ..
 
Your ideas are so amazing, that today is the day to join Team Voron :)

Will convert X5SA400. First planned IDEX and Ratrig VCore 3.1 but this here changed my mind to go with Voron Trident. To Made it to my printer of dreams I will check to add tool changer, may DAKSH.
Thank you!
 
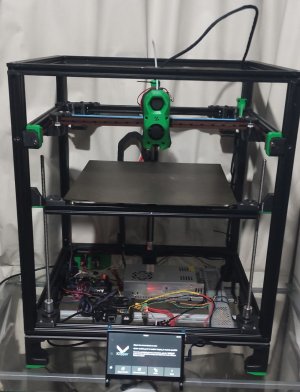
I've not updated this in a while .. I've been slowly working on standardizing this build to basically be a BOM VT 350 .. I still have the weird 2040 extrusions to deal with .. but I did make a few tweaks to maximize build volume ..

I also actually have a VT350 frame kit just lying here in a shelf .. but I need to figure out what new rails I need to get to be able to actually switch to it ;) ..

I think actually the one thing I'm the most "proud" of at this point is the bed mount conversion .. while I'm looking for a good source of proper BOM bed/heater combo .. that stuff is expensive .. so I'll probably keep using the tronxy bed for a bit ..

At this point I even installed TAP, and it seems to be working solidly with the bed mount :) I'm re-using the 10x10 aluminum bars that the bed mounted into, and I made some mount adapters which mount into the stock VT bed extrusion setup.
 
Hi there!

I got my serial number about 2 months ago... Between July/August my SKR 1.4t failed, bought a Mellow Fly D7 and now printing tophat, but I'm considering finished project. Impossible buy 8mm aluminum plate here in Brazil, costs like 300 bucks.

To detailing: Nevermore v6, heater chamber, internal spool, 2 chambers sensors(one in heater), hygrometer(battery gone), EBB36 with usb communication mod(can bridge bypass), 7" waveshare hdmi clone screen with articulated arms, WS2812 in front logos(neopixel_effects(status)), daylight on stick bars... All fans are Sunon Maglev, super silent! 😁
 

Attachments

  • VT.1662.png
    VT.1662.png
    497 KB · Views: 9
Hi there!

I got my serial number about 2 months ago... Between July/August my SKR 1.4t failed, bought a Mellow Fly D7 and now printing tophat, but I'm considering finished project. Impossible buy 8mm aluminum plate here in Brazil, costs like 300 bucks.

To detailing: Nevermore v6, heater chamber, internal spool, 2 chambers sensors(one in heater), hygrometer(battery gone), EBB36 with usb communication mod(can bridge bypass), 7" waveshare hdmi clone screen with articulated arms, WS2812 in front logos(neopixel_effects(status)), daylight on stick bars... All fans are Sunon Maglev, super silent! 😁
Very cool.

I've not really bothered to get a serial yet .. but I definitely could :) ..

Stuff I've done since ..
* Removed the standard 12864 based front screen and shoved an old Knomi 1 I had lying around (custom made a skirt panel for mounting that).
* Added Voron TAP (still working out small issues, but its pretty reliable) .. it occasionally gets weirdly stuck where the accuracy drops a lot .. I just have to move it up and down a bit to get it loose again and it works great again
* I replaced my SB toolhead with a XOL toolhead (it mounts just fine on the TAP) .. this also allowed me to finally make use of an Orbiter 2.0 Extruder I had kicking around,
* I spend a bunch of time trying to get ERCF working .. its finicky for sure :) .. thats still an open project ..

This is my main printer now, by Switchwire conversion is sitting in a corner gathering dust :)
 
Top