What's new
VORON Design

Register a free account today to become a member! Once signed in, you'll be able to participate on this site by adding your own topics and posts, as well as connect with other members!

Formbot Kit 0.2r1 with EBB36/Can

tuct

Member
First try on a Voron, got a Formbot kit and upgraded to r1 + decided to go with CAN, more details later,
here a just some pics from the last view days!

28.07 - i love electronics! so i started to install klipper on my pico and btt pi and got it running with the bare minimum
PXL_20230728_005158497.jpg

Parts from etsy!

PXL_20230728_103454023.jpg

Flashed EBB36 with Klipper and configured it

PXL_20230728_125507215.jpg

29.07 - Started with the frame

PXL_20230729_013157446.jpg

added motors

PXL_20230729_022904101.jpg

30.07 - Belts Belts Belts!

PXL_20230730_001216606.jpg

and a bed!

PXL_20230730_115854935-2.jpg

Wiring

PXL_20230730_162542226.jpg
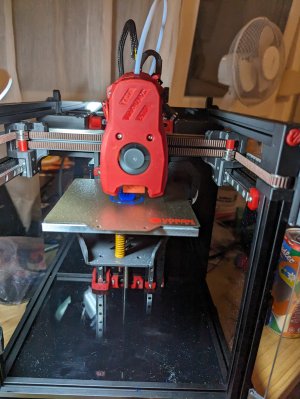
31.07 - more wiring and first tests and skirts
-> destroyed a 3010 fan now waiting for a replacement....
-> also broke the mini stealth burner case and had to re-print and build, waiting for the fan to
PXL_20230731_224415660.jpgPXL_20230731_224422493.MP.jpg
 
1/2/3 August finaly got my replacement 3010 (burned the original by flipping +/-) and finished mini stealth burner.
Hat is finished too and software is installed and basic config is done.
First prints without or barely any part cooling ;)
Forgot to take a Pic of the finished printer, will do when I am back from vacation.
I installed the specific os for the btt pi and used https://github.com/th33xitus/kiauh to setup Klipper mainsail and Co, super easy and quick this way.
Then I build and flashed the pico.
First basic and testet with the two thermistors connected. After that I flashed the pico again but with can bus config (can over usb) and connected my small can adaptor to the pico and can to the btt36 (flashed this as well).
Can share links to the detail description if some is interested.
After that I moved the stuff I needed in the printer cfg from the pico to the btt36 and testet again.
This is what I used to make my pico speak can:
Waveshare Accessory Board for Connecting MCUs to CAN Network, Onboard CAN Transceiver SN65HVD230 https://amzn.eu/d/8f00QHQ
 

Attachments

  • PSX_20230803_230528.jpg
    PSX_20230803_230528.jpg
    630.2 KB · Views: 25
Had some issues with my CAN setup, Timer too close, turns out running Klipper in CAN bridge mode on the main MCU is not working very well...
Used a spare RP2040 instead and now i am happy!

Here are some new images


Led make every printer faster!!!
PXL_20230816_015526011.jpg
And now with a Nevermore V6, Webcam and a bigger screen (currently printing its own new front skirts)
PXL_20230823_224915402.jpg
 
Looks great!
I’m also just starting my voron journey and bought the same kit.
Also got the EBB36 can board since the 14 pin umbilical seemed like a hassle.

Did you get a BOM for the printed parts by any chance?
I’m printing the parts myself and since formbot doesn‘t seem to be too big on documentation I am not quite sure which of the stock parts I don’t need and which mods I do need…
 
Hi,
Unfortunately I did not get a Bom, and also decided to upgrade to 0.2r1 which meant I had to order a few more parts.

I ordered my parts on etsy (sry also no bom). You definitely won't need the bed parts that are replaced by the bed included in the kit.

I had to reprint some parts that changed between 0.2 and 0.2r1 (you can check the dates on the stls on github or via version).
 
For the ebb and can, I highly recommend using the can hat u2c or a dedicated mcu with can bridge Mode.
Using my skr pico in can bridge Mode was not working properly : mcu timer too close or so after sometimes a few minutes or a few hours of printing.

I switched to a rp2040 with can bridge only and it worked. In the meantime my u2c hat arrived, just a more specific mcu in the end ;)
 
Thanks for the detailed reply!

The bed parts I assumed I didn’t need and already have the kirigami specific ones printing right now.

I ordered the BTT Pi specific U2C add on so I should be fine on that front.
And while I already was on the biqu store I couldn’t help but pick up a Knomi display, I’ll have to figure out where to put it…
 
Top