What's new
VORON Design

Register a free account today to become a member! Once signed in, you'll be able to participate on this site by adding your own topics and posts, as well as connect with other members!

LDO V0.2-S1 Build

claudermilk

Well-known member
Trusted Advisor
Voron Owner
I'll get an early start on this while waiting on the kit to arrive. I've been plotting a V0 build for a while & the Voron holiday giveaway gave a kick with me receiving a V0 printed manual; now Hector throwing a coupon and digging up a space gray kit in stock while on a Nero stream gave a final push. So I couldn't say no, right? I was planning a Rook first as a father-daughter project this summer, but the V0 jumped the line (much to my bank account's pain). I'm planning Fusion Geomagnetic Mauve as the primary color, and Polymaker Galaxy Teal as the accent; should look good.

My first challenge is the Pi. I don't have a Zero 2W, and they are unobtanium unless you want to spend >$100 (on a $15 board? Yeah, no). I have a couple of 3Bs hoarded so I can get it up and running, but it looks like I'll have to steal the mount file from my Trident. I can get a Zero 2 locally, but I don't think that has quite the horsepower to run it, correct? I'd like to eventually run a webcam and of course be able to do input shaping. I don't think the LDO Picobilical PCB would help there, right?
 
FWIW the SKR Pico mounts includes in your PIF parts (assuming you use PIF) will fit a Pi 3B just fine -- no need to rob parts from your trident. Also, the picobilical now includes the ADXL chip on the tool head board, so input shaping is a piece of cake.
 
Ah, so the SKR Pico and 3B have the same mounting hole pattern? Cool. I do recall seeing somewhere that the Picobilical PCB had the ADXL on it. So I will go with the bird-in-the-hand and use one of my hoarded 3Bs. I had it semi-earmarked for this anyway.

I got my filament ordered and sliced up the plates of parts. Took the LDO project files and revised them for r1. I also ditched the skirt plate and redid my own using the multibody variant. I'm going to try and get all fancy and do the open honeycomb infill trick that's all the rage.
 
Slow start on this due to an ordering hiccup. I wanted a gray frame, but I have a blue frame. I love the blue--that's my Trident--but I want something different for this one.

In the meantime, I'm printing up parts.
PXL_20230708_132229981.MP (1).jpg
Fusion Geomagnetic Mauve prints up really nice and looks great. The Polymaker Teal has been more difficult on my Trident for some reason.
I'm attempting the multibody, multi-color parts for the MiniSB cowl and the skirts. First attempt looks good.
PXL_20230711_080454227.jpg PXL_20230711_204133438.MP.jpg
 
Got the skirts printed up, not without a bit of struggle. It took a few tries to get the right plate and squish to allow the parts to come off mostly intact. A few mesh bits still needed acetone welding back into place.
PXL_20230717_123848530.MP.jpg
 
Actual building has finally happened!

ron-paul-its-happening.gif.851873ffc2a45fa58b64967c0363848c.gif
First of all, the required bag of Haribo was acquired. It's even the correct package size. :LOL:

PXL_20230730_202015298_MP.jpg.9f46d647ebface938006fe00b1152ffd.jpg

New Voron builder-in-training. She did almost all the actual wrenching. I mostly supervised, directed, and advised.

PXL_20230730_211018280_MP.jpg.45acc33babe305711b9ef53b5e0373fc.jpg

Current progress.

PXL_20230730_221449873_MP.jpg.cac2864d5f7f789ebb44959b17d071ed.jpg

At this point she was about done and I was getting there--been a busy weekend. As it turns out this was about as far as we could get anyway. Next up is the Kirigami bed, and i had a reprint needed. I also found that there were no feetsies. Where's my feetsies? I forgot to print them. And the clear logo insert for the Kirigami, so some printing needed to be done first. I also prepped all the heatests (I think); I'd rather I burn my fingers than my building assistant (and mom will appreciate dad not letting her play with dangerous, hot tools).

Those no-drop nut holders are great--they work like a charm. For my batch, I need to file the bottom a bit so they don't have too tight a fit, but there will be no cascade of nuts shooting out onto the floor from a poorly-considered frame rotation.
 
Looks nice! I hope my little ones want to help me with a build some day.
 
I'm slightly surprised and very happy she is interested. I've been promising since December to do a build and had planned a Rook, but the V0 jumped the line. Oh. Darn.

More progress. Slow and steady, just the Kirigami set up and mounted; BUT, no tramming needed at all! The rails turned out to be perfectly positioned and the bed just drops smoothly. The extra effort making sure the parts were as perfectly flat and square with the 1-2-3- blocks paid off.

Lots of progress pics.

Prepping parts. Thanks Steve for showing us the Knipex pliers--they were perfect for pressing the M3 nuts into the front piece for the Kirigami.

PXL_20230731_232410625_MP.jpg.c53c606e1b657668c7e2beabe1f2bce6.jpg PXL_20230731_232225004.jpg.c11af3c3cb30926f4e759e3787b30244.jpg PXL_20230731_232929817.jpg.a2678ce645f5f0124c18496fe757e53c.jpg PXL_20230731_233257497.MP.jpg

Kirigami ready

PXL_20230731_235614629_MP.jpg.52a8a7f5a5d22a8bbf0214920363c7c4.jpg

Attaching the bed.

PXL_20230801_000620931_MP.jpg.44e219c8c294602da6067cb08d88acaf.jpg PXL_20230731_235902400_MP.jpg.b2230460c14e865fa80c8e8cbdf94494.jpg PXL_20230731_235913805_MP.jpg.2989cb789f83d50909040bb00fa15916.jpg

Bed attached, and done for the day. It travels smoothly, no tramming needed. I'm surprised and super tickled at that.

PXL_20230801_003323631_MP.jpg.ae3b14830b13dcefa940fead2be65b57.jpg
 
Some more progress yesterday.

"How many preloaded nuts?"

PXL_20230801_224152259.jpg.343c362e67c8b34a72607689ee6db584.jpg

This part of the frame assembly was a bit fiddly and juggling lots of bits.

PXL_20230801_224406066_MP.jpg.90f650cfbb60ad383901179c9671239d.jpg

Getting it lined up and square.

PXL_20230801_225651092_MP.jpg.991cf222c22526d5ef9614f7fcefb1eb.jpg

Sadly, in the final preload check I found I had missed a few. 😒🤦‍♂️ 
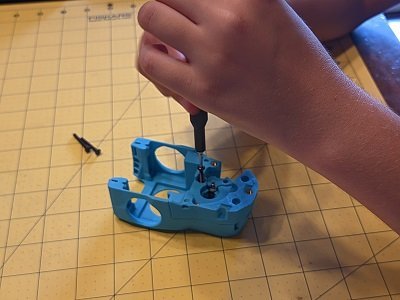
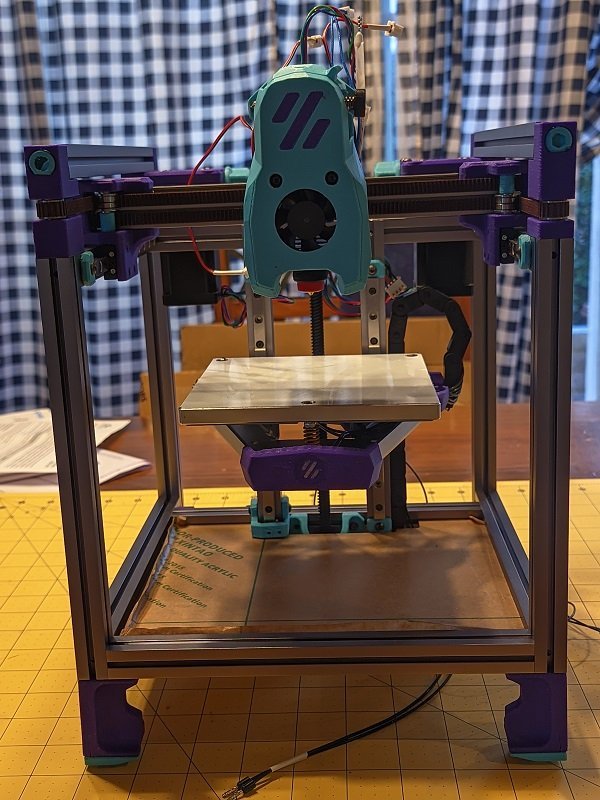
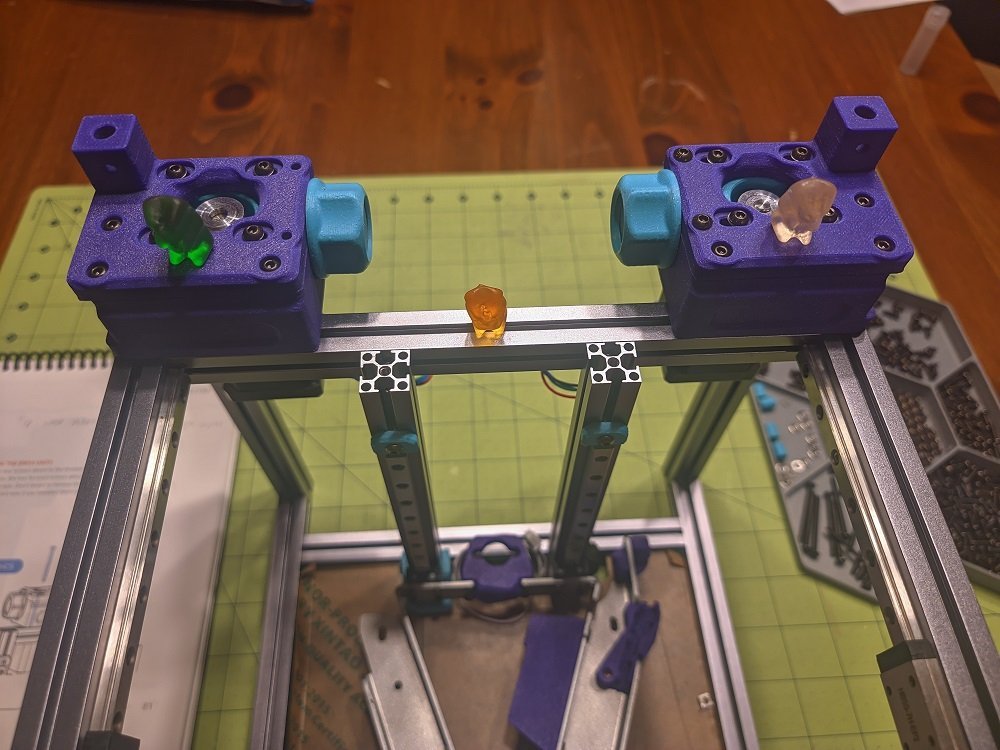
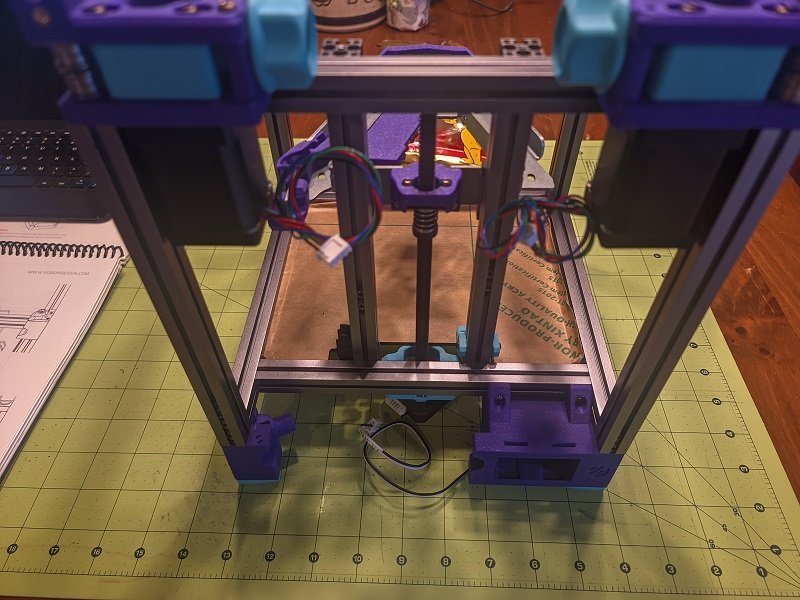
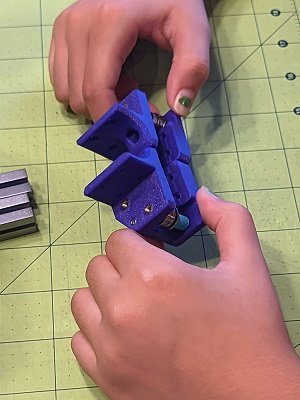
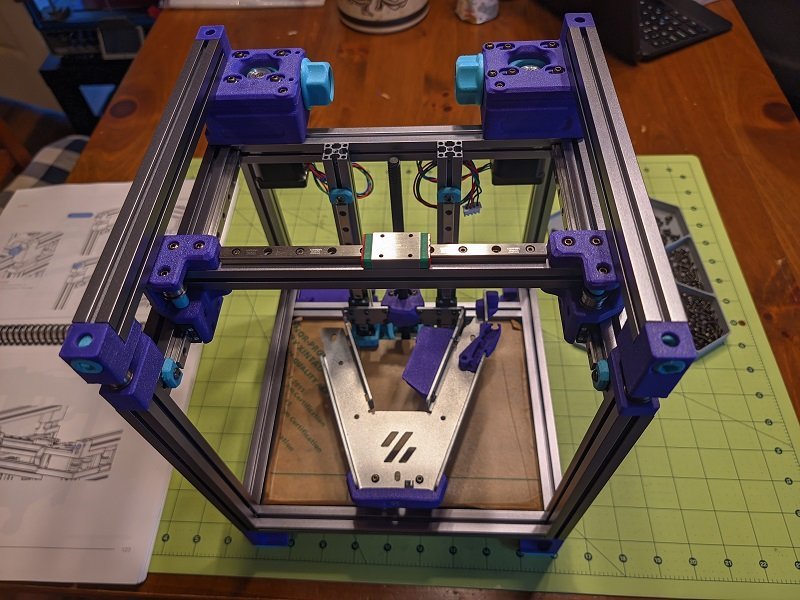
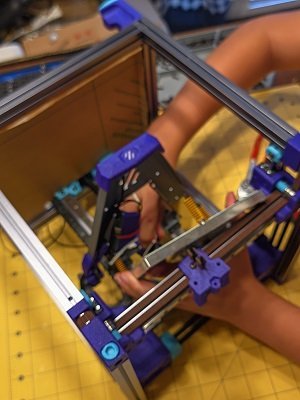
Had to do some unbuilding to get all the nuts loaded and lost the perfect first time tramming.

Time for gummies. That got her interest back--checking the nuts and making sure everything was square got tedious and boring.

PXL_20230802_004123031_MP.jpg.cfde1e44c25b9732c66f0da065a960de.jpg

Finished for the day. It's so little and cute!

PXL_20230802_004136930_MP.jpg.a558f33a404b08cae9cde7414aa69fc1.jpg
 
Some more progress. This is going to be a slow build with distractions, and attention span, but that's ok. It's not a race.

This time is the AB drives. She got lessons in gravity. :LOL: The A drive stacks got re-stacked about 6 times.

Finally putting the top and bottom together after learning to keep the stack horizontal, and use a finger to hold the screw in place. B drive went much faster.

PXL_20230805_021840377_MP.jpg.e13e1c7a0d4b45d39aae79c01caa8dc8.jpg
PXL_20230805_010830340_MP.jpg.500319f4efad5cf276f9a49f7a61869f.jpg


Going on the frame.

PXL_20230805_023926379_MP.jpg.a912b21a00e717c1a10cfaef491a499c.jpg


The V0 and V0.1 must have been tedious to do this with all the extra bolts. I like that one uses the threaded hole in the extrusion. Big brain there.

The AB drives (or should that be BA?) installed.

PXL_20230805_024510466_MP.jpg.5471761c6cfb79303e688736bed0350d.jpg
 
More progress! Front idlers, Z motor and feetsies!

More bearing stacks! They only had to get rebuilt a couple of times due to gravity or wrongly-oriented flanges.

PXL_20230807_235547811_MP.jpg.a189786788c0c78dc33cfdc95ba9b584.jpg


Getting the Z motor in. I haven't messed with an anti-backlash spring & fitting, so it took a little puzzling before I got it. Plus going Kirigami, so the parts didn't quite match the manual, but in the end we got it figured out. Thankfully I have little fingers at my disposal to place those hard-to-reach screws.

PXL_20230808_003921265_MP.jpg.e57c1d1474521fa0660902fd37f17670.jpg
PXL_20230808_010522301_MP.jpg.551c7bb1c0e4f7c06185e9dce1bcdbe5.jpg


FInally, feet!

PXL_20230808_002958288_MP.jpg.367d4cfbf1b5f42811b8a240f0d01f98.jpg


And finished for the evening.

PXL_20230808_003654860_MP.jpg.ff6a8cb7040f74058811d11e775d417b.jpg
PXL_20230808_010906600_MP.jpg.3f1ea6a00d6af41a992bf2a1677f048d.jpg
PXL_20230808_010855902_MP.jpg.9be7ce1c8d3af79f795b835d7ed1608c.jpg
 
More progress. This time is the X axis and finishing up the frame.

"Really? More bearing stacks?" "Yes, but these are the last ones, I promise."

PXL_20230810_234613089_MP.jpg.62622ade155e2d3bf78095596957a749.jpg


Completed joints, no more bearing stacks to build. Had to unbuild and rebuild after realizing I had grabbed the wrong screws, then seeing one bearing inserted backwards.

PXL_20230810_235235472_MP.jpg.3da76a8f7f8085815d807601fdaa10c0.jpg


Last rail being assembled. She's a pro now.

PXL_20230811_000124675_MP.jpg.9d9cdee57b30ae82da73e4ca42f5fe0b.jpg


X axis built and ready to go.

PXL_20230811_001842556_MP.jpg.10b71ad360f73c98ab41fd48bffe7b82.jpg
PXL_20230811_001413970_MP.jpg.c71287b6a0f858b3943bed157bc567be.jpg


...and installation.

PXL_20230811_002222584_MP.jpg.be6817b5abf0d862cd471ff085260d22.jpg


Getting the nuts lined up was a bit of a PITA and after realizing we missed the bottom two it took some effort to get those done. This is no news to veteran V0 builders.

Current progress on the printer. It's not looking like a printer!

PXL_20230811_005546300_MP.jpg.613e680c35234ea61d1cd563f5060f84.jpg
 
PXL_20230812_031345059_MP.jpg.cd69b5a639851e52db0d610a373bca20.jpg


Belted! Only the final-for-the-night photo as I was the one doing most of the work. My assistant did the first routing of belt A so we could get a length. From there I pretty much took over cutting the belts, and doing final routing. This little guy is a PITA to belt, especially the carriage; I struggled for a while before getting it done, so she wouldn't have had the finger strength or stubbornness to fight through (also distracted with baking). Belt tuning is Nero yeah-it's-about-right gauging. I tried a couple of phone tuning apps, but couldn't get reliable output I trust.\ and I'm not sure that the Prusa printed meter applies to this setup.
 
A little progress after a vacation hiatus. I had hoped to make a bunch of progress over vacation, but wifey kept us all busy and away from the printer.

Prepping the bed.

PXL_20230822_001227806_MP.jpg.6bd9c1bc0a452d8c18d92f5b3742c110.jpg


Wiring up the printer side and loading the cable chain. Aha, now we see why they didn't insert the pins into the connector shells. We also had an amusing minor roadblock: one of the chain links had some molding flash that "blocked" the path. I pulled it out and replaced with a normal spare link, then found that the flash was very thin.

PXL_20230822_003720405_MP.jpg.c682580994a46179d13b5fdaee8a4dd6.jpg
PXL_20230822_002633599_MP.jpg.a80973d1110197dcd4091a6e9766f1a5.jpg


Mounting the bed

PXL_20230822_003908292_MP.jpg.3da991375975eb1b0f0d866f4ee19bf1.jpg
PXL_20230822_004231891_MP.jpg.64248ec0b56131432222af41e08ae27c.jpg


She was intimidated by tackling the wiring, but with assistance got it done.

Next up is the tool head, so we saved that for a dedicated build session.
 
PXL_20230812_031345059_MP.jpg.cd69b5a639851e52db0d610a373bca20.jpg


Belted! Only the final-for-the-night photo as I was the one doing most of the work. My assistant did the first routing of belt A so we could get a length. From there I pretty much took over cutting the belts, and doing final routing. This little guy is a PITA to belt, especially the carriage; I struggled for a while before getting it done, so she wouldn't have had the finger strength or stubbornness to fight through (also distracted with baking). Belt tuning is Nero yeah-it's-about-right gauging. I tried a couple of phone tuning apps, but couldn't get reliable output I trust.\ and I'm not sure that the Prusa printed meter applies to this setup.
Not to derail your build log, claudermilk, but just something I wanted to share since I've never had much luck with tuning apps either. A buddy of mine designed a really nice belt tension meter, and it's been SO much more pleasant to use than tuning apps. Smoothness and consistency of the jig really relies on print quality, but you should have absolutely no issues there.


BOM is pretty minimal, though the spring and music wire are generally not things that we accumulate while building Vorons lol.
 
That is a neat tool! Any excuse for a cool tool--especially one you build yourself, and this looks to be a bit easier to use than the Prusa one. Bonus: his demo clip uses a Trident (my first Voron). Thanks for the link.
 
Some more progress. It's slow but steady, contingent upon the time available and desire of my co-builder to tackle the next step. This time it's the tool head.

First up, the extruder (still Pocketwatch?)

PXL_20230831_231126579_MP.jpg.fa8df210bb2d451361a0030231f95598.jpg


The fans were a bit of a challenge, so she punted over to me.

PXL_20230831_235008449_MP.jpg.02f11941929e14c7e0094c6ed8c366c1.jpg
PXL_20230831_235013830_MP.jpg.c744668b94fe3f4af6e32c3502737ac9.jpg


I also handled mounting the tension knob and making the initial setting. With commentary on what it's doing, why, and how the parts interact. Then comes the motor; she got it mounted and I finalized gear lash--again with instruction commentary and hands on feeling what proper lash is.

PXL_20230831_235213196_MP.jpg.db24e0c6ed2750b0d29f37a7f0eeb65a.jpg


Then comes the hotend. I'm totally tearing these apart later and stealing the blue heat sink for my blue-framed Trident and giving this guy the red Voron edition part. 😈

Lastly, tool head mounted! It's really looking like a printer now. Next up is electronics.

 
Top