VORON Design

You are using an out of date browser. It may not display this or other websites correctly.
You should upgrade or use an alternative browser.
You should upgrade or use an alternative browser.
250x250 No Kit/Self Sourced Voron 2.4
- Thread starter Christian
- Start date


LoadMaster7
Well-known member
Christian, be sure to heat up the hotend and tighten the nozzle. Guess what I forgot!!! What a mess, but the Voron design made it a pretty easy clean up job. ")
LoadMaster7
Well-known member
I have the stock setup, no shield, and the probe is working fine. Maybe it will be an issue once I complete the enclosure? My build has slowed now the printer is working. I'm trying to complete some Christmas gifts first.
It looks like you are making good progress!")
It looks like you are making good progress!
Yeah, the usual procedure, same on my Kobra.Christian, be sure to heat up the hotend and tighten the nozzle. Guess what I forgot!!! What a mess, but the Voron design made it a pretty easy clean up job.
If a heat shield was needed it would be in the manual, but I had it here and is easy to cut.
The Kobra is now also back printing christmas stuff. The skirts will the voron print, as soon it runs.
Wirering the toolhead will be challenging. I just have a lot of wires and connectors. Did you had the cables ready made in the kit?
Made a lot of progress this weekend.
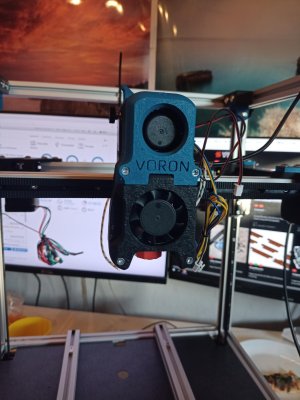
First finishing the toolhead:

After the gantry and toolhead, the heated bed was on my list, first cleaning, make some marks and then placing the heater.
The plate and heater are sourced from Kris3D, lacking a proper drillpress I spend the extra money to get it predrilled


After the heater was mounted, the magnetic sheet was next. Making some holes to get the bolts screwed.
With the magnetic sheet came a PEI build plate from Amazon. Got it as 260x260 since it was an offer and cheeper xD The magnetic sticker I cut to size after putting it on. The bigger PEI sheet (10mm. on each side) is also quite handy, so I don't have to be too precise when laying it on the bed xD


And wireing it

Now from the mechanics to the electronics.
First soldered the diode to the cable for the probe connection

The Z-Endstop I did two times, the first switch didn't work after I was done. I realised that right away, since I check every connection after assembly.
That also would be my main advice when doing the electronics, take a multimeter and check every connection and cable, before and after installation. Safes a lot of time troubleshooting.
Next preparing the MCU:


Since I don't have a rasberry pie or any other controller I can stuff into the printer, I have enough room to mount the Octopus vertically in front of the fans.
The mount I will use can be found in the mods (https://mods.vorondesign.com/detail/B1dyZJLYmabAets8VNdWLQ)
I will use a Laptop as print server, since I have a Thinkpad with broken keyboard and touchpad collection dust. Octoprint is already controlling the Kobra.
First finishing the toolhead:
After the gantry and toolhead, the heated bed was on my list, first cleaning, make some marks and then placing the heater.
The plate and heater are sourced from Kris3D, lacking a proper drillpress I spend the extra money to get it predrilled
After the heater was mounted, the magnetic sheet was next. Making some holes to get the bolts screwed.
With the magnetic sheet came a PEI build plate from Amazon. Got it as 260x260 since it was an offer and cheeper xD The magnetic sticker I cut to size after putting it on. The bigger PEI sheet (10mm. on each side) is also quite handy, so I don't have to be too precise when laying it on the bed xD
And wireing it
Now from the mechanics to the electronics.
First soldered the diode to the cable for the probe connection
The Z-Endstop I did two times, the first switch didn't work after I was done. I realised that right away, since I check every connection after assembly.
That also would be my main advice when doing the electronics, take a multimeter and check every connection and cable, before and after installation. Safes a lot of time troubleshooting.
Next preparing the MCU:
Since I don't have a rasberry pie or any other controller I can stuff into the printer, I have enough room to mount the Octopus vertically in front of the fans.
The mount I will use can be found in the mods (https://mods.vorondesign.com/detail/B1dyZJLYmabAets8VNdWLQ)
I will use a Laptop as print server, since I have a Thinkpad with broken keyboard and touchpad collection dust. Octoprint is already controlling the Kobra.
Here some tools I use for the wires:
With a price around 13 EUR this is this wirestripper one of the tools with the best price to performance ratio I own:

And some basic crimping tools


Let the wireing begin...


Alle the cables fit in the chains and worked out, but the next time I would definetly buy more different sized wires. Just bought 2 sizes and some are just too oversized.
With a price around 13 EUR this is this wirestripper one of the tools with the best price to performance ratio I own:
And some basic crimping tools
Let the wireing begin...
Alle the cables fit in the chains and worked out, but the next time I would definetly buy more different sized wires. Just bought 2 sizes and some are just too oversized.
Finally, after getting nearly all clips of the chain back in place, I pluggd it in and no fuses were breaking 

After wireing i decided to also place a aluminium shhet betwen the heated bed and the bottom plate to redirect some heat back up to the plate and later the chamber.
Of course that is not the first print on the photo. Took some configuration and tuning, but I was surprised how fast it generated clean prints. I was expecting initial problems in the motion system, since it was the first time I build something like that.
Therefore, many thanks to everyone that contributed to the manual, documentation, invented and refined the build itself!
The first issue I got was, that the latch of the extruder didn't stayed close. But that I fixed with putting a heat shrink tubing (yellow on the photo, without shrinking) around the bolt. Now it stays perfectly closed.

Then the grat moment, the very first print after calibrating the extruder.

Temperature was totally too hot, but I was so stuned and proud that the printer actually produced anything that looked something like the file it got xD After the first adjustements in the slicer the right bar was printed. Dimensianlly acurate! What an amazing feeling.
Now lets try something more difficult:

Alright... The first mod I will build will be a filament runnout sensor...
Let's try again:

Adjusted the sclicer settings a bit more and switched from Cura tu SuperSlicer.
Time to tune the machine a bit more with the well known and referenced https://ellis3dp.com/Print-Tuning-Guide/
And some failures and tests later, the printer is finally printing the missing parts itself

Next steps will be know printing the skirt and adding the fans and display. Then the filament runout sensor.
After wireing i decided to also place a aluminium shhet betwen the heated bed and the bottom plate to redirect some heat back up to the plate and later the chamber.
Of course that is not the first print on the photo. Took some configuration and tuning, but I was surprised how fast it generated clean prints. I was expecting initial problems in the motion system, since it was the first time I build something like that.
Therefore, many thanks to everyone that contributed to the manual, documentation, invented and refined the build itself!
The first issue I got was, that the latch of the extruder didn't stayed close. But that I fixed with putting a heat shrink tubing (yellow on the photo, without shrinking) around the bolt. Now it stays perfectly closed.
Then the grat moment, the very first print after calibrating the extruder.
Temperature was totally too hot, but I was so stuned and proud that the printer actually produced anything that looked something like the file it got xD After the first adjustements in the slicer the right bar was printed. Dimensianlly acurate! What an amazing feeling.
Now lets try something more difficult:
Alright... The first mod I will build will be a filament runnout sensor...
Let's try again:
Adjusted the sclicer settings a bit more and switched from Cura tu SuperSlicer.
Time to tune the machine a bit more with the well known and referenced https://ellis3dp.com/Print-Tuning-Guide/
And some failures and tests later, the printer is finally printing the missing parts itself
Next steps will be know printing the skirt and adding the fans and display. Then the filament runout sensor.
LoadMaster7
Well-known member
Congratulations on getting the printer up and running! It is a good feeling once you see it working. Mine has been printing non stop, making new parts for itself.Finally, after getting nearly all clips of the chain back in place, I pluggd it in and no fuses were breaking
View attachment 1074
After wireing i decided to also place a aluminium shhet betwen the heated bed and the bottom plate to redirect some heat back up to the plate and later the chamber.
Of course that is not the first print on the photo. Took some configuration and tuning, but I was surprised how fast it generated clean prints. I was expecting initial problems in the motion system, since it was the first time I build something like that.
Therefore, many thanks to everyone that contributed to the manual, documentation, invented and refined the build itself!
The first issue I got was, that the latch of the extruder didn't stayed close. But that I fixed with putting a heat shrink tubing (yellow on the photo, without shrinking) around the bolt. Now it stays perfectly closed.
View attachment 1075
Then the grat moment, the very first print after calibrating the extruder.
View attachment 1076
Temperature was totally too hot, but I was so stuned and proud that the printer actually produced anything that looked something like the file it got xD After the first adjustements in the slicer the right bar was printed. Dimensianlly acurate! What an amazing feeling.
Now lets try something more difficult:
View attachment 1078
Alright... The first mod I will build will be a filament runnout sensor...
Let's try again:
View attachment 1077
Adjusted the sclicer settings a bit more and switched from Cura tu SuperSlicer.
Time to tune the machine a bit more with the well known and referenced https://ellis3dp.com/Print-Tuning-Guide/
And some failures and tests later, the printer is finally printing the missing parts itself
View attachment 1079
Next steps will be know printing the skirt and adding the fans and display. Then the filament runout sensor.
Today I let the printer cool down to at least get the display mounted xD

Also took some time to get mor familiar with SuperSlicer and get it dialed in. Then I took all I learned and made a SuperSlicer Profile for the Kobra and recalibrated the whole machine, loaded a customized firmware with Linear Advance. Now it is still slow but now I get also with the max speed of the machine super clean prints. Now it is time to get the rest of the christmas presents printed on my little printfarm.
Also took some time to get mor familiar with SuperSlicer and get it dialed in. Then I took all I learned and made a SuperSlicer Profile for the Kobra and recalibrated the whole machine, loaded a customized firmware with Linear Advance. Now it is still slow but now I get also with the max speed of the machine super clean prints. Now it is time to get the rest of the christmas presents printed on my little printfarm.
After all the tuning of the printers I learned about Input Shaping. So I ordered a sensor on Amazon. Since I don't have a Rasberry Pi, rather use an old Thinkpad as Host, I also had to learn about getting an SPI connection established with the laptop and ordered USB adapter.


After getting the connection sorted and a driver running on Linux, it was time to get through the Klipper-Config an a lot of crashes xD
But finally it worked

And now back to printing the skirt
After getting the connection sorted and a driver running on Linux, it was time to get through the Klipper-Config an a lot of crashes xD
But finally it worked
And now back to printing the skirt
Alright, never change a running sys... ok let's build the Klicky Probe xD

I smoothed the print lines of the probe and the dock, to reduce possible failures when bringing back the probe with a file.


After adjusting everything it works so far very good. I also use now the klicky for Z homing.
I smoothed the print lines of the probe and the dock, to reduce possible failures when bringing back the probe with a file.
After adjusting everything it works so far very good. I also use now the klicky for Z homing.

LoadMaster7
Well-known member
Good Job! Congratulations!!
WhiteWulfe
Well-known member
Congrats on your serial!
Similar threads
- Replies
- 26
- Views
- 3K
- Replies
- 11
- Views
- 2K
- Replies
- 40
- Views
- 12K