What's new
VORON Design

Register a free account today to become a member! Once signed in, you'll be able to participate on this site by adding your own topics and posts, as well as connect with other members!

Formbot Voron 2.4r2 build log

iamnot414

Member
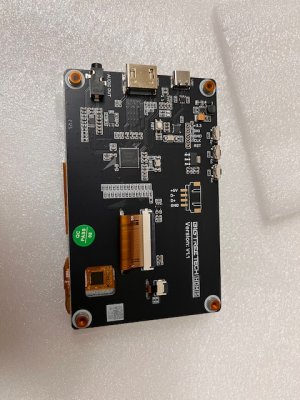
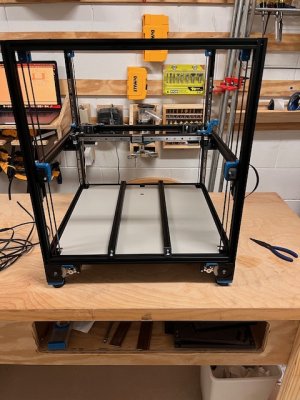
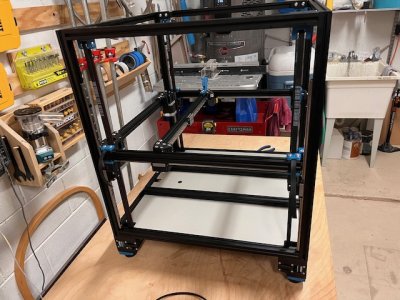
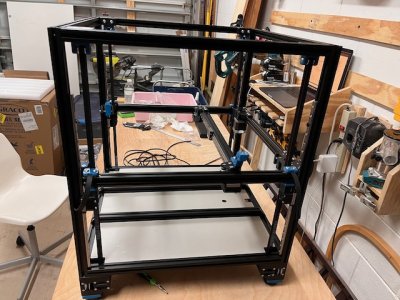
Starting build log so I can track on the various doings in building this printer. This is the first time build a printer. I have a Prusa Mini+ and have been printing for 3 years. I want a printer with a bigger print bed because my youngest son likes helmets for various characters and likes to cosplay. I also want a project for my oldest son and myself to work on together. Wish us luck!
 
It will be a fun project. I got started on researching my Trident immediately after finishing my Mini+ build. I've since also added a V0 built with my daughter; it was a fun project together.
 
I order my Formbot 2.4 300x300 kit yesterday. Coming from a MK3s+ Clone Kit and trying to build it during the holidays.
@iamnot414 Did you order CAN BUS or other accessories?
 
@Bob20 This is what I ordered: Formbot on AliExpress

There were a bunch of upgrades including a Toolhead, Fan Adapter, and Breakout PCBs. It doesn't come out a say it is a CANbus but I believe those are the parts for it.... Or I could be completely wrong. It got delivered today and will upload some pictures tonight.
 
Last edited:
Unboxing.
IMG_2462.jpegIMG_2463.jpeg

IMG_2464.jpeg
Doesn't look like CANbus, the breakout PCB has cable that goes to the toolhead PCB but it's not condensed to four cables.

IMG_2467.jpegIMG_2470.jpeg
 

Attachments

  • IMG_2465.jpeg
    IMG_2465.jpeg
    115.7 KB · Views: 15
Looks exactly like the kit I got. I can confirm that that is not a CAN bus. The toolhead PCB is based on the design by hartk, but does have an extra jumper that caught me out and caused me to blow up my motherboard. So fair warning.
 
Looks exactly like the kit I got. I can confirm that that is not a CAN bus. The toolhead PCB is based on the design by hartk, but does have an extra jumper that caught me out and caused me to blow up my motherboard. So fair warning.
Ok, I will take special note of that. We definitely don't want that to happen.
 
Built the frame:
IMG_2481.jpeg
IMG_2491.jpegIMG_2490.jpeg

Built the Gantry: and added it to the frame:
IMG_2502.jpegIMG_2504.jpeg

Installed the bed:
IMG_2517.jpeg


We had a few issues with the z Drives where the pulleys didn't want to slide onto the shafted but we were able to get around that by putting the shafts in the freezer for the night. The pulleys and bearings slide on nicely the next morning.

The kit didn't have the parts for the Z endstop so we went ahead and installed TAP for the X carriage. We had some confusion when going through the instruction for the assembly until I found R8_errata. This cleared the confusion.

Now on to the Electronics..
 

Attachments

  • IMG_2503.jpeg
    IMG_2503.jpeg
    135.8 KB · Views: 8
  • IMG_2505.jpeg
    IMG_2505.jpeg
    148 KB · Views: 7
  • IMG_2506.jpeg
    IMG_2506.jpeg
    151.6 KB · Views: 7
Looks exactly like the kit I got. I can confirm that that is not a CAN bus. The toolhead PCB is based on the design by hartk, but does have an extra jumper that caught me out and caused me to blow up my motherboard. So fair warning.

The the jumper you are referring to, is it on the Toolhead PCB or on the Motherboard?
 
Last edited:
Top