What's new
VORON Design

Register a free account today to become a member! Once signed in, you'll be able to participate on this site by adding your own topics and posts, as well as connect with other members!

Formbot Voron 2.4r2 "Bruiser" build log

I went to do the bed next and despite doing inventory 3 times, I couldn't find the m4 thumbscrews that are used as spacers.
I did however find:

View attachment 3377

I initially thought that they were wood, which worried me.
I contacted Formbot, asking about them, and they assured me that they were indeed replacement parts, and that I could use them as spacers.
Some more research and it turns out that they are made from Bakelite, which is a resin filled with wood fibers (hence the wood like appearance).
However it is known for its lack of electrical conductivity and heat resistant properties, the latter being very important for holding up a heated bed.
I'm old enough to remember when house phones and lamp sockets were made with Bakelite. It's a heavy material but a great insulator and tough stuff!
 
I'm old enough to remember when house phones and lamp sockets were made with Bakelite. It's a heavy material but a great insulator and tough stuff!
Yeah, I think I still have an old telephone with a bakelite case. Still it would have been nice to have some kind of indication that the spacers were made of that, and what they were for, I had to go back to Formbot after much frustration. It wasn't listed in any "upgrade" or replacement part document anywhere.
 
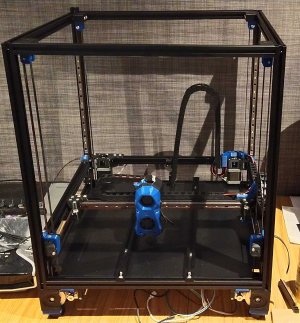
With the Stealthburner on, it actually looks like a Voron now:
Stealthburner.jpg

Replacement electronics are on the way, so I should be able to get it printing soon.
 
A month later and I have just revisited the build log. I had hoped to get it up and running in November, but that was completely upset by a couple of simple frustrations.
I couldn't get past the homing.
Sounds stupid I know, but I kept having issues with seemingly tiny things:
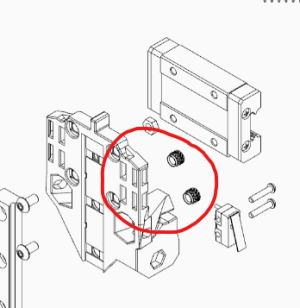
1. First of all the X/Y belts. They were loose, and the homing seemed to make them worse. An examination into this revealed a simple and overlooked part of the "TAP" upgrade (yes that same thing coming back to haunt me).
1702106617927.png
can anyone spot anything missing in the highlighted red circle? No? Well, it turns out that there is a small printed piece that is used to clamp the belts.
Should be obvious right? It escaped me. So much so that I ended up ordering a CNC TAP from Mellow. That kit came with a little metal piece to clamp the belts.
Great. I could now tighten the belts and get to homing.
Erk. No. On to the new issue:
2. The CNC kit didn't have the right physical shape to hit the microswitch endstop.
The solution to this was found within the community. Whoever Stadi_602547 is, I thank you very much! I hope it is alright to link the solution here:
I did end up printing this in PLA (I don't trust the Ender for ABS/ASA), and will be scheduled as one of the first parts to print once the enclosure is on.
Great! New TAP installed, X is homing fine, should be smooth sailing from here.
Nope
3. The new TAP feels like it works great, but is not triggering. All the physical stuff checks out, must be wiring or software.
After uncounted reconfigurations of the software, multiple wiring changes, I did resolve this.
It turns out that despite my thinking that TAP should count as a "probe" and therefore be plugged into the Octopus' "probe" pin PB7.
Save yourself some hassle and don't do that. Just connect it up to a regular old endstop pin (stop_7 in my case - PG15)
That should be it, right? 3 little niggles dealt with and on to printing?
Sadly no. I will leave the next one for a new post though. This is getting a bit long.
 
Yeah, that Octopus PB7 bug can drive you to distraction until you find out you need to shift the signal to PG15. It doesn't matter if it's Tap, Klicky, or the OG inductive sensor. Ask me how I know...
 
Well, it turns out that I never posted the next problem that I ran into in the build.
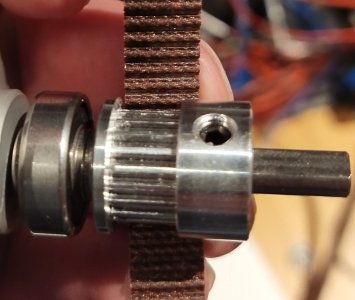
Can anyone spot anything wrong in the following picture?
Z_axis_motor_belt.jpg
No?
Well it turns out that all the pulleys on the Z-axis belts were wrong.
6mm Pulley for a 9mm wide belt.
I had 4 wrong pulleys, with a wrong label in my kit.
I didn't know when I assembled them (one of the first things assembled), and it took me back and forth with a bunch of other 3D printer enthusiasts to get to the bottom of why my gantry was playing up when I tried to level it.
Fortunately for me, it only took a little over a week for new pulleys to arrive.
 
Top