VORON Design
You are using an out of date browser. It may not display this or other websites correctly.
You should upgrade or use an alternative browser.
You should upgrade or use an alternative browser.
LDO 2.4/300 Build Log
- Thread starter Dave
- Start date
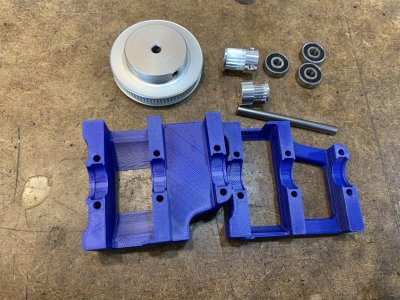
I’m really impressed with the quality of the hardware in this kit. The only other 2.4 kit that I’ve built was from Formbot, and it had been a workhorse for well over a year. I have been extremely happy with that kit, but there were a bunch of parts that I substituted out during the build just because I knew that they would cause an issue later on. some of the pets also showed signs of wearing faster than I would have expected, but the vast majority of the kit parts have proven quite sufficient for long-term use after many more than 2000 hours on that printer. (I lost track somewhere along the line. It’s probably closer to 3k hours, but at this point, who‘s counting?) Formbot had since upgraded many of those parts that were of concern or that wore quickly (good for them!), but I do wonder how that kit would have fared had I not made those changes/upgrades.
With this LDO kit, I get the feel that almost all of the parts are “real parts” and intended for real use in real stuff, rather than being “part shaped objects” that look like the real thing, but have some fatal flaw that will cause them to fail prematurely. The quality is definitely there! I still think that the kit is more than I would spend on a printer, but it also seems apparent after digging into the kit that trying to source a similarly high quality kit myself would be more expensive than the LDO kit. For a high-end build, I think that this represents a pretty good value. Out of the box, I haven’t seen a single part that wasn’t as high of a quality as anything in my stash of ”really reliable but not Gucci” parts. Well, except the rails. They aren’t super high end. But the also don’t need to be! On this point, I think that LDO nailed it! The rails are perfectly suited for their purpose. They feel like they are shipped dry, which means that I haven’t played with them since one shouldn’t run the rails without lubrication, but the preliminary assessment is that they are very good, but not overkill for the application. This makes me happy. You can spend a TON of money on rails that are super precise. For a printer, we don’t need that precision, and mounting the rails to aluminum pretty much kills the extra precision anyway! These rails seem perfect!
On with the build!
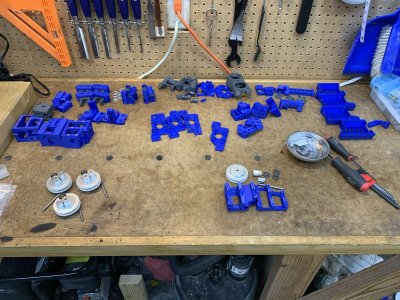
Don’t tell Doc, but I am having a tad bit of over-extrusion on my parts. I’ve put WAY too many hours on this nozzle and really need to swap it out. I thought my Obxidian nozzles would have been here by now, but, um, well. . .
The print quality is still more than fine, but these parts don’t have that super-flush fit that you get with immaculately printed parts. So, a light hit of sandpaper it is! If you need to use a bit of sandpaper to get a good fit between parts, do it!
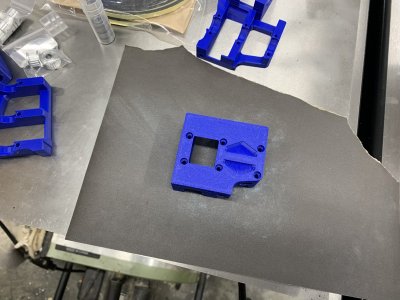
The print quality is still more than fine, but these parts don’t have that super-flush fit that you get with immaculately printed parts. So, a light hit of sandpaper it is! If you need to use a bit of sandpaper to get a good fit between parts, do it!

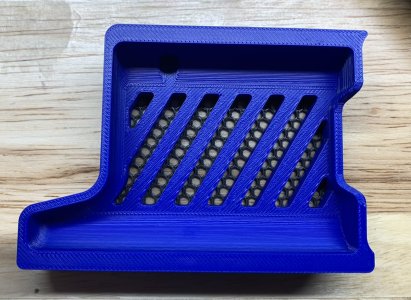
Here is one of the skirts. You can see the over-extrusion and worn nozzle artifacts more clearly here. But I honestly don’t mind! It’s not that apparent in person, and the parts are perfectly strong. So no worries. I’ll spend my stress time worrying about other things that will impact how the printer actually works. (The grey mesh panels behind the skirts are printed using a method that Eddie the Engineer documented in a video on YouTube.
The skirts themselves are based on ones that HartK sent me. Check in his GitHub for lots of cool stuff. https://github.com/hartk1213/MISC/tree/main/Voron Mods )

Last edited:
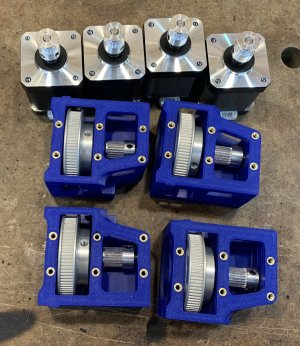
I believe it is part of the experience, that you at least forget one belt. Happened twice to me.Good news and bad news, I gueas. Good news: these all got assembled. Bad news: I forgot to put the belts on. Sigh.
View attachment 1319
Funny story: I was just talking about nozzle wear with some folks on the Discord, and put up a picture of my skirt that I posted above (it was printed with a reaally old nozzle, so I posted it as something that was borderline of needing nozzle replacement). Doc immediately chimed in with "your extrusion multiplier is too high by about 0.01 to 0.015". LOL! That dude is AMAZINGLY good at printer tuning! If you ever get a chance to meet him in person, try and pick his brain for a while. It will make you better at 3d printing. (Plus, I think that he is a pretty good dude!)
I am always one to admit when I was wrong, and I was completely wrong about the precision brass spacers. Those things are amazing. I really don't want to try and source more for other builds, but they are fantastic to work with.
OK, now for a few VERY MINOR gripes.
1) (Update: I’ve been told that a new Stealthburner tool head board is being tested. I won’t say more, but what I saw looks REALLY good!) The tool head board is outdated. The kit comes with a Stealthburner upgrade kit, which is fantastic, but the tool head board doesn't fit the new stealthburner. I am sure that this is a transitional thing and that they are using up stock, but it would have been nice for the SB upgrade kit to include a SB tool head board. This is all a bit moot for me since I will be using a CAN toolhead board, but I see it being a potential shortcoming for some other folks. I am going to check if the pin outs are compatible with HartK's SB boards (I have a couple of beta versions sitting around that need a good home), and if so, then I will run with that for another build I am doing for someone else.
2) There aren't enough M5 10mm BHCS. OK, so this one is my fault. I am not building to spec, so I know that I am using weird quantities of hardware, but it does bring up an issue. Vorons are modular. People customize them all of the time. The hardware that LDO includes in the kits is spiffy, but it is not available outside of LDO. If I want extra screws of a certain size, I have to rely on the connections that I have, and many people may not be able to harness those connections. I do wish that LDO would come up with some sort of a way to make extra hardware available outside of kits. BUT, I understand that this is a business decision, so I am not terribly worried. This one is NOT a criticism of the kit, but a recognition that future upgrades or modifications may require use of hardware that doesn't match the aesthetics of the build. Not a functional problem, but it is something worth thinking about.
3) I don't like the DIN wire terminals. They are good, and they work perfectly well, but they are huge relative to Wago connectors, and I, personally, don't like them very much. This is a preference thing. They work exceptionally well! So no complaints about functionality. I just don't like them. Easy solution: I'll use Wagos instead. Problem solved!
4) I wish folks would include five 20mm M5 screws in kits. Why, you may ask? Well, because that's the size that you need for the GE5C bed mounts, so you ACTUALLY need four for the mod, but will need an extra to replace the one you dropped on the garage floor that rolled under your table saw. Or, at leas I will! So, not LDO's fault in the slightest, but I am out of 20mm M5 screws, and I am grumpy as a result.
5) The screw top was loose on my bottle of Tap Magic, and I made a mess on my work bench. This has nothing to do with this build, but it is a gripe. And it made me grumpy. So now I am complaining about it. Grumble grumble. And no, there is no tapping as part of this kit. I just had to do other stuff that wasn't part of this build. Woe is me.
But all things considered, this has been an amazing build so far! I'll post more pictures in a bit, but the printer is starting to look like a printer!
Last edited:
Hey Dave, I can confirm we did anodize for all frames since we have same thougt that power coat may affect assembly accuracy due to build up of powder.Some SUPER nit-picky thoughts on LDO’s frames: I’ve built four of LDO’s frames at this point, so my experience is limited, but I did have a few observations that I’ve been rolling around in my head. First of all, the frames are excellent! No doubt about that! The V0 frames I built (I’ve built three of these frames) had a smooth surface finish that I THINK was a dyed anodized coating. It was flat, and looked great. The 2.4 frame, on the other hand, had what looked like a lightly textured power coated finish. It looks AMAZING, and seems to be pretty durable. I banged a tool into the side of the frame in a way that I fully expected to have damaged a painted or anodized coating, but I couldn’t see any damage to the powder coat. It’s VERY well done and looks like it will be a durable finish in the long run. I like it!
However, because the ends are machined and tapped prior to coating, it means that the tapped holes are looser than I would really like (to leave tolerance for the coating), and the mating surfaces of the blind joints are textured. For me, this led to an ever-so-slight misalignment in a corner. I was able to twist and turn the parts a little to get them to mate more squarely, but this was a SLIGHT concern for me. I love the look of the parts that have been coated after being cut—the ends look so much better than bare aluminum. but this means that the ends may not be perfectly flat due to the texture of the coated end mating with the texture of the side if the vertical supports. With an anodized coating, this isn’t an issue since the anodizing doesn’t change the geometry by enough to impact the squareness of the frame, but with the powder coating, there is some chance that the corners won’t be square. I’m honestly not sure what to think about this since I have a sample size of one powder coated frame, but I can’t get this out of my head that it may cause a squareness issue at some point. I seriously doubt that it will large enough to impact functionality, but it’s something that I would keep an eye on if I were using a frame with a textured surface finish.
Aesthetically, the powder coating looks phenomenal and appears to be durable (again, I’m assuming here—it may not be a powder coating!). I, personally, am fine with fettling the mating surfaces to get parts perfectly square. I’m just thinking out loud about other builders who may not be as aware that there is a potential for things needing a bit of TLC. I think I’m being overly concerned here, but I’m writing this down just because it’s been in my head for a day, and I needed to get it out. Ok. Done!
————————
TL/DR: The coating on the LDO frames sure is pretty, and appears to to be durable! Make sure that you square it well.
Jason, thanks for the info! I have to laugh that you posted right after my minor gripe post. Hope that you feel like I’m being fair, and please don’t hesitate to chime in! The kit is exceptional, and I’ve been pleasantly surprised by all of the goodies and extras that have been thrown in. The build has been silky smooth—everything that I could need has been included in the kit. Well, except for grease, thread locker, and a soldering iron, but even thread locker was pre-applied to to the grub screws—nice touch. But obviously shipping hazmat would cause more issues than it would solve! I can’t say enough good things about the quality of the kit.Hey Dave, I can confirm we did anodize for all frames since we have same thougt that power coat may affect assembly accuracy due to build up of powder.
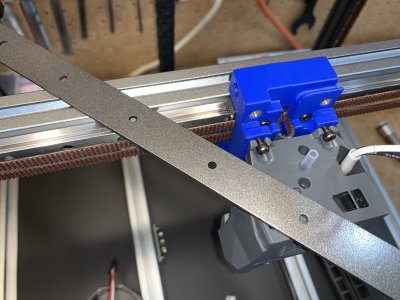
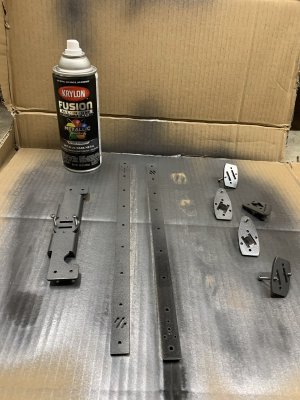
It’s not perfect, but I’ve found that the Krylon Fusion dark metallic spray paint matches the Space Grey of the LDO frame pretty closely. I’ll show a picture when it’s on the printer, but I wanted to get a pic of the can in case anyone is trying to color match their LDO frame. The Space Grey color is SO good!!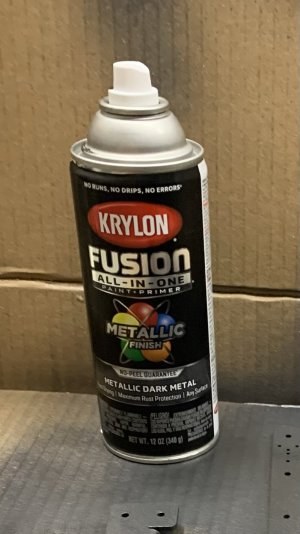


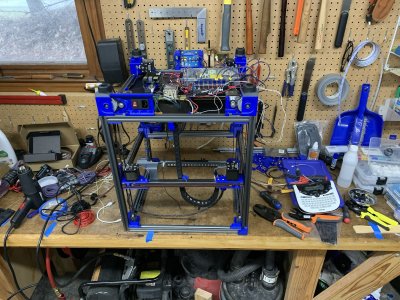
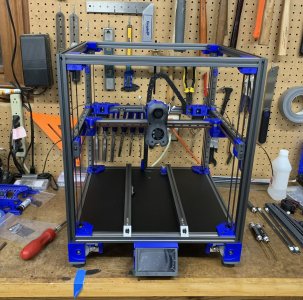
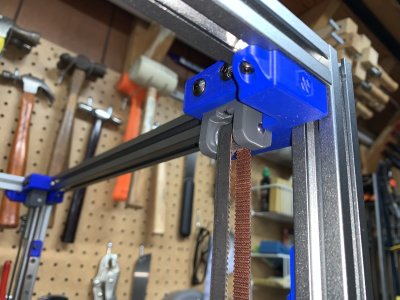
Meanwhile, the frame and motion system is almost done! I obviously skipped posts about a bunch of steps because they simply don’t line up with the manual, and I didn’t want anyone to accidentally try and follow my insane build order when trying to build their printer. Did that sound convincing? Good! The truth is that I got on a roll and forgot to take pics. 

A few changes from the stock 2.4r2 that I like:
Daylight on a stick https://github.com/VoronDesign/Voron-Hardware/tree/master/Daylight
Shades: https://github.com/Dfdye/Voron_Mods/tree/main/Daylight_and_matchstick_shades
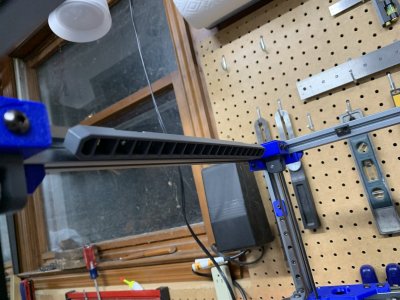
Spherical bearing mounts https://mods.vorondesign.com/detail/eB5T2RNQcYI4o6cilhpXEg
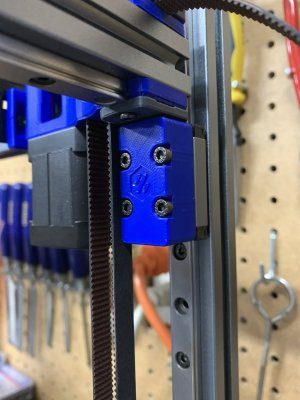
Pinned bearing axles (there is ZERO evidence that these make a difference, but I like them! https://mods.vorondesign.com/detail/C8XJJ0fBGfBFKQZctjKeA
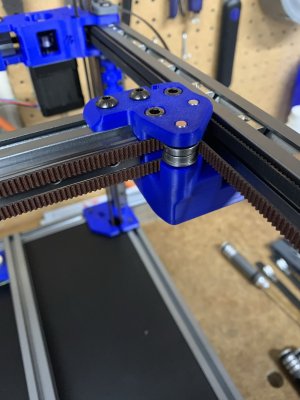
Rama’s idlers. Not sure if these are better than the r2 idlers, but again, I like them! https://github.com/Ramalama2/Voron-2-Mods/tree/main/Front_Idlers
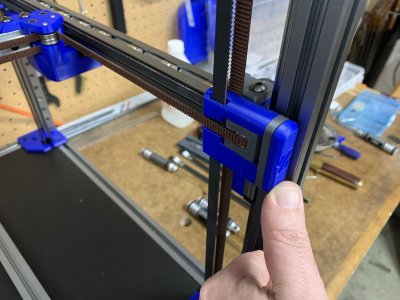
Belt covers with cable pass through https://mods.vorondesign.com/detail/LzEFU0RDHXUarF7y69x2Q
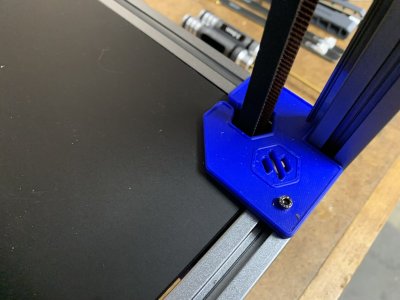
Top corner cable hiders https://mods.vorondesign.com/detail/rXJYi9H1vNzno2fZlwAB3g
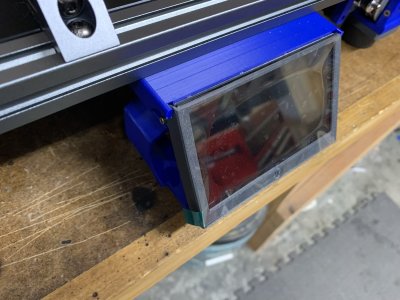
And last but not least, a touchscreen interface.
Including links for a few other things that are coming soon just so that I will have links to them in the thread:
BTT Filament Sensor Mount: https://www.printables.com/model/220585-voron-v2-btt-smart-filament-sensor-mount
Back blanking plate (good if you don't use the stock exhaust) https://mods.vorondesign.com/detail/JpyUj2eynCA10xcD4UEdow
Extrusion Backers: https://mods.vorondesign.com/detail/ewDI1Cntz7urtuq3Cm9wGQ
Klicky Probe (I like the old design with the glue-in magnets better than the new version, TBH): https://mods.vorondesign.com/detail/6p2BbGiMg3JZPKQsRtMmqQ
Nevermore https://github.com/nevermore3d/Nevermore_Micro
Daylight on a stick https://github.com/VoronDesign/Voron-Hardware/tree/master/Daylight
Shades: https://github.com/Dfdye/Voron_Mods/tree/main/Daylight_and_matchstick_shades

Spherical bearing mounts https://mods.vorondesign.com/detail/eB5T2RNQcYI4o6cilhpXEg

Pinned bearing axles (there is ZERO evidence that these make a difference, but I like them! https://mods.vorondesign.com/detail/C8XJJ0fBGfBFKQZctjKeA

Rama’s idlers. Not sure if these are better than the r2 idlers, but again, I like them! https://github.com/Ramalama2/Voron-2-Mods/tree/main/Front_Idlers

Belt covers with cable pass through https://mods.vorondesign.com/detail/LzEFU0RDHXUarF7y69x2Q

Top corner cable hiders https://mods.vorondesign.com/detail/rXJYi9H1vNzno2fZlwAB3g

And last but not least, a touchscreen interface.

Including links for a few other things that are coming soon just so that I will have links to them in the thread:
BTT Filament Sensor Mount: https://www.printables.com/model/220585-voron-v2-btt-smart-filament-sensor-mount
Back blanking plate (good if you don't use the stock exhaust) https://mods.vorondesign.com/detail/JpyUj2eynCA10xcD4UEdow
Extrusion Backers: https://mods.vorondesign.com/detail/ewDI1Cntz7urtuq3Cm9wGQ
Klicky Probe (I like the old design with the glue-in magnets better than the new version, TBH): https://mods.vorondesign.com/detail/6p2BbGiMg3JZPKQsRtMmqQ
Nevermore https://github.com/nevermore3d/Nevermore_Micro
Last edited:
Last edited:
Crap. I just realized that I put the wrong top plate in the A motor gantry assembly, and it doesn't have a limit switch mount. At the time I was thinking that I was going to do a 100% stock build to get a feel for the kit, but I bailed on that pretty early. I just forgot to change the plate back to where I didn't have to have a switch pod. Grrr. I guess this means that I will be using sensorless homing after all.
You remind us "soldering iron" maybe a good touch in future, to work with LDO heatset insert tool.Jason, thanks for the info! I have to laugh that you posted right after my minor gripe post. Hope that you feel like I’m being fair, and please don’t hesitate to chime in! The kit is exceptional, and I’ve been pleasantly surprised by all of the goodies and extras that have been thrown in. The build has been silky smooth—everything that I could need has been included in the kit. Well, except for grease, thread locker, and a soldering iron, but even thread locker was pre-applied to to the grub screws—nice touch. But obviously shipping hazmat would cause more issues than it would solve! I can’t say enough good things about the quality of the kit.
One of the nice touches that LDO includes is the little “Y” power splitter boards. I’m not using them for what they were intended to be used for (I think one was for LEDs and the other was for electronics fans), but they are incredibly handy. I have a bunch of 4:1 power splitter boards that I made a while back, but if these are already here and I don’t have to do additional soldering, I’m absolutely going to use these! Also, the fact that LDO includes parts for the Nevermore is pretty spiffy The bed fans are there for passive chamber heating. The bed heater puts out a TON of power. Using the excess to help bump chamber temps into the 55-65 degree range does wonders for reducing part warping and allowing higher cooling fan speeds. The fan mounts are slightly modified versions of the mounts that Ellis uses. 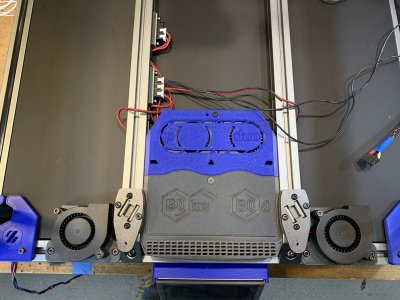

Last edited:
Wiring is pretty much done. LDO includes GREAT pre-assembled wiring harnesses with this kit. They are fantastic, but I’m obviously not using them. I’m doing so much non-stock stuff that it made more sense for me to do most of my own wiring, but I’m using the LDO harnesses on a different Trident build that’s closer to a stock configuration, so they are getting used.
The other thing that makes me do my own wiring is that it’s much cleaner than having a ton of extra wire bundled up. The kit includes nice plastic channels to help hide the excess wire, but that’s a bandaid that just hides the clutter. IMHO, if you are able/comfortable/have the time, it’s better it’s better to custom cut the wires to length during the install to minimize extra clutter in the electronics chamber. It helps tremendously with maintenance and troubleshooting later on.
OH! This reminds me of the one thing that I have found that I genuinely dislike about this kit: the cable ties are (in my opinion) crap. They don’t hold well, and seem to be made of some sort of softer plastic than most cable ties. I bought a bag of 1000 cable ties that I like a while back, so no worries. I’m set! The LDO cable ties seem to work perfectly well for bundling small wires, but for holding larger stuff in place, I’ve had a few slip. And to be fair, the cable ties are probably fine since there shouldn’t be any tension on them after install, but I just don’t like them and think they could be better.
So, there!! I have found something in this kit that’s not up to what I would like. I had to get all the way down to the cable ties to do it, but I finally found something! LOL!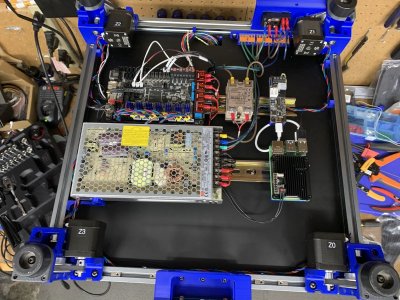

Similar threads
- Replies
- 24
- Views
- 1K
- Replies
- 67
- Views
- 21K


