What's new
VORON Design

Register a free account today to become a member! Once signed in, you'll be able to participate on this site by adding your own topics and posts, as well as connect with other members!

My First Voron 2.4 R2 Formbot 350 X 350 X 350mm - Dragon High Flow

Lesson number 100. After running input shaper, check all screws and bolts! My printer stopped running the quad gantry level. I had changed nothing that should have caused this. Checking things over, I found a number of screws, including the inductive pickup mounting screws loose. I found it strange that the pickup had moved up enough that it wouldn't trigger and would cause an error message, pointing that the toolhead traveled more than allowed without trigger. All of this made me look everything over. Moved the inductive pickup down 3mm, tightened loose screws and the printer world is back to normal.

So, now I am wondering if I should rerun the input shaper process seeing I had to tighten things back up? If I rerun it, will it all become loose again? So many questions!!:rolleyes:
YES, I say put it through the stress, this way you can sort out the errors of issues now while you are calibrating instead of half way thought a 4 year print.
Post the .PNG file from Input shaper, its easier for me to spot issues like loose bolt looking at the graph. You can tell a lot of things by the graphs.
 
Wow, my trip to input shaping was a challenge, but I got it done! I ended up going with a Raspberry Pi Pico with a ADXL345 attached. It took me a number of tries to make it work. Following a number of videos and other online help, I found out a number of things I didn't know. Like the differences in cat Ethernet cables. I had a number of different cables that I tried to use as connecting wire between the Pi Pico and the ADXL345. The first cable, to my surprise was solid wire, so I skipped using it. The second one had individual strands, so I thought it would be a good choice, only to find out the wire refused to solider. I have never experienced this before. So, I ended up crimping connectors to make all of the connections, and this worked fine.

What a difference in performance! This was well worth the effort.

View attachment 1451View attachment 1452View attachment 1453
Pretty sure you have a wobbly table. X has that early bump and Y has many bumps, both signs of table or some other dampening.
 
Pretty sure you have a wobbly table. X has that early bump and Y has many bumps, both signs of table or some other dampening.
You nailed it! It is a very cheese folding table. It is all I have at the moment to work on in my garage. I'm in the process of finding storage and work bench. It is proving to be a bit of a challenge here in Florida. I am told shortages due to COVID and demand after so many places were damaged by hurricane Ian at the big box stores. Thanks for taking the time to look.
 
You nailed it! It is a very cheese folding table. It is all I have at the moment to work on in my garage. I'm in the process of finding storage and work bench. It is proving to be a bit of a challenge here in Florida. I am told shortages due to COVID and demand after so many places were damaged by hurricane Ian at the big box stores. Thanks for taking the time to look.
No problem. Once you put it on a stable surface your machine is going to be fast.
I keep mine on a sit/Stand table so it's pretty unstable but I print slow most of the time anyway.
Look forward to the new charts after its moved.
 
Hey LoadMaster7 since you competed your kit you will have the answer for this. Regarding the Z cable chain. The mount have one hole and the end of the cable chain has three. I keep seeing references to mods to go from two holes to three on the cable chain. To me the build guide looks like they don't have the ends on the z chain at all. What did you do to mount yours?
 
Hey LoadMaster7 since you competed your kit you will have the answer for this. Regarding the Z cable chain. The mount have one hole and the end of the cable chain has three. I keep seeing references to mods to go from two holes to three on the cable chain. To me the build guide looks like they don't have the ends on the z chain at all. What did you do to mount yours?
msaeger, I used the center hole of the three to secure the chain. The one screw attachment is working fine for me. I'll try and take a few photos of it to post tomorrow.
 
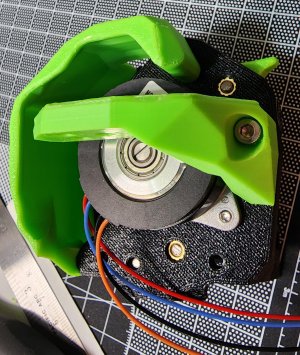
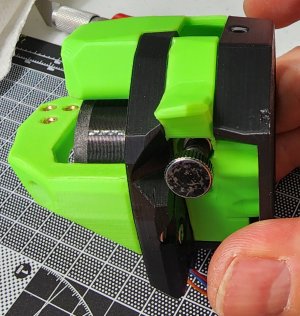
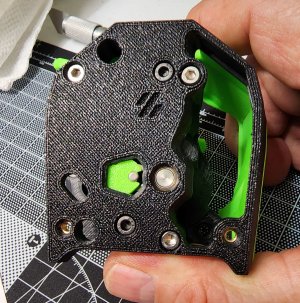
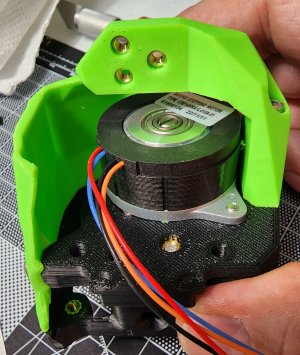
Assembly of a Sealthburner has started. I have everything for CAN, but I'm thinking of getting it running with my current configuration first before jumping into CAN.Stealthburner CW2 1-1.jpgStealthburner CW2 2.jpgStealthburner CW2 3-1s.jpgStealthburner CW2 3s.jpg
 
I jumped out of my comfort zone with slicer software. I have been running Cura for many years. I have installed SuperSlicer. My first ever print with it is running as I write this. It is a Voron cube. It will be interesting to see how it turns out.
 
Last edited:
If you get a bad-looking print, there is nothing wrong with grabbing Ellis SS profile and tweaking it to your machine. It's pretty nice once you get used to how it is set up.
 
If you get a bad-looking print, there is nothing wrong with grabbing Ellis SS profile and tweaking it to your machine. It's pretty nice once you get used to how it is set up.
The print came out fairly nice. Tuning I'm sure would improve it. I'm not putting too much time into re-tuning. I'm in the process of building a Stealthburner toolhead with CAN and will be installing it next. I am short a few little items to complete it. I am not in a rush to change it over. I'm enjoying the stock Formbot build and all that I am learning with this new to me Voron world.
 
The print came out fairly nice. Tuning I'm sure would improve it. I'm not putting too much time into re-tuning. I'm in the process of building a Stealthburner toolhead with CAN and will be installing it next. I am short a few little items to complete it. I am not in a rush to change it over. I'm enjoying the stock Formbot build and all that I am learning with this new to me Voron world.
Let me know what parts you need? I have a lot of extra parts, and I don't want them just sitting in a box to never get used.
In fact, I think I have a few EBB boards laying around.
 
Hello @LoadMaster7
I am following your footsteps. I am excited. I has question.
Your picture looked like you used a NEMA 14 pancake Moons stepper for your Stealthburner. Alas The Formbot kits that are being sold now apparently come with CW2/Stealthburner parts. My issue is in ordering an EBB36 or 42, as I don't want to pick the wrong one. However it seems like the kit will ship with a NEMA17 pancake motor.

Any ideas or suggestions? Did you originally get a NEMA14 with your order?

And please continue the updates! I had fun watching your updates for 5 pages. How did the CANBUS installation go? I'm planning on buying a beacon as well. Any inclination to get one of those?

Sincerely,
Austin Tyler Dean
Get the 36. The 42 is for the square style motors.
 
This shows the new fuse mounted to the original location. My first fuse was RTV glued to the heating pad. Not sure of the cause, but this fuse failed. Since installing new fuse to the bedplate I have had no more issues.
The heating pad will always be much hotter than the build plate. Nothing wrong with the fuse. Think of cooking meat on a grill. The instructions say to heat the meat to 130F internal temperature. You would not place the thermometer on the charcoal. That is in effect what gluing to the hot pad was. You put the temperature sensor on the "fire" and not on ther object to be measured.
 
Top